Beach photos are a fantastic way to capture memories of your time by the shore, but they often feel like snapshots when you look at them later. This summer, let’s change that. Here are three tips that will help you return from the beach with photos that will make you say, “Wow, I took those!”
Tip #1: Get down low when you shoot.
It’s easy to take a photo while you’re standing, but the picture will look just like everyone else’s. You might even plan your composition and put your subject on a “rule of thirds” line. While that will help, it still results in a beach photo that lacks excitement.
Instead, get down low to shoot.
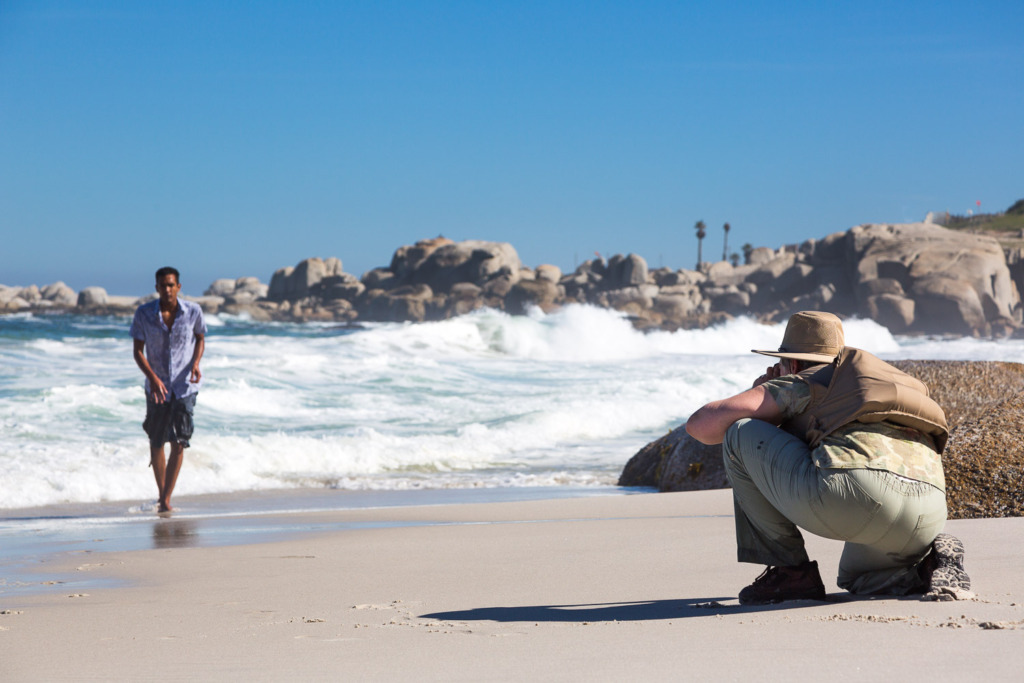
Yes, you may get wet or sandy, as my friend did when we were shooting models at Camps Bay near Cape Town, South Africa, but the difference in the angle will make your images come to life.
And include the foreground and background.
Including the foreground and background from a low angle can add a sense of place and context.
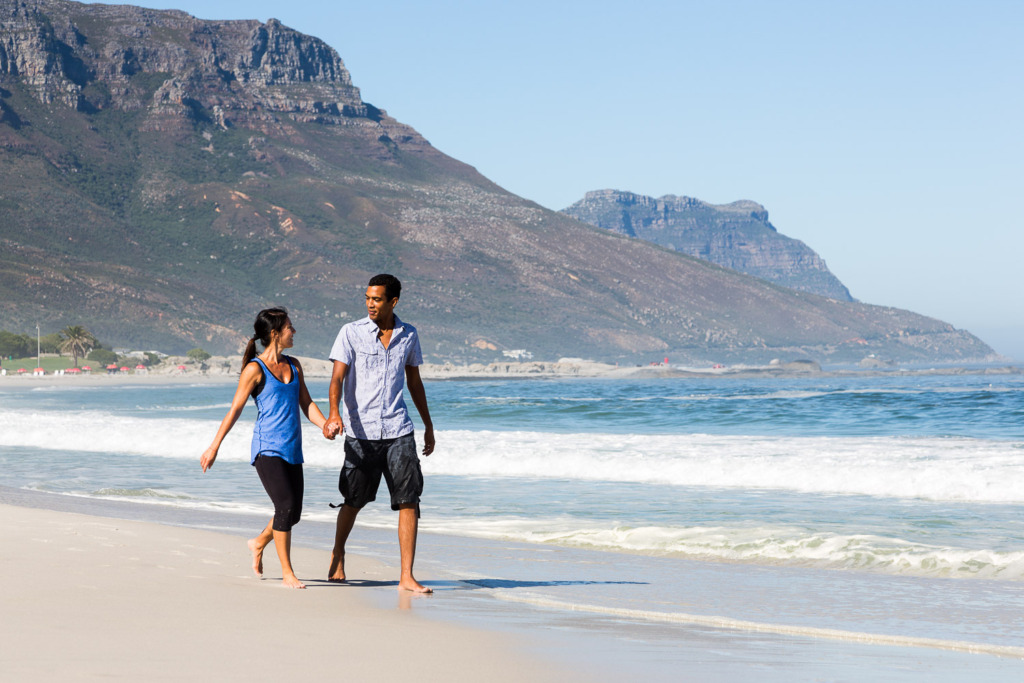
For this image of a couple, I squatted down to include the foreground of the sand and the background of the water and mountains. Suddenly it wasn’t just a photograph of a happy couple on the beach. Instead, it was a photo that would remind them of their vacation together.
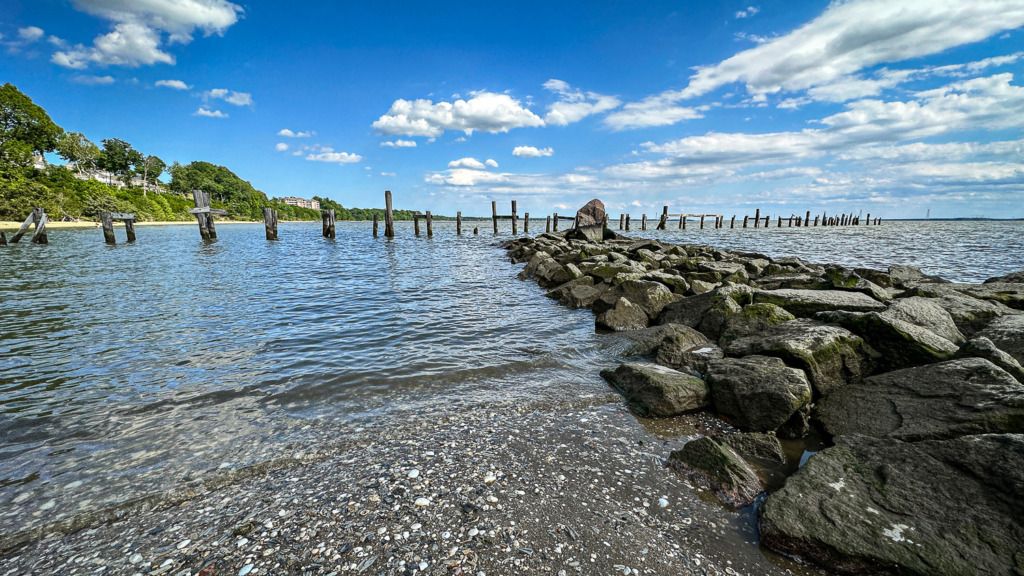
I shot this image at a neighborhood beach. To draw the viewer’s eye into the scene, I squatted by the rock jetty so it would point toward the background. In the distance, you can see an old pier jutting out of the water.
Or blur the background in your beach photo.
Sometimes, the people are the story, and the context doesn’t matter. This is especially true if you’re taking family portraits. In that case, setting a low aperture number (wide aperture) will help blur the background and eliminate distractions if you’re using a DSLR or mirrorless camera. If you’re shooting with an iPhone, you’ll use Portrait Mode.

For this photo of a mother and young child, I squatted down to their level and shot with an aperture of 4.0 to place the focus directly on them.
And this brings me to…
Tip #2: Plan your beach photos for early or late in the day.
I took the family photo above in the later afternoon. The sun was low, which eliminated harsh shadows on their faces. That’s a much more flattering approach to portraits.
If you’re out on the beach when the sun rises or sets, you can capture silhouettes.
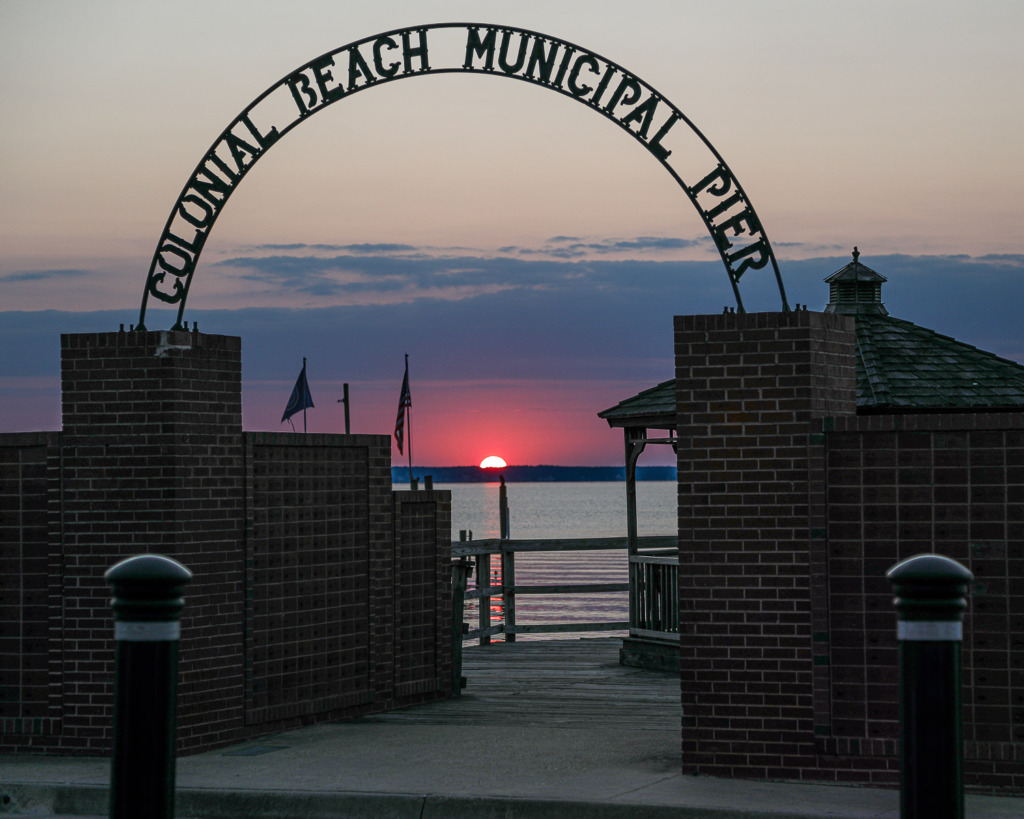
I was out before dawn looking for a good vantage point when I realized I could frame the sunrise with the entry to the Municipal Pier in Colonial Beach. To create a dark foreground and avoid a burned-out sun, I set my Exposure Compensation to -2.
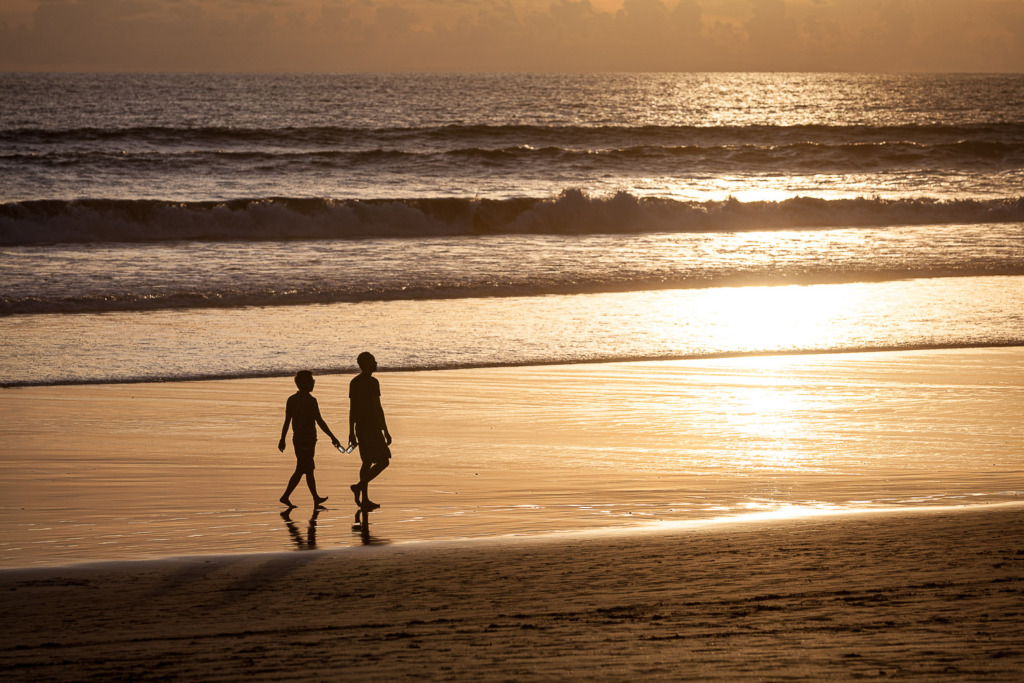
Trying to capture an unusual sunset photograph can be a challenge. It’s so easy to pick up your camera and aim at the sky, but adding a story to the beach photo will set it apart. For this photo, I was sitting on a low wall next to the beach in Bali, waiting for the perfect moment. I knew I had my story when these two men wandered into the scene. I set my Exposure Compensation to -2/3 to darken the scene and make it a silhouette. One of my favorite details was the sunlight glowing through the water bottles.
Tip #3: Look for patterns and details to include in your image.
If you’re going to the beach locally, you can choose the best day for good weather, but when you’re traveling, that’s not always possible. When we arrived at the famous beach in Deauville, France, the weather was not cooperating. It was cold, windy, and overcast.
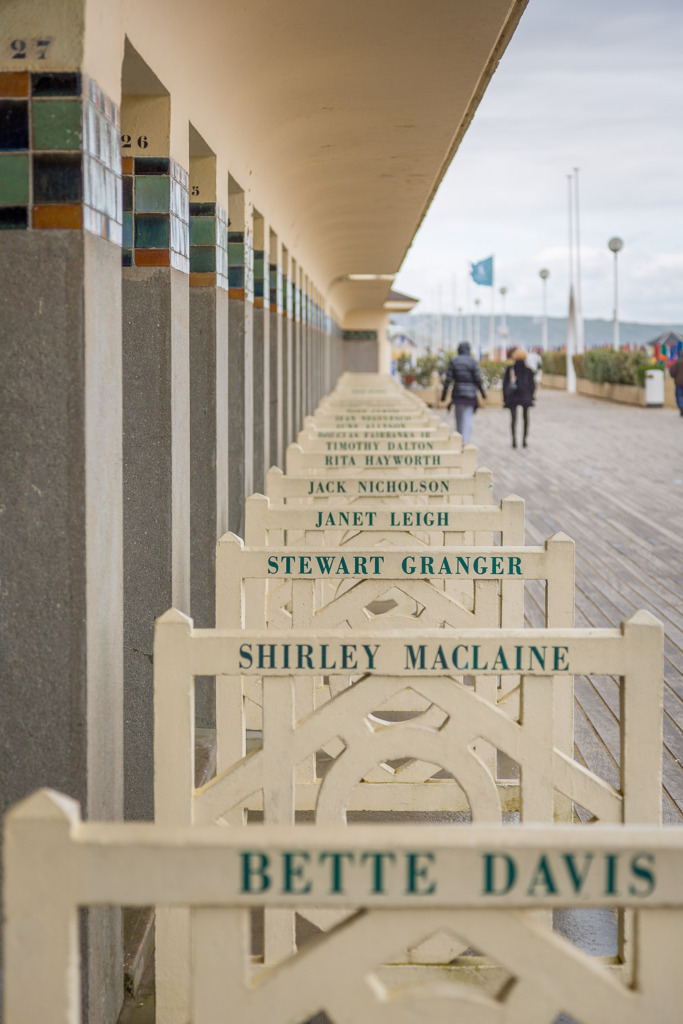
After wandering around and shooting the usual souvenir shots of the famous names next to the dressing rooms, I noticed the intricate knots tied in the colorful cloth around the beach umbrellas.
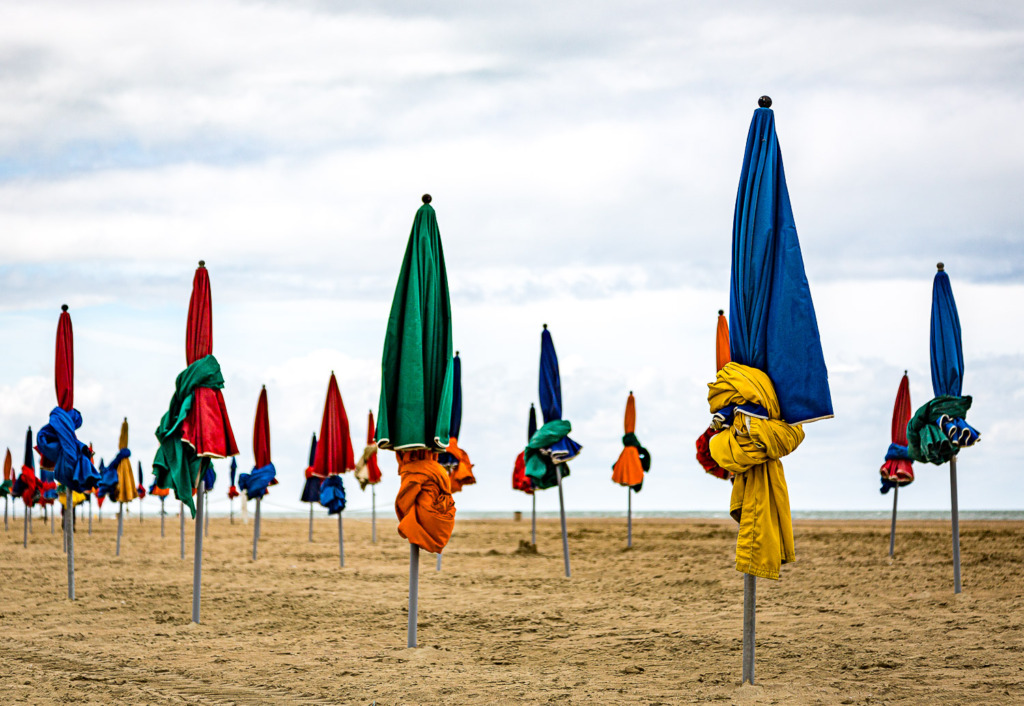
Squatting down low, I aimed at the umbrella closest to me on the right and set a low aperture number of f/4.0 to blur the umbrellas in the background. The repeating vertical pattern, interrupted by the different colors and knots, stood out to me.
Your longest lens will help capture details in your beach photos.
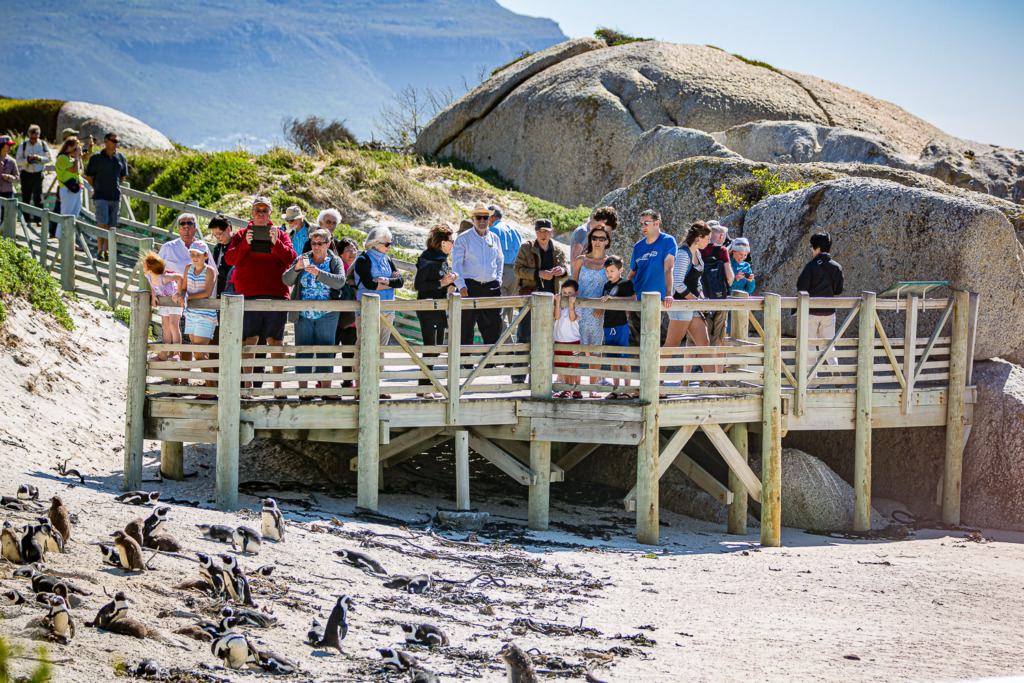
If you visit Cape Town, South Africa, you must visit the Penguin Colony at Boulders Beach in nearby Simon’s Town, where penguins seem to be everywhere. However, you’ll need a long lens to get a good detail shot because people are limited to elevated boardwalks to protect the birds. I took the following two images with my 70-200 zoom lens and my 2X extender. That meant I could shoot at 400mm.
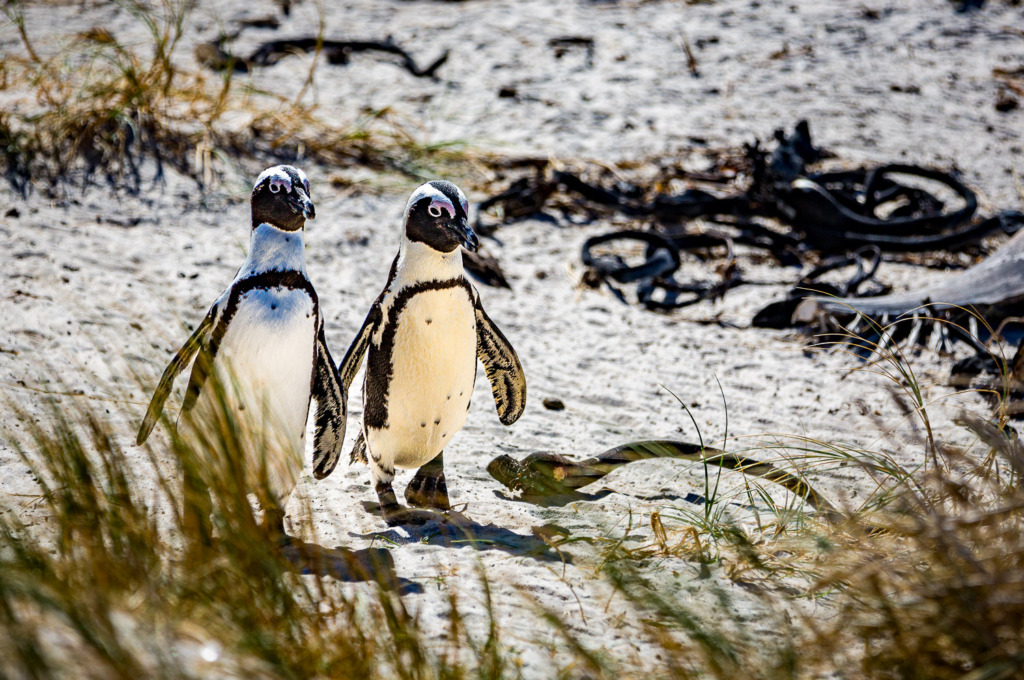
Being able to isolate this pair of penguins created a story. And, squatting down low on the boardwalk, I captured a close-up of an egg when the mother stood up.

Try to combine these tips as you shoot.
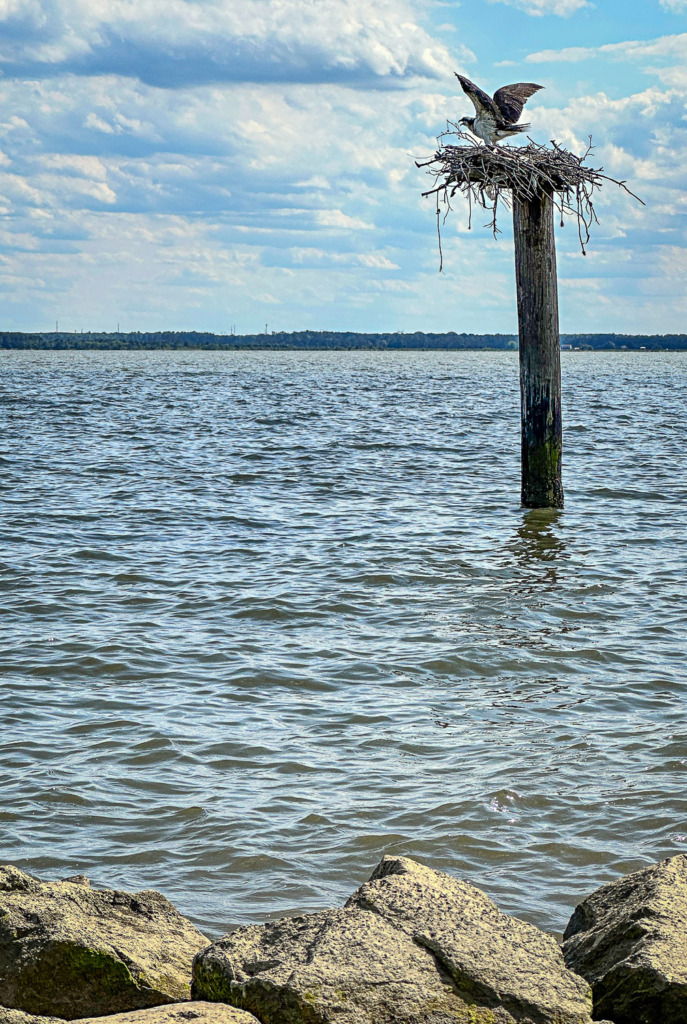
This beach photo was shot near the jetty at our neighborhood beach. I got down low to include the rocks in the shot. Can you see the various patterns in the scene? The rocks, the ripples in the water, and the clouds all added movement and excitement. I waited awhile for help from the Osprey, who finally stretched her wings for the camera.
I didn’t have my long lens, but I used the longest lens on my iPhone 14 Pro Max, which was 77mm. I was at the beach later in the afternoon, so the shadows were softer. Finally, I included the foreground and background in the scene.
Now it’s your turn.
I hope you’ll try these tips when you go to the beach or lake this summer! Try combining them to create a unique and compelling image.
You can learn more about Exposure Compensation in this post: https://www.carolinemaryan.com/when-to-use-exposure-compensation/
If you plan to take family photos at the beach, this post about Shooting Senior Photos might help. Recognize the old pier in one of the photos? https://www.carolinemaryan.com/shooting-senior-photos/
You can learn more about the Penguin Colony at Boulders Beach here: https://www.capetown.travel/get-to-know-the-african-penguins-at-boulders-beach/.
If you own a DSLR or mirrorless camera and want to improve your photography, be sure to check out my online class, Camera Mechanics: https://www.carolinemaryan.com/camera-mechanics-workshops-info/


Leave a reply