Put practicing photography on your to-do list right now! Holiday travel is fun and hectic, full of family, friends, and events. You’ll want to return with photos you treasure, so the time to get ready is before you go, not while you’re in the middle of the happy chaos.
You haven’t much time to get ready, but a quick trip to a nearby attraction will get you prepped in no time. For this post, I spent part of an afternoon at Jamestown Settlement in Virginia, not far from us. Another good place to practice is your local Christmas market or farmers market.
Here are seven quick tips, including camera settings and composition ideas.
Tip #1: Watch the Weather.
This is good advice whenever you go out to shoot photography. Nothing spoils a photo shoot like frozen hands and feet! Jamestown Settlement is located on the James River, which can mean cold winds. So I chose a warmer day and dressed in layers. While the museum has indoor gallery exhibits, including an excellent film, I wanted to visit the outdoor re-creations for photography practice. And here’s a bonus for tip #1: If you’re bringing your DSLR, carry an extra battery stored somewhere warm if the day is cold. Batteries tend to lose their charge faster in cold weather. Keeping that battery in your pants pocket will make it last longer.
Tip #2: Use Burst or Continuous Shooting Mode for action shots.
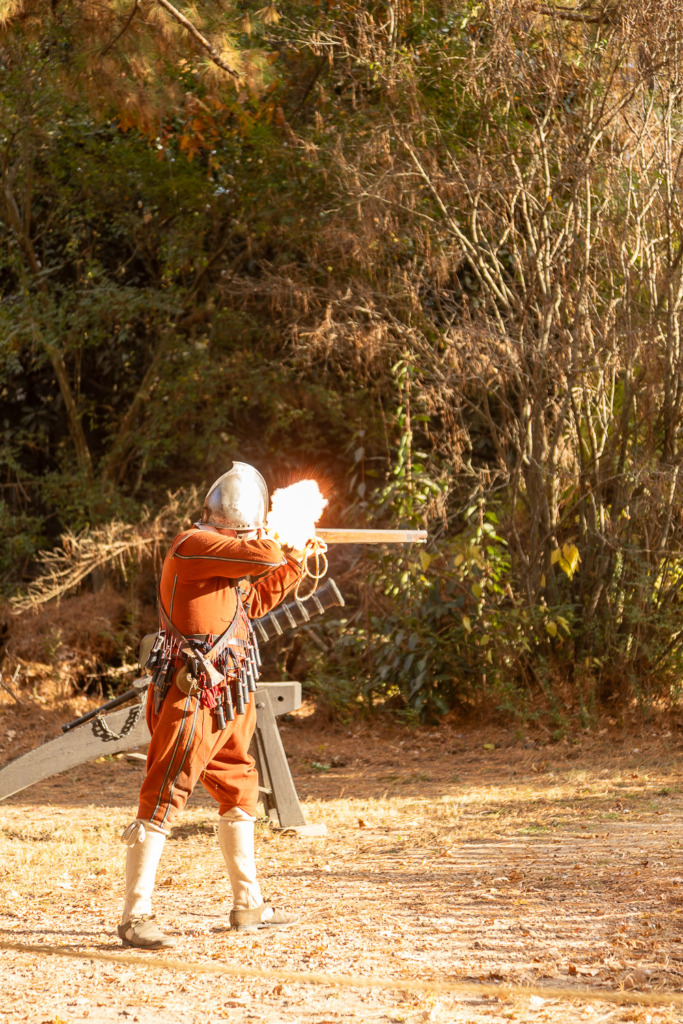
When you’re out practicing photography, look for nearby action and explore ways to capture it. That way, you’ll be ready when your kids jump for joy when they see Santa and you’re trying to get the shot!
At Jamestown Settlement, I was lucky. A historical interpreter was demonstrating musket firing as I approached the James Fort. I stood behind a small crowd as he taught us about gunpowder and guns during the colonial period. Then, he announced that he would be loading and firing the musket. I had no idea what to expect! So, I aimed my Canon DSLR at him, focused and waited for the first movement.
You can keep your camera pre-set for action photography.
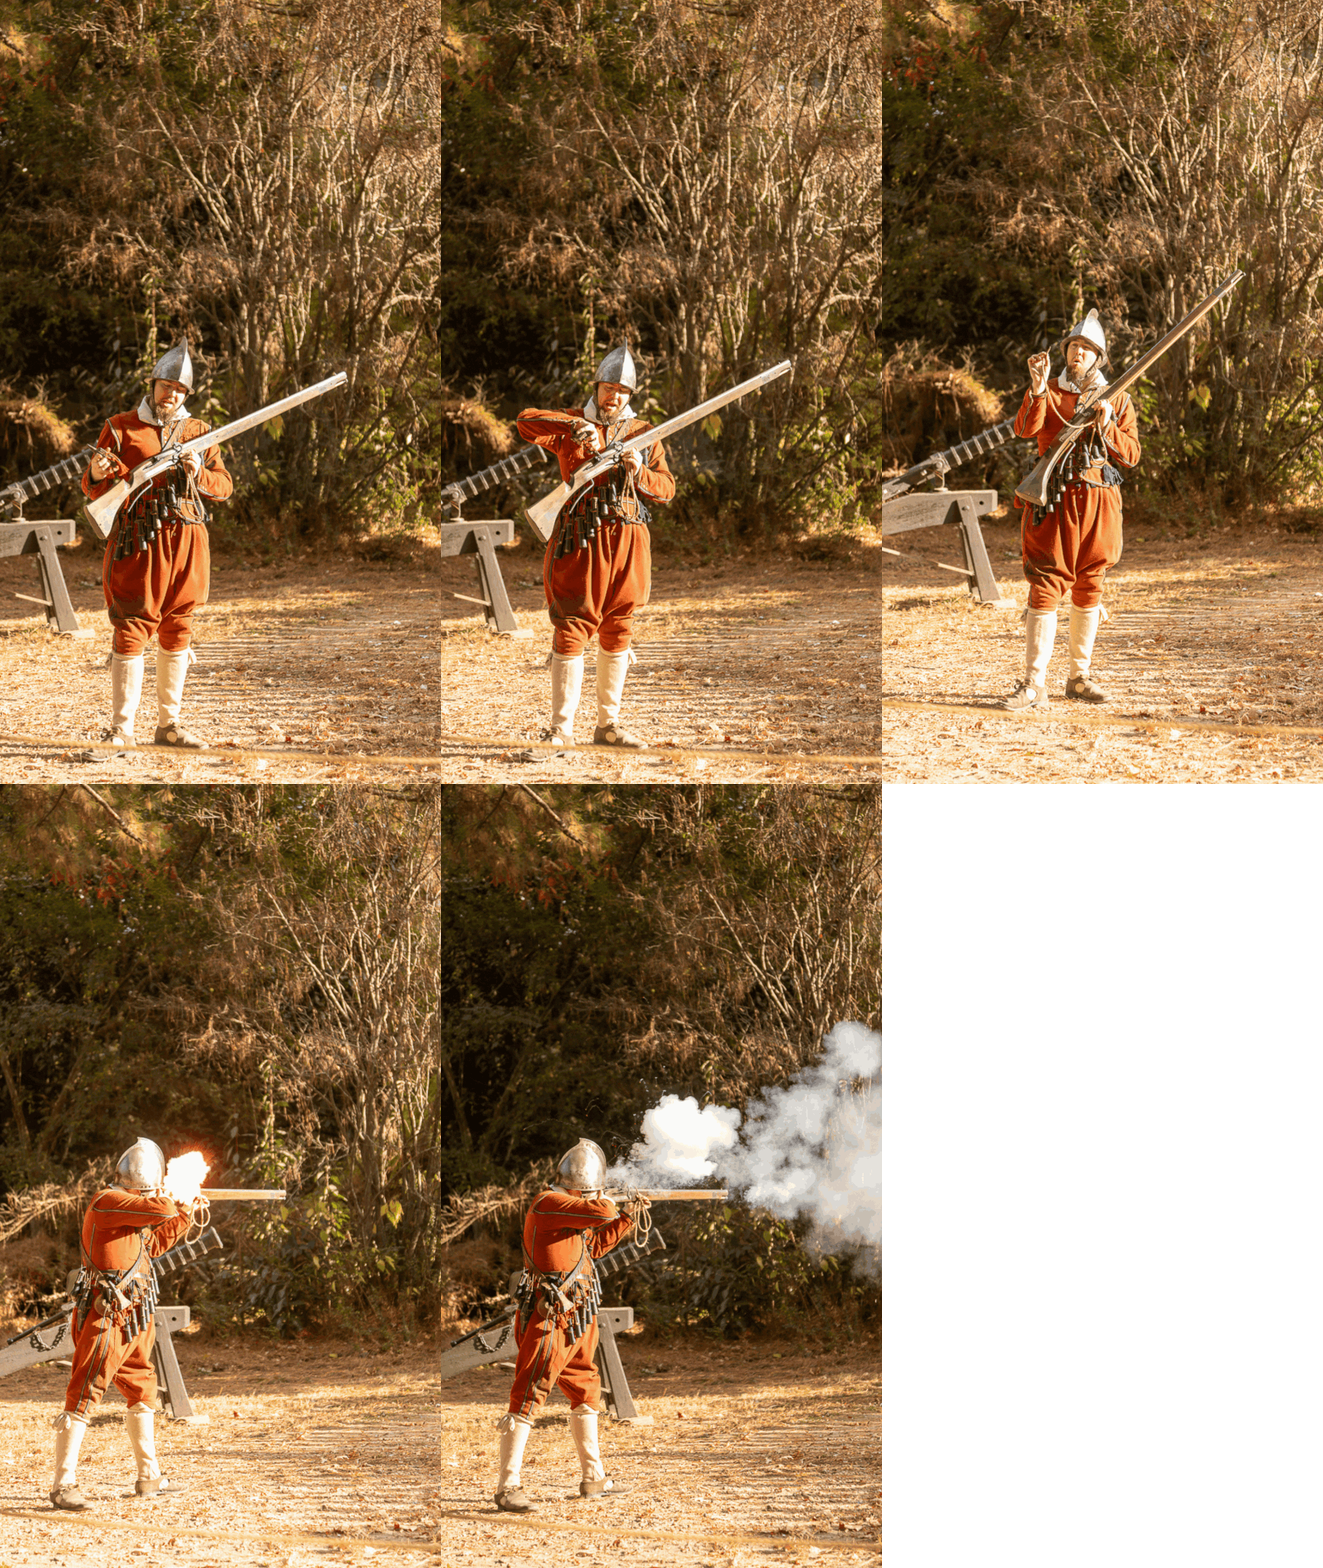
I always have my camera set to Continuous Shooting Mode, called Burst Mode on many camera brands. All I have to do is hold down the shutter button instead of tapping it. I release it when the action has stopped. As he held the bag of gunpowder up in the air and prepared to pour it into the musket, I started shooting without releasing the shutter button.
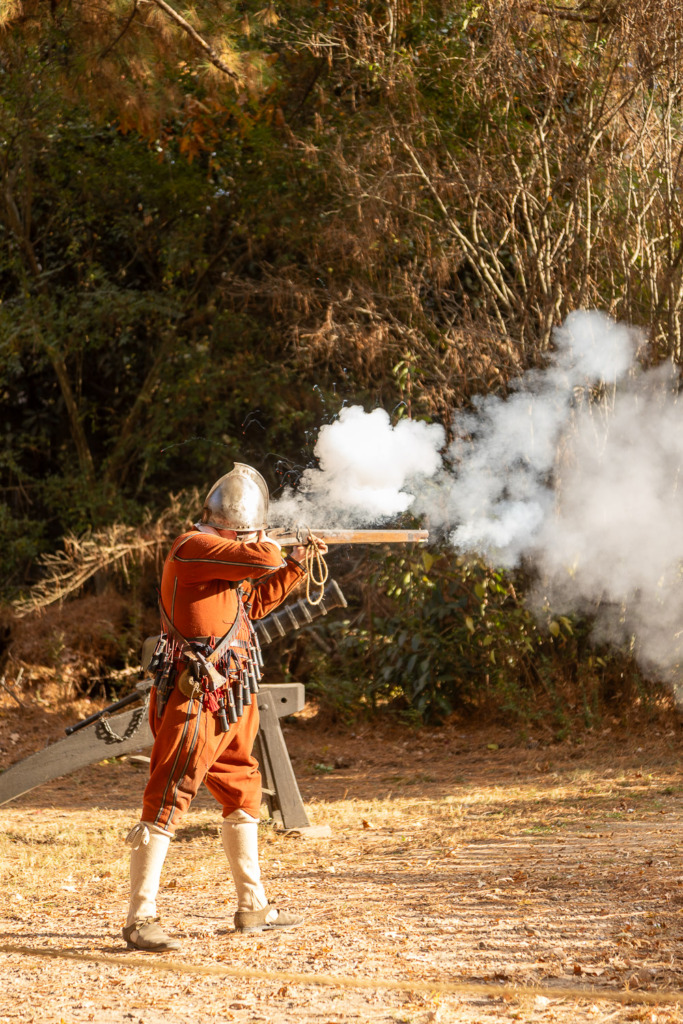
When the burst was finished, I had six photos, starting with the preparation and ending with the bullet leaving the gun. Two of the photos were peak-of-action shots I would never have caught without the burst. I’ve included both of them in this section.
Afterward, I wished I’d set my camera to the faster burst, but there was no second chance. He was off to demonstrate something else. That’s why practicing is so important. You’ll need to be ready quickly when the action starts and probably won’t have a second chance.
I even created this GIF with five burst photos using free Canva software.
Tip #3: Take environmental and closeup shots of the scene.
As you practice photography before your trip, think about the photos you expect to capture. You might even write a shot list. This will help you decide what settings you’ll need and prepare to use them.
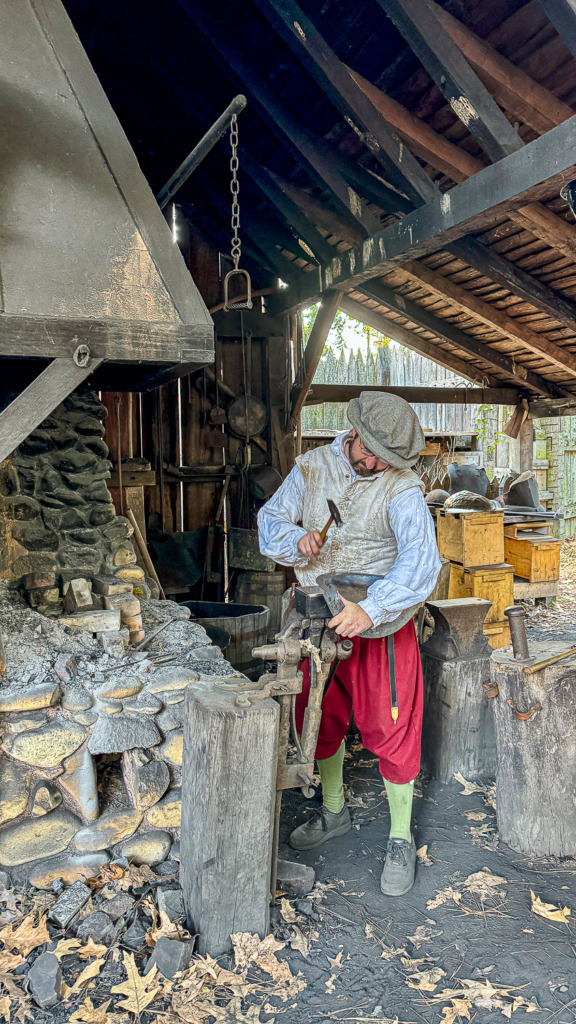
The photo of the blacksmith making a helmet is an environmental portrait. It captures a person surrounded by his working environment and tells the story of him and his work. You know he’s a blacksmith because of the fireplace and the handle hanging above his right arm. He’ll pull on that handle to work the bellows. This photo sets the scene, just like a photo of Santa sitting in a chair and surrounded by piles of brightly wrapped gifts.
Then capture the details.
The next photo could be a closeup of his hands holding the hammer and the helmet. Or I could zoom in on the finished equipment in the background. Or even the fire when he worked the bellows. As you practice your photography, use your imagination and weave a story of your adventure.
Each additional photo would fill in the story’s details, like a storyteller answering the question, “What happened next?”
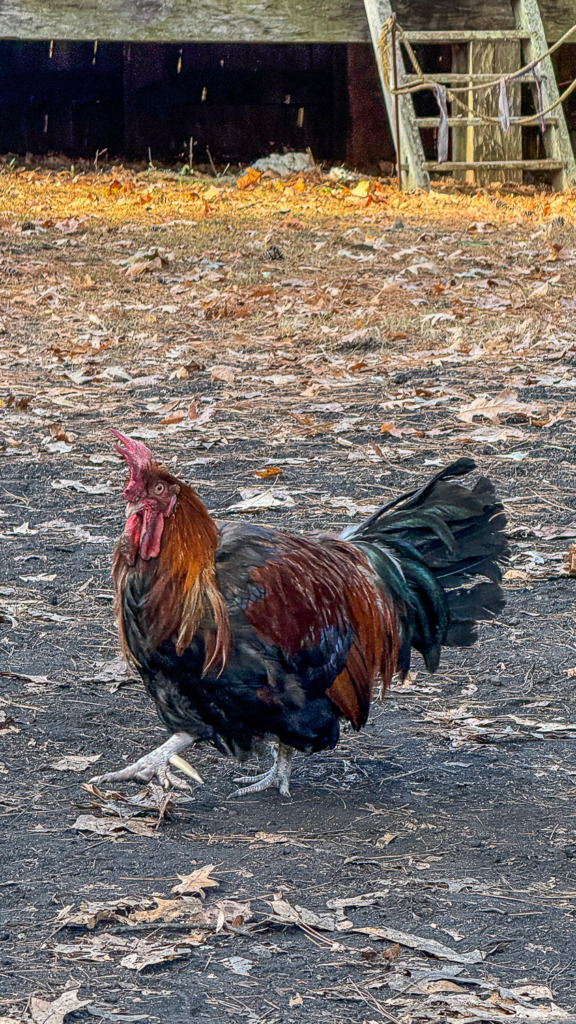
Speaking of details, being ready will help you capture the moments you don’t see coming. I almost fell over this fine chicken when I turned around to leave the blacksmith. I grabbed my iPhone out of my pocket, crouched down to the level of the bird, and got a burst of him walking by. I loved the last one. He was definitely giving me the eye. And he was part of the blacksmith’s environment.
Bonus tip: you’ll get more compelling photographs if you get down to the level of the animal or the child.
Tip #4: Play with light as you practice photography.
Assess the movement.
Some of the best outdoor photos are taken before the sun rises and after it sets, but when you’re shooting people, the blue hour (just before sunrise or after sunset) will probably require a shutter speed that’s too slow. Your happy pets, children or tourists will suffer from motion blur. The golden hour (just after sunrise or before sunset) will be better. Now, if your subject is a bouncy Boston Terrier or a dancing teenager, you’ll do even better with more light to speed up the shutter speed.
I almost always set my Canon 5D Mark IV to Aperture Mode when my subjects are people. Yes, that’s even if they’re in action! (I do use Manual Mode for action shots of people, but rarely for candid photography.)
So, your first job is to assess the movement and choose the time of day wisely. As you practice your photography before your trip, imagine how the available light will affect your subject. Then, have fun practicing in different light!
Try different positions:
When I went to Jamestown Settlement for my practice, it was later in the afternoon when I arrived at the James River, and the sun was lower on the horizon. It was time to visit the three ships, the Godspeed, Discovery and Susan Constant. They are recreations of the original three ships that arrived in Jamestown in 1607. And, yes, they are seaworthy. A neighbor helped bring one down to Virginia from Maine, even climbing the rigging.
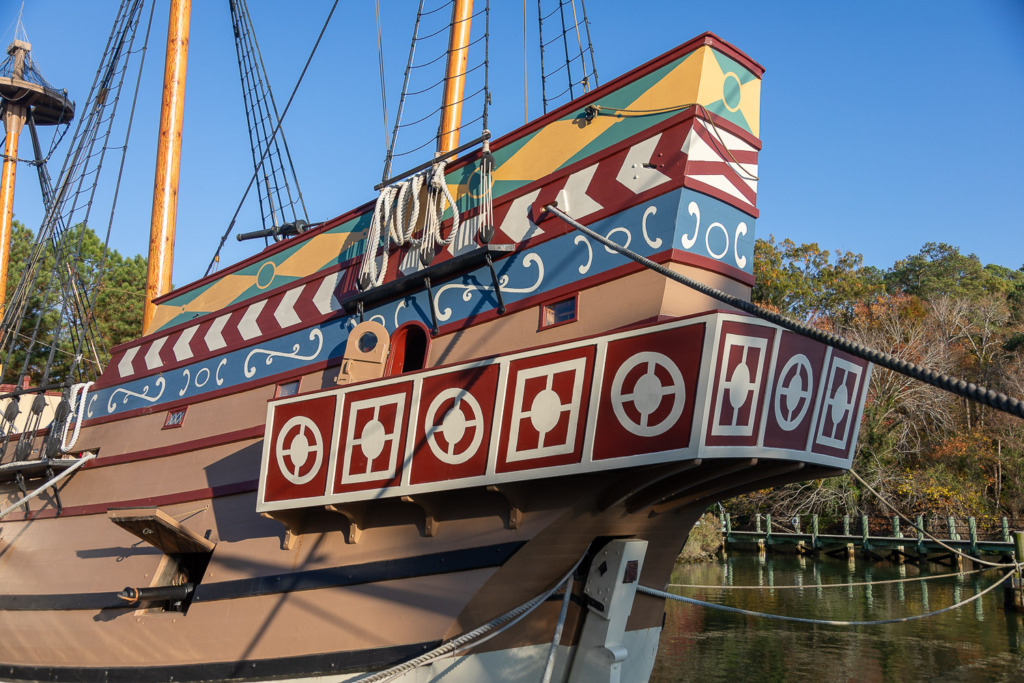
This was a perfect place to experiment with the effect of different shooting positions on light since I could capture the ships with the river or the land behind them just by moving a few feet.
My photograph taken aiming toward the river looked very different from another taken aiming toward the land. Which do you prefer?
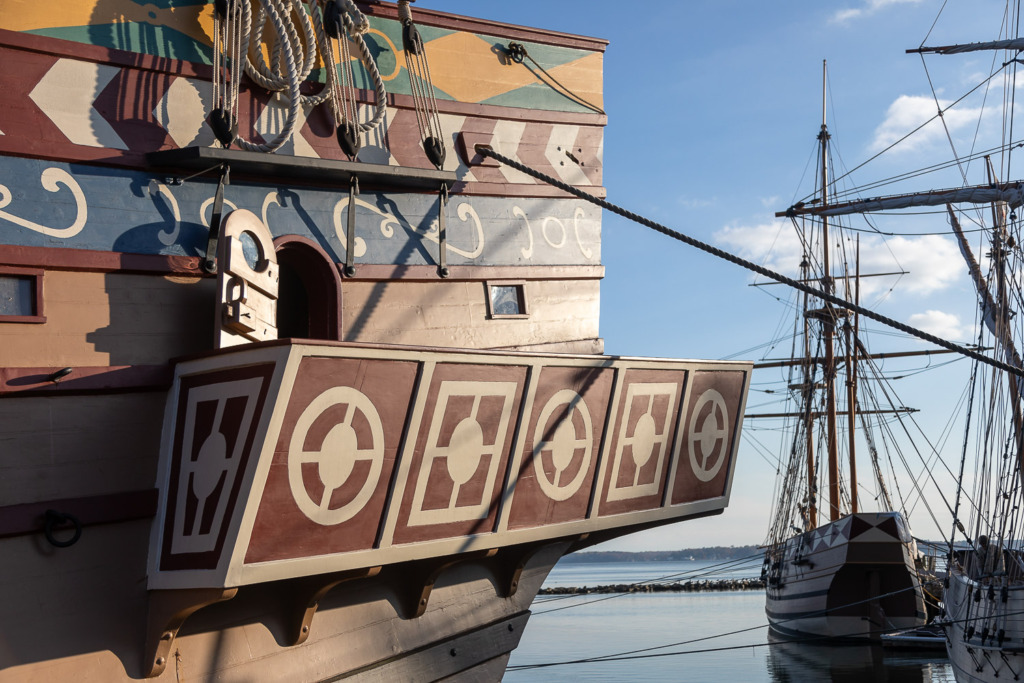
As you practice, try different angles and imagine when you’d want to use the lighting effect that each position creates.
Backlight can be flattering or overwhelming, as can front lighting. It’s going to be your choice, so get ready!
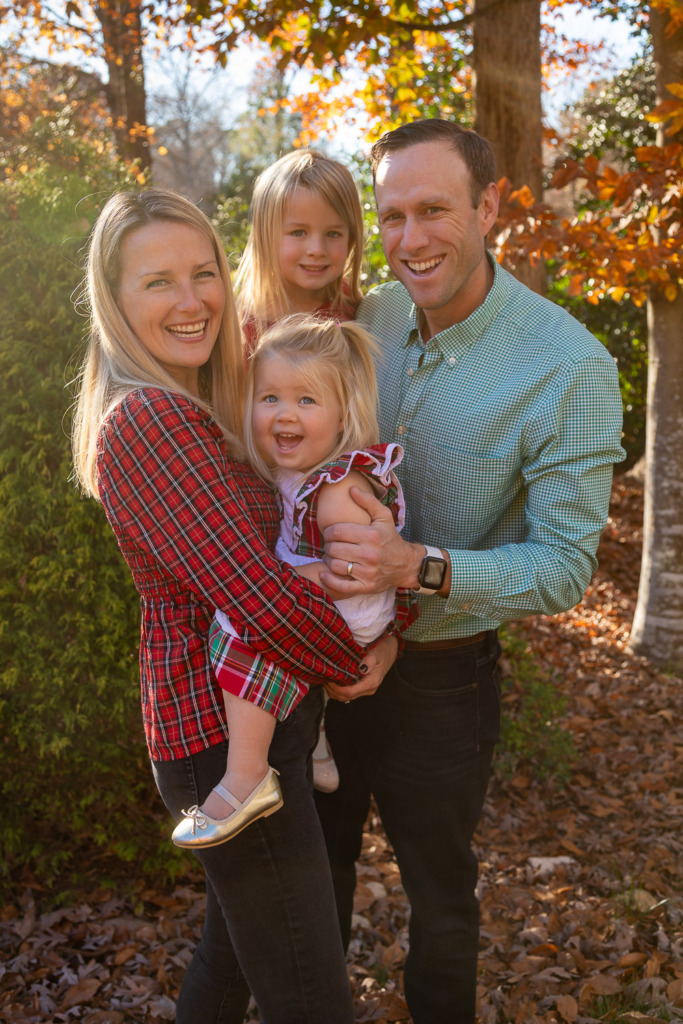
A few weeks later, on Thanksgiving Day, I had a chance to put my practice to the test. Quickly capturing a family Christmas card photo for my daughter, and her family had to fit in as the turkey rested before we ate. (That’s cooking jargon… sorry!) The sun was still too bright, so I positioned them for a backlit shot and fired away, using burst mode. This is the one they chose.
Tip #5: Watch for distractions in your photos as you practice.
My last stop in Jamestown Settlement was the re-creation of a town lived in by the Paspahegh.
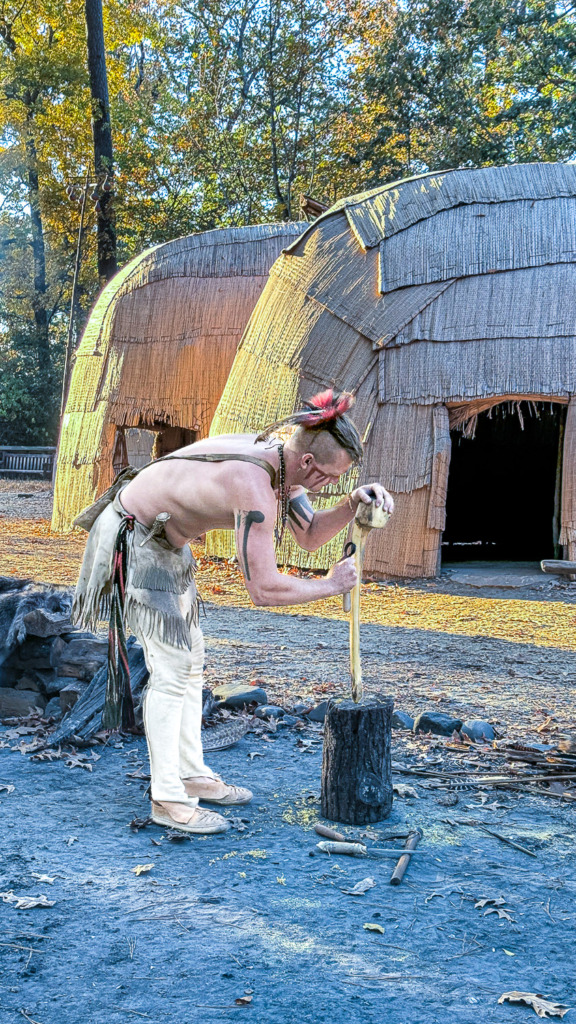
In this Indian village, an interpreter was carving a tool handle. I had to try standing in different places and using different positions to avoid capturing tourists in my photos. Whether you’re shooting photos of your family or historic places, it’s important to avoid reminders of modern times in your travel photos and strangers in your family photos.
Now it’s your turn.
As you prepare for your holiday celebrations, allow a few hours to practice your photography. Your photos will be better, and you’ll feel much less stressed!
If you are still stuck in Auto mode on your camera, check out my online training here!
You can learn about Jamestown Settlement here.
And more about the history of Jamestown here.
You can find another post on shooting your family photos here.
And here’s one about being the family paparazzi.


Leave a reply