When you look at your pictures, are they out of focus? Blurry photos happen to the best of us. But there are steps you can take to help avoid camera shake and shoot clear and in-focus photos. Here are three tips plus a bonus tip to help you capture steady shots.
Avoid camera shake with a good hold.
It all starts with how you hold your camera. Pick up your camera to take a photo and then check out your left hand. Is the palm of your hand under your camera lens and facing up?

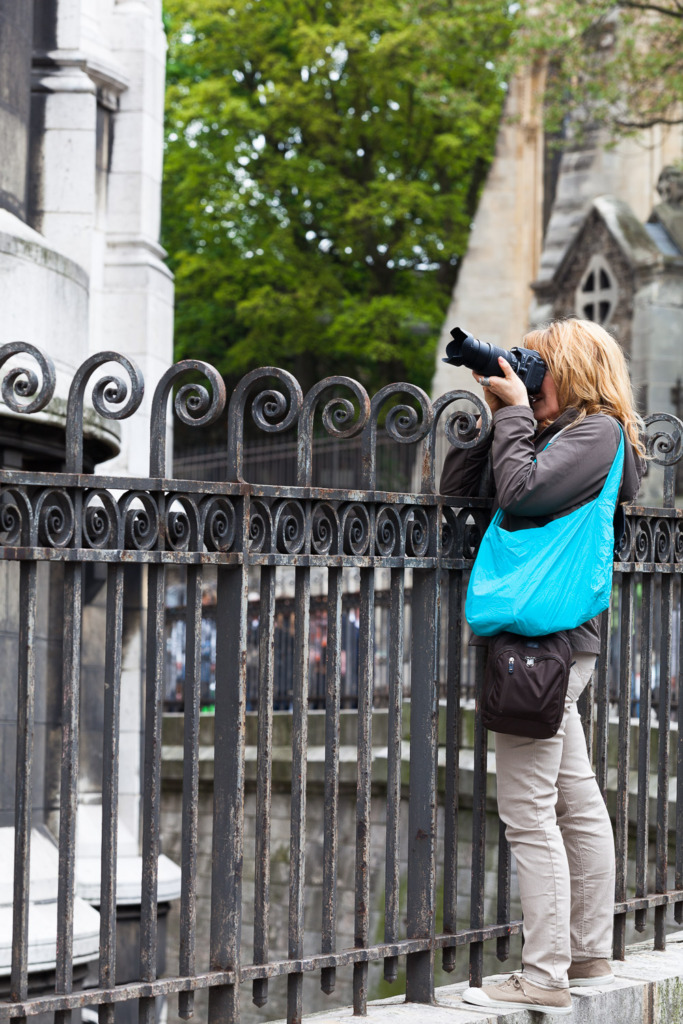
See how my friend’s left palm is under the lens and her thumb is next to the lens? This is the best position for steady shots. It ensures that your left elbow will be against your body and not flailing around like a chicken wing. 😉
When I teach, I call this position “setting the table.” The weight of your camera rests on your open palm and your thumb adds stability by resting against the lens. Give it a try and see if your camera isn’t steadier immediately.
Now, try holding your camera while you finish reading this blog post. If you’ve set the table, your hand and arm shouldn’t be tired at all.

When you are shooting a vertical photo, keep your palm under the lens and twist the camera so your right hand is on the top.
Turn on Image Stabilization for steady shots.
Most modern cameras or lenses come with some form of stabilization. The details vary by the brand and model of your camera or lens. For instance, image stabilization for my Canon cameras comes in the lenses and is called Image Stabilization.
Some Nikon models have stabilization in both the camera and the lens. (If this is the case for your camera, remember to have it turned on in both the lens and the camera!) Nikons call it Vibration Reduction.
And some other camera brands have the stabilization built into the camera itself.
Whatever your camera calls it, it’s your key to steady shots! You should always have this turned on unless your camera is mounted on a tripod. When you’re using a tripod to avoid camera shake, you can set a slow shutter speed without a problem. Strangely enough however, leaving image stabilization turned on can cause blurry photos! The mechanism that stabilizes your camera causes small movements and these movements on a tripod can cause the blur!
Brace yourself to avoid blurry photos.

You can’t always have the best place to stand. And awkward positions can result in blurry photos. Here, my friend was shooting a photo of Sacré Coeur Basilica on Montmartre, in Paris. To get a good angle, she was balancing on a narrow ledge and leaning against a fence. She was able to capture a steady shot by setting the table for her lens with her left palm and leaning against the fence.

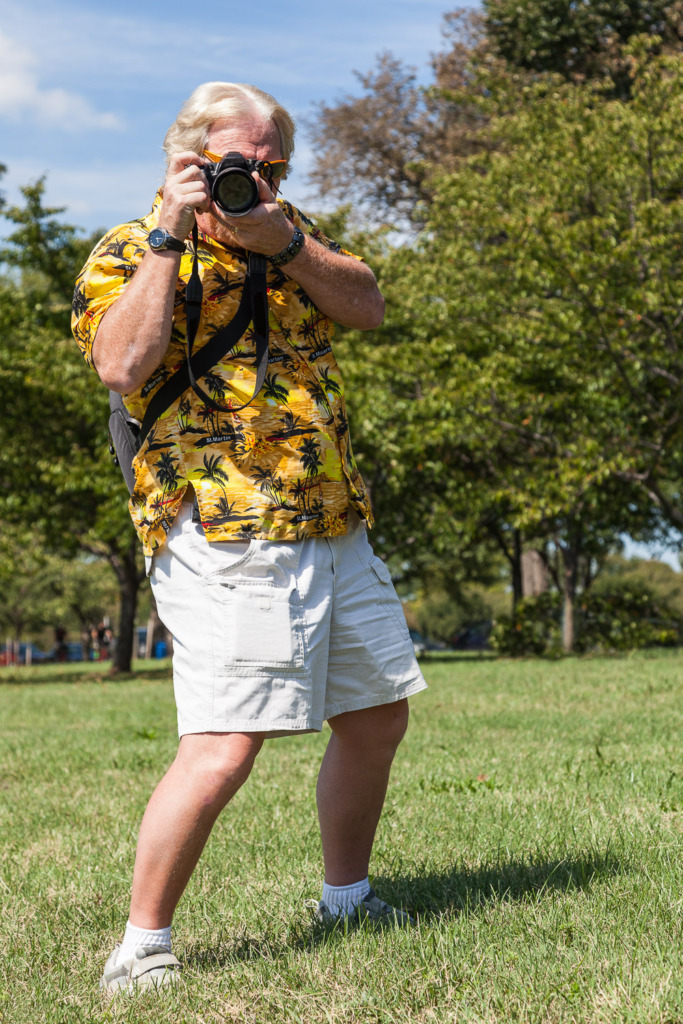
Here, another friend in Washington, DC is demonstrating how to brace yourself like a boxer. This works particularly well if it’s windy out!
Bonus tip to avoid camera shake:
Don’t forget that your camera has a built-in timer! Using the 3-second timer is a great way to steady your hands after you’ve pushed the shutter button. I also hold my breath and stand as still as possible. That’s how I got the photo of the sunset in Guam, taken at 1/25 second.

Now it’s your turn.
I wrote about bracing yourself for show shots in this blog post:
Another tip is to capture the peak of action. Learn it about it in this blog post: https://www.carolinemaryan.com/capturing-the-peak-of-action/
For information on my online class that will teach you even more, click here: https://www.carolinemaryan.com/camera-mechanics-workshops-info/
For a deep dive into image stabilization, head to Wikipedia here: https://en.wikipedia.org/wiki/Image_stabilization


Leave a reply