This month, we’ll have a chance to capture a great moon photo, when the Buck Moon rises on Wednesday, July 13th. This will be the closest and brightest supermoon of 2022.
Why not prepare now, so you’re ready to capture a beautiful photo of it?
- Tip Number 1: Watch the weather.
- Tip Number 2: Shoot the day before the moon is full for a great moon photo.
- Tip Number 3: The moon rises diagonally so be prepared.
- Tip Number 4: Use a zoom lens and shoot while the moon is low.
- Tip Number 5: Shooting an HDR will probably not work for a great moon photo.
- Tip Number 6: Shoot in Manual Mode.
- Tip Number 7: Process your photo.
- Now It’s Your Turn:
Tip Number 1: Watch the weather.
The perfect night for shooting a full moon has a clear sky with low humidity, so luck is definitely involved here since July is not known for low humidity! There could be haze on the horizon too, so the moon may not be visible until it is higher in the sky. Sometimes you have a better chance of shooting a great moon photo when it sets in the morning.
Tip Number 2: Shoot the day before the moon is full for a great moon photo.
Check the time of the moon’s rise. Often, you’ll get a better shot with the foreground included on the day before the moon is full. That’s because the moon rises later each night. If you can shoot before the sky is dark, you’ll have a better chance of getting a good exposure for your foreground with the moon above it.
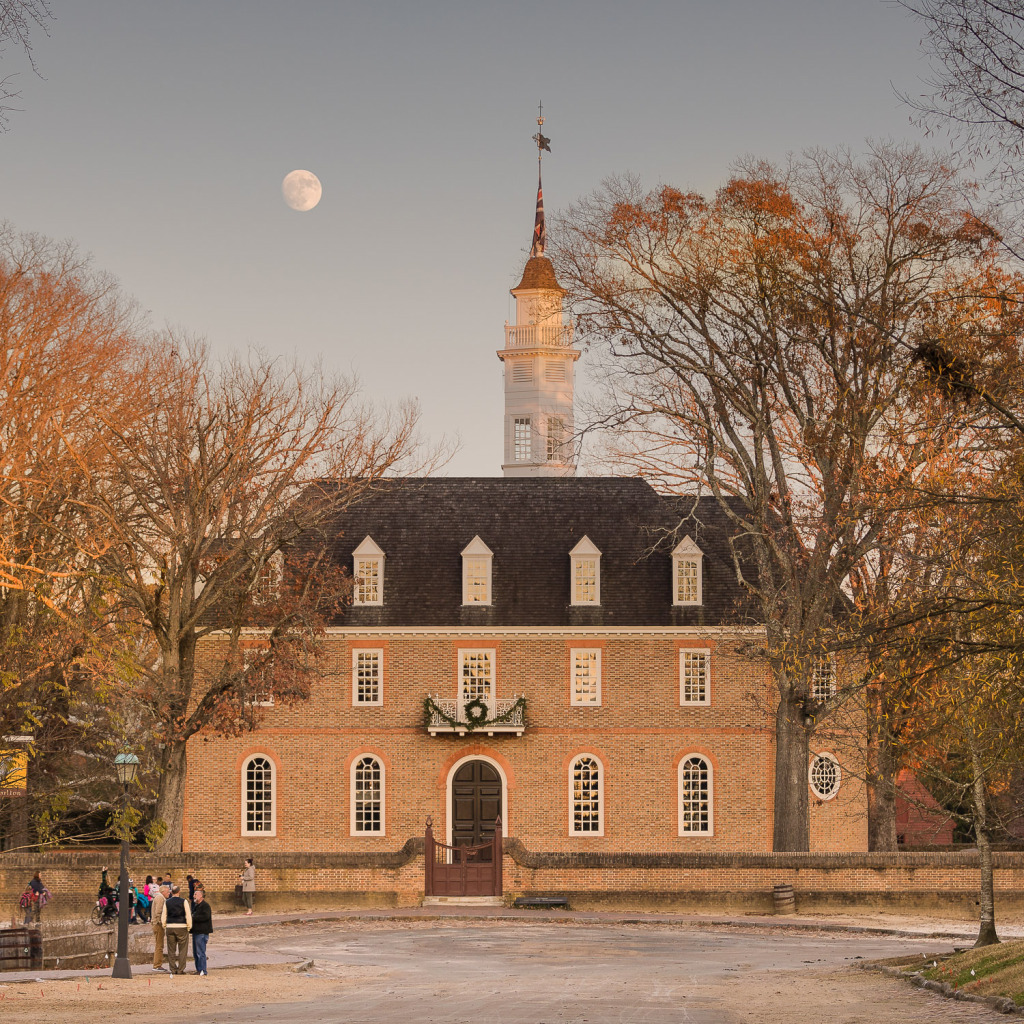
I was scouting my location for a full moon shot when I took this photo of the almost-full moon above the Capitol building in Colonial Williamsburg. It was in the perfect place in the sky and the building was lit by the setting sun.
The next day, I returned for the full moon. It was later in the evening and the sky was black. On top of that, the moon was higher in the sky when it came into view above the building. The photo taken a day early looks better to me.
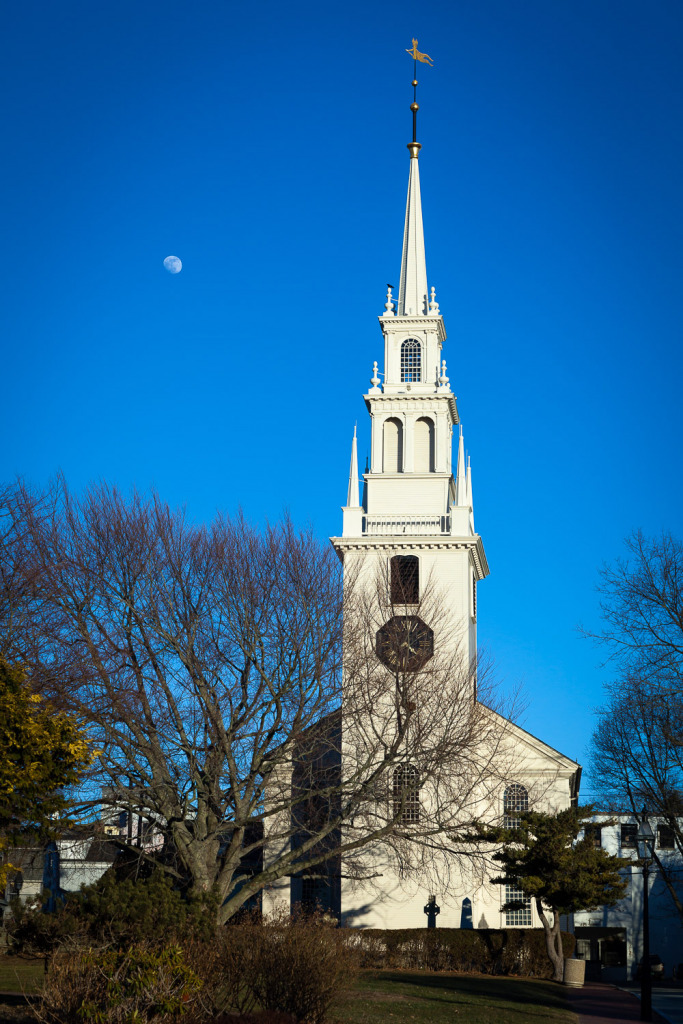
Here’s a photo I captured in Newport, Rhode Island a few days before the moon was full. I love the way Trinity Church was lit by the late afternoon sun which made it glow against the deep blue winter sky.
Tip Number 3: The moon rises diagonally so be prepared.
When you do your research and scout a good location, understand that the moon doesn’t rise straight up in the sky. It may be behind a building or tree by the time it has risen above the haze. If you’re in a high location, you may have a more unobstructed view.
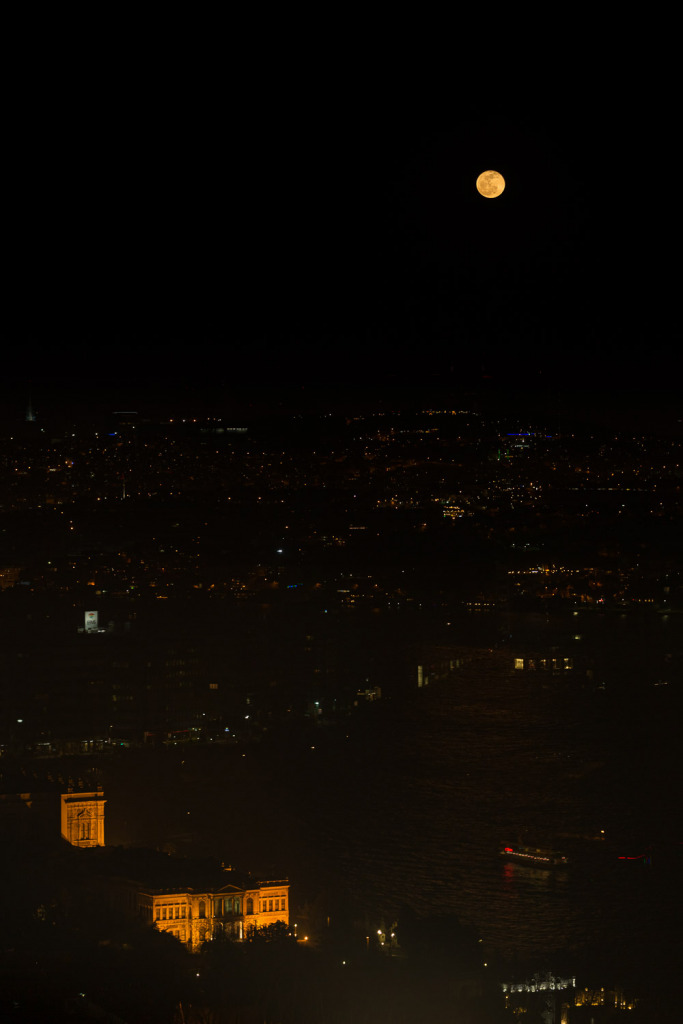
I’ve captured some great moon photos from hotel windows. Here’s one warning, though. You’ll need to turn off all the lights in the room to avoid reflections on the window. I even resorted to putting a black t-shirt over my head and the camera and pressing the camera against the window to shut out reflections for this shot of the moon above Istanbul, Turkey. Do you have any idea the name of the building in the photo? I wish I knew!
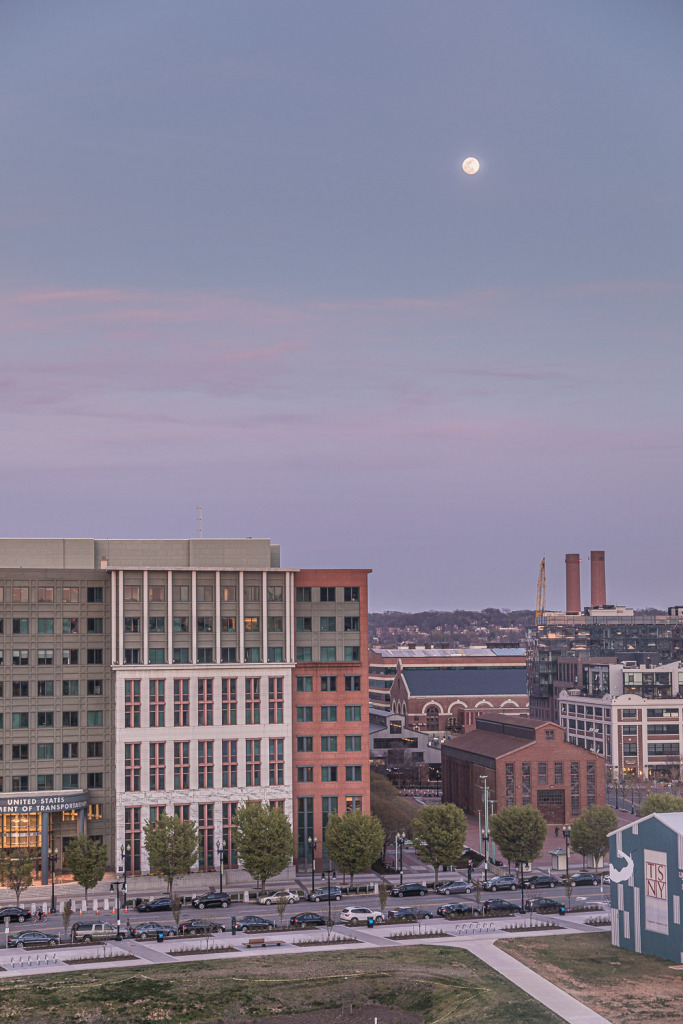
Here’s another great moon photo shot out of a hotel window in the Navy Yard in Washington, DC. The Department of Transportation is in the foreground to the left, and the New York Trapeze School is in the building to the right.
If the clouds hadn’t been on the horizon, I could have taken the photo earlier, and it would have appeared much larger. Instead, I had to wait for the moon to climb above the clouds.
Tip Number 4: Use a zoom lens and shoot while the moon is low.
While the moon will appear larger in July because it’s closer to the earth, it can use some help from you to appear that way in a photo. Using a zoom lens is a good starting point. Also, the moon always looks larger when it is closer to the horizon, either rising or setting.
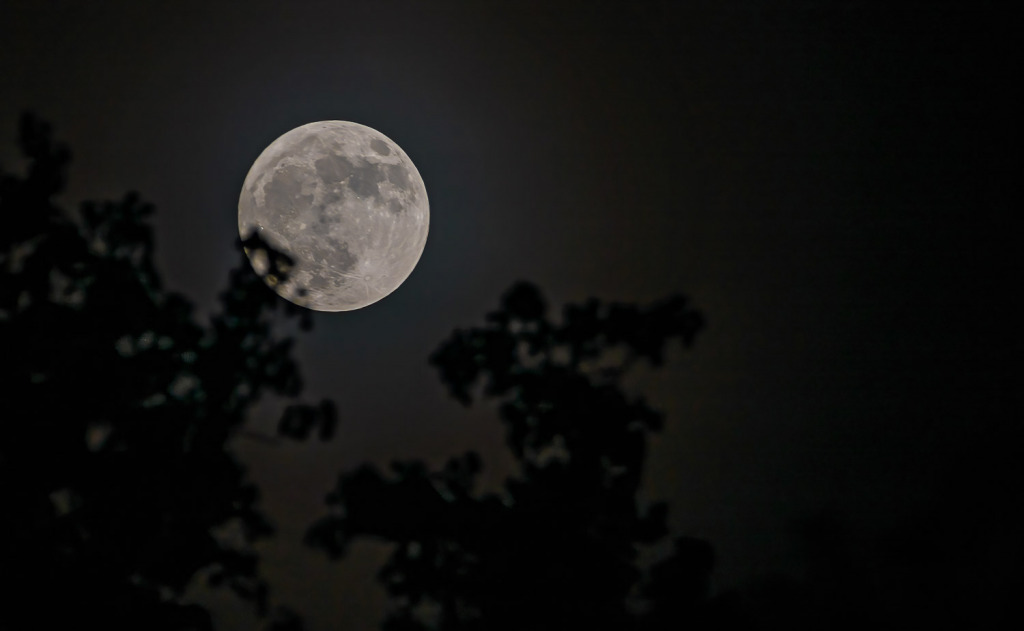
If you can include part of the foreground, that will help. For this photo, I included the tops of the trees.
Tip Number 5: Shooting an HDR will probably not work for a great moon photo.
The problem with shooting multiple photos and blending them to expose for the moon and the foreground is that the moon is moving! It will appear oval in the photos you shoot at a slower shutter speed!
Instead, choose your foreground carefully. If it isn’t well lit, you can turn it into a silhouette. Or shoot a day earlier. (See Tip Number 2.)
Tip Number 6: Shoot in Manual Mode.
If you are shooting on the night of the full moon, start with the following settings: Manual Mode, ISO 100, Shutter Speed 1/100 sec, and then adjust your Aperture for the correct exposure for the moon. Take a photo and zoom in on the LCD screen to see if you can see the details of the moon. If it’s too bright, increase either your Aperture or your Shutter Speed and take another shot.
You may find that you get a better photo if you underexpose it and then brighten it when you process the shot.
The good news is you probably won’t need a tripod. That’s less equipment to carry.
Are you used to shooting JPGs? Try shooting your photo in RAW instead. This will help you when you process the photo.
Tip Number 7: Process your photo.
This is an important step! In your photo software, reduce the Highlights and play around with the Shadows to see if raising them or lowering them will help bring out the details of the moon’s surface. Adding Contrast will also help. All of this can be done in the Photos app on a Mac computer.
If you use Lightroom Classic, you’ll have more controls that you can tweak. I add Texture, Clarity, and Dehaze and sharpen the photo. I also may adjust other sliders or even take the photo into Photoshop, depending on how it looks. This is the fun part!
Now It’s Your Turn:
If you wonder about shooting in Manual mode or just wish you understood your camera better, I hope you’ll click on this link to learn about my online workshop, Camera Mechanics. In it, I quickly take busy camera owners from confused about their cameras to confident. Why waste hours and hours doing research on YouTube, when you can easily get all the training you need in one place and spend the rest of your time out shooting photos you’ll love? I’ll be opening enrollment soon and will be updating the Workshops page this week with a waiting list. https://www.carolinemaryan.com/workshops-camera-how-to-williamsburg-va/
I’ve written about the settings to use for shooting the full moon in this post: https://www.carolinemaryan.com/exposure-for-a-moon-shot-its-not-what-you-think/
When I lived in Seoul, South Korea, I set out to take a photo of a super moon and ended up creating a composite using an HDR shot of the foreground and the properly exposed shot of the moon. You can read about it here: https://www.carolinemaryan.com/shooting-the-full-moon/
If you want more help with planning your moon shot, download the Photopills app to your mobile phone. It is outstanding but you do need to allow time to follow their excellent training. You won’t learn to use it in a day! https://www.photopills.com/



Leave a reply