How can you make your travel photos stand out? Here’s a trick that will stop the scroll and bring on the excitement.
- Be prepared to shoot in low light when you include flames.
- Do you need special gear?
- Will a tripod help your travel photo?
- What shooting mode is best when you’re shooting flames?
- Choose your travel photo composition intentionally.
- Timing is everything, so be ready!
- Capturing movement helps tell the story of your travel photo.
- Now it’s your turn.
Imagine scrolling through your social media feed and seeing a travel photo that instantly catches your eye with its vibrant colors, sense of adventure, and flickering flames dancing in the frame. It’s a moment frozen in time, telling a story that begs for more detail.
Well, it’s time to unlock the secrets and fire up your own travel photos.
Be prepared to shoot in low light when you include flames.
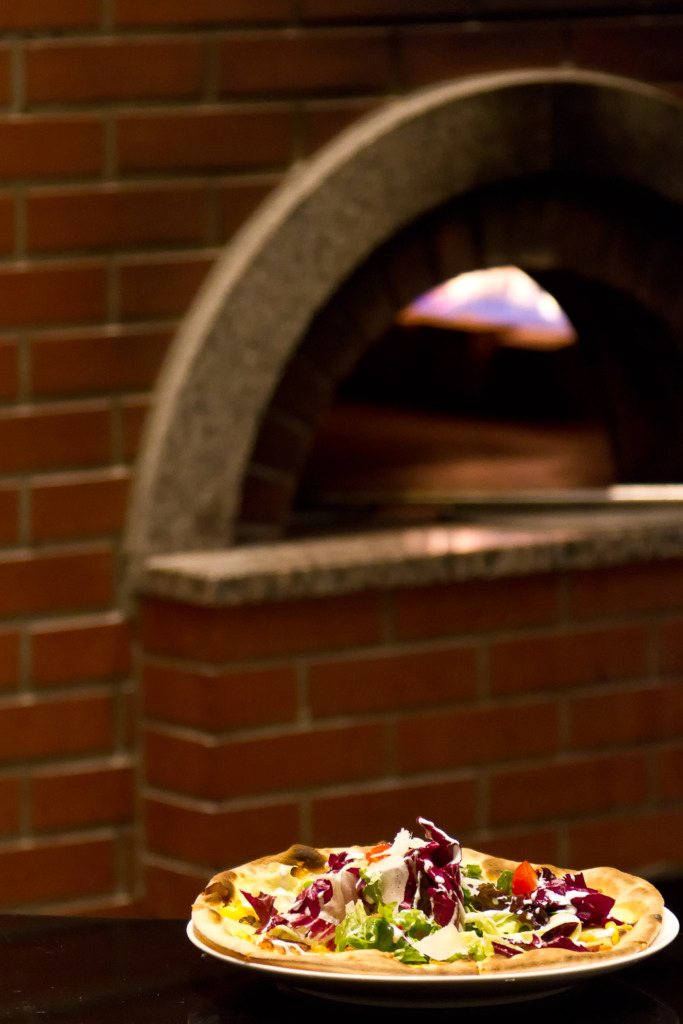
(Canon EOS 7D, Aperture Mode, f/4.0, 1/100 second, ISO 3200)
I shot this photo in 2010, at Paris Croissant, near the top of the Cheonggye Stream in Seoul. They had the best pizza!!! I was writing an article for a local magazine about good places to eat in our area of Seoul, so this was composed with that in mind. I wanted to include the pizza oven with its flames in the image, but the star was the pizza.
The restaurant lighting was low, but fortunately, the pizza was sitting under a bright light, which helped. I set my camera to the lowest aperture number possible for the lens I was using to let in more light and bring the focus to the pizza. I didn’t have a tripod with me, so I boosted the ISO until it allowed a shutter speed of 1/100.
When capturing flames in your travel photos, being prepared to shoot in low light is essential. While the flickering glow of a flame can create a captivating visual element, photographing flames in low light can be a challenge if you’re unfamiliar with shooting techniques.
Do you need special gear?
While it would be lovely to invest in a high-quality camera, and your chance of capturing a stunning shot would increase, I’m a firm believer that the camera that’s with you (your iPhone) or the camera you can afford right now will be fine. Don’t let a lack of fancy equipment hold you back! The sooner you get out and practice, the better your photos will become and the more fun you’ll have!
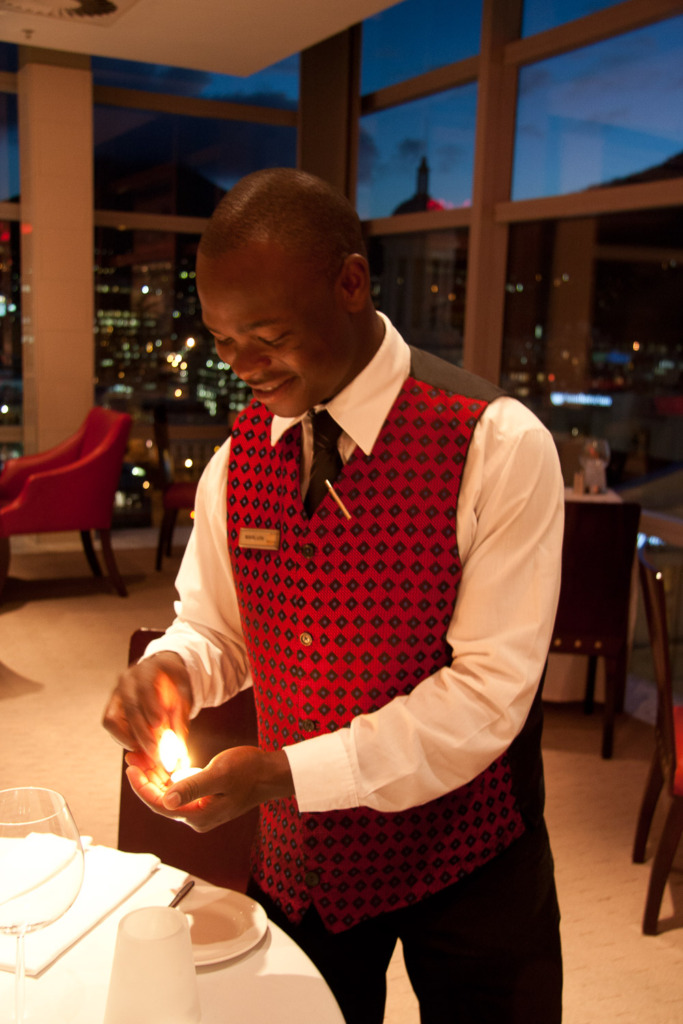
(Canon EOS 40D, Program Mode, f/4.5, ¼ second, ISO 800.)
I took this photo in the top floor restaurant of the Westin Cape Town in 2009. I was using my first DSLR, the Canon 40D. (My current iPhone is a better camera!) I didn’t have my tripod with me, so I steadied the camera on the back of my chair. I’d watched our waiter lighting the candles in the restaurant as the sun was setting and was ready when he arrived at our table. He graciously offered to pose!
I love the magical feeling of the fire in his hands and the joyful expression on his face. Including Cape Town’s skyline through the windows made it an even better travel photo.
Will a tripod help your travel photo?
Shooting in low light often requires longer shutter speeds, which can result in blurry images if your camera is unstable, so a tripod is a wonderful addition. But what if you want to travel with less weight? Then, a Platypod is a smaller and lighter-weight option. (I’ll include a link at the bottom of this post.) Or you can brace your camera on something stationary like a table.
What shooting mode is best when you’re shooting flames?
Remember when I said you should get out and practice? Well, I shot the photos in this post over the years, with the earliest in Program Mode and the latest in Manual Mode. I love all of these photos, no matter what mode I used! Practice will truly make you a better photographer!
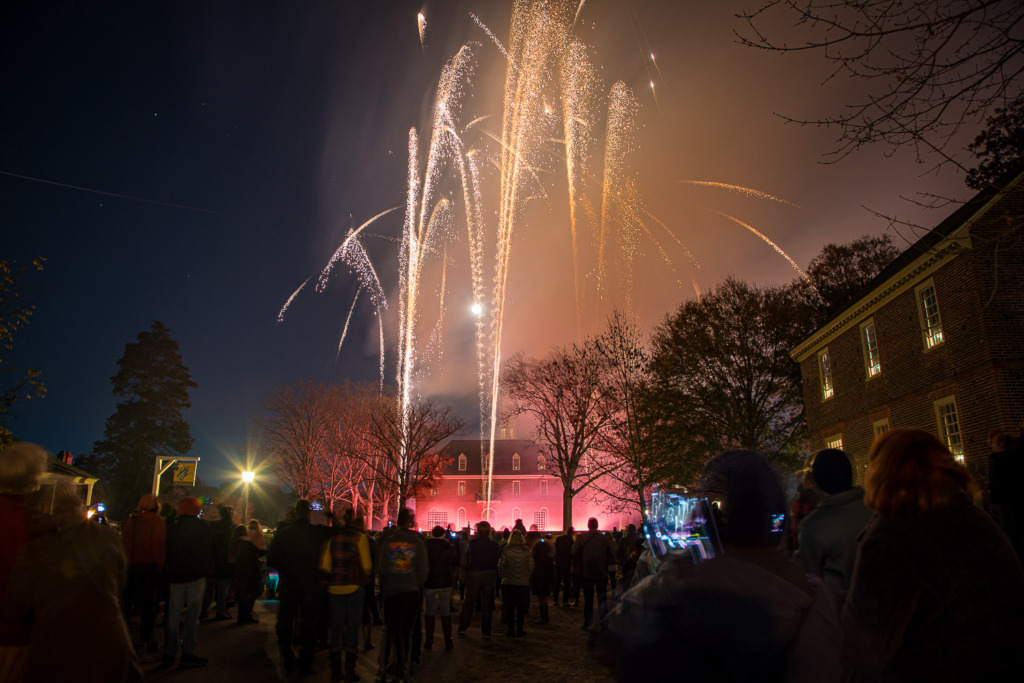
(Canon EOS 5D Mark IV, Manual Mode, f/8.0, 25 seconds, ISO 100)
I’ll include a link at the bottom to a blog post I wrote about shooting fireworks. After all, it’s July 4th weekend, so you might get to practice right away! I shot this fireworks display during the Grand Illumination in Colonial Williamsburg in December 2017. It was freezing out!!!
The shutter speed I’ve listed is deceptive since I cover the lens between volleys and use Bulb Mode to keep the shutter open for multiple volleys. I explain the technique in the linked blog post.
Today, while I shoot most of my photos in Aperture Mode, I prefer using Manual Mode for low-light images. You’ll want to be ready in the moment, so take time now to familiarize yourself with the manual settings on your camera.
Choose your travel photo composition intentionally.
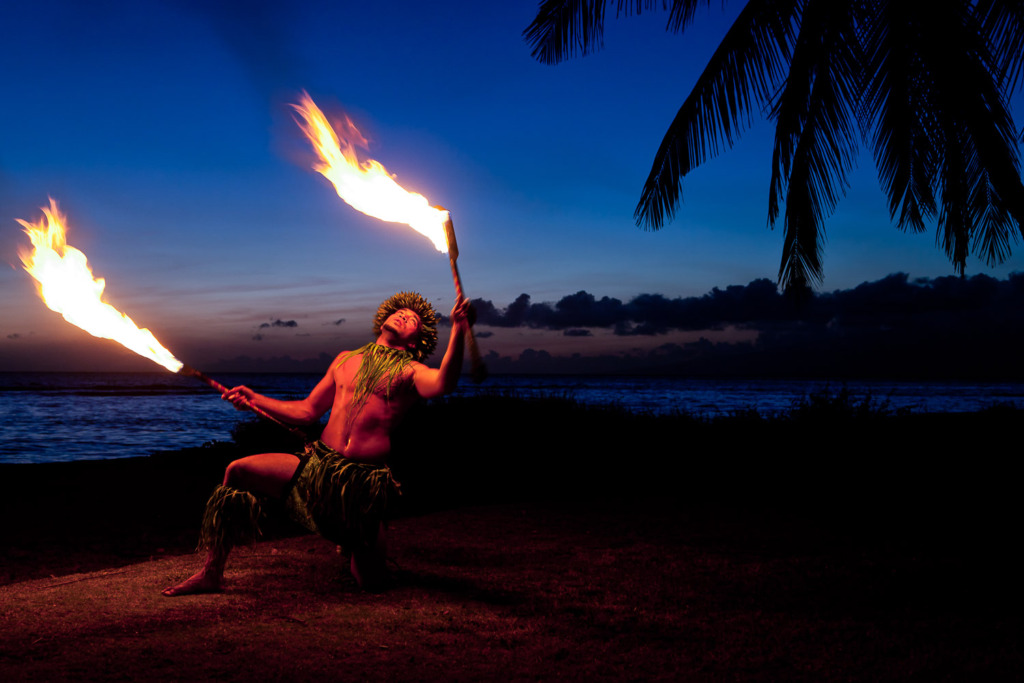
(Canon Eos 5D Mark II, Manual Mode, f/6.3, 1/6 second, ISO 200)
When you’re shooting travel photography, it’s important to keep in mind how you want to use the final print.
You might wonder why this fire dancer in Hawaii is over on the rule-of-thirds line on the left. Why would I put him there when the flames were moving out of the frame? Here’s the story. I shot the photo for a travel article and placed him on that side while leaving the other side, with the palm tree, darker. My goal was for it to be a two-page spread with part of the article printed in white letters on the right side of the photo.
I would love to have caught him facing the right, but the best shot I got was this one, with him arching his back and looking back to the right. As a two-page spread, he would take up the left page, and the palm tree with words over it would take up the right-side page.
One quick note: If you’re shooting a two-page spread, be sure your subject is not in the middle! Otherwise, they’ll end up stuck in the binding of the magazine! 😳
Timing is everything, so be ready!
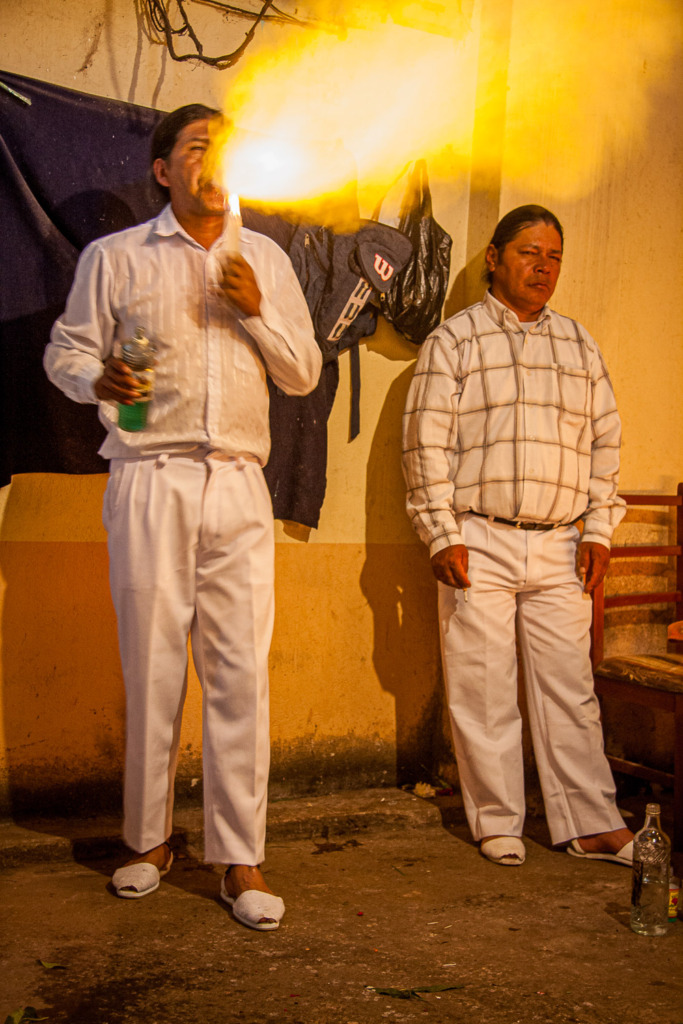
(Canon EOS 40D, Program Mode, f/5.0, ¼ second, ISO 800.)
Shot in 2010. This photo of two shamen leading a ceremony in Ecuador is an example of composition, timing, and capturing movement. Sometimes, aiming up from a low angle can emphasize the person’s importance in the photo. The two shamen were inducing trances. Once we were seated, we couldn’t move, or we’d disturb the ceremony. The resulting image makes the two men look larger than life.
I decided on my settings and then watched the ceremony through my viewfinder with my finger poised on the shutter button. That way, I was ready to capture a moment when it happened. By the way, my slower shutter speed helped! As he started to breathe out and I pressed the shutter button, the camera captured the flames as they left his mouth and traveled across the room, almost making it look like slow motion.
Capturing movement helps tell the story of your travel photo.
Finally, by being aware of timing and always being prepared, you can seize those fleeting moments that help tell the story of your travel photo.
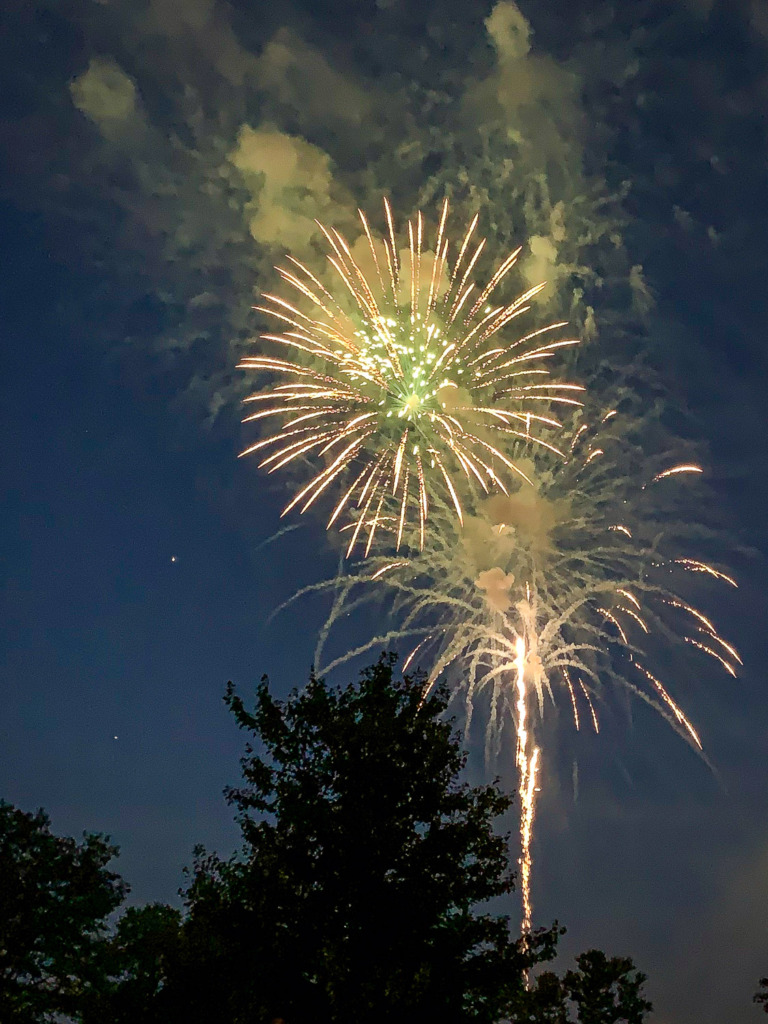
(iPhone XS, F/1.8, ¼ second, ISO 800)
But what about your iPhone? Can you shoot fireworks or other flames with it? You be the judge. I love this shot taken in 2019 while visiting my sister and her husband in New Canaan, CT.
Today, I would do one thing differently. I now have an iPhone 14 Pro Max and would shoot this in Live Mode. That mode shoots a three-second-long video as part of shooting an image. I would love to be able to play around with Loop, Bounce, and Long Exposure to see what those Live Mode settings would create after the fact.
Now it’s your turn.
Now it’s your turn to infuse life into your pictures by finding ways to capture movement.
In a world saturated with travel photos, it’s time to set yours on fire. By incorporating flames into your images, you have the power to captivate and leave others longing for more.
To learn more about the Platypod, you can click here: https://amzn.to/3pp8XZE
To read my blog post about shooting fireworks, click here: https://www.carolinemaryan.com/shooting-photos-of-fireworks/
If you’re not sure about using your camera settings, click here to learn about my online workshop: https://www.carolinemaryan.com/camera-mechanics-workshops-info/
I’m an Amazon associate and may earn a small commission if you make a purchase with my Amazon link. Thanks!


Leave a reply