When you add movement to travel photos, you capture unique shots that are more dynamic and engaging. Movement helps you relive the moment in your photos, and your viewers will love seeing them, too.
Here are three tips for adding movement to your travel photos.
Tip Number 1: Use a slow shutter speed and pan the action.
When shooting action shots, we usually try to freeze the motion. But often, showing movement is a better way to add ambiance and excitement to the image.
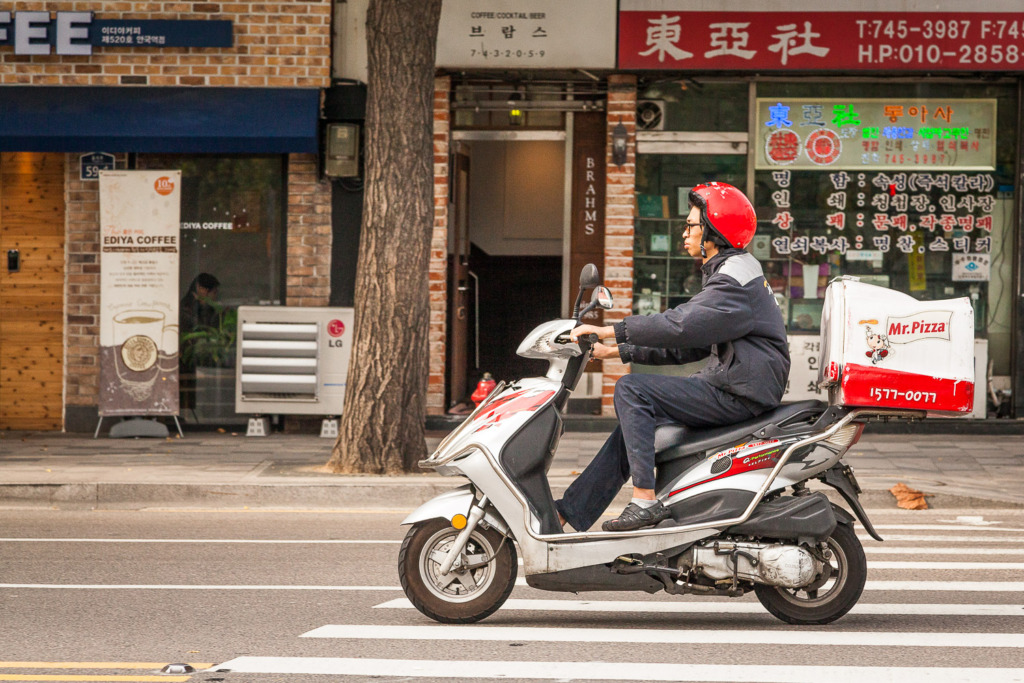
f/7.1, 1/1600 second, ISO 640, Manual mode
First, let’s look at a bad example. I think you’ll agree that this is not an exciting photo. It looks fake, like it was shot on a motorcycle propped up in front of a street scene photo. Dull! You’ll be surprised to learn that the driver had just sped through a yellow light at top speed.
So, what’s wrong? I shot it at a shutter speed of 1/1600 and froze the action. You want to freeze the action for some scenes, but not for this one!
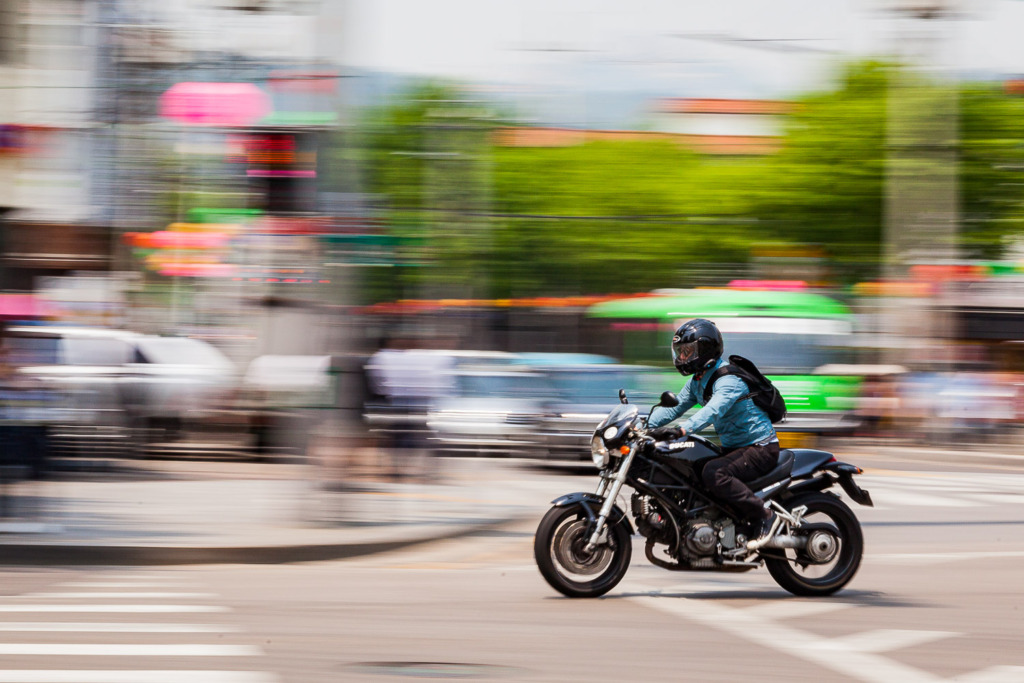
f/22, 1/30 sec, ISO 100, hand-held, Shutter mode
Then, I decided to add movement to my travel photo by panning to capture the following image. I set the shutter speed to 1/30th second, and as the motorcycle driver crossed the intersection, I moved my camera to follow him. But here’s the trick. After I pressed the shutter button, I continued to follow him with the camera. That created the streaks in the background and allowed him to be in focus without motion blur. You won’t get this result if you stop moving your camera when you press the shutter button!
Doesn’t this photo do a much better job of expressing the movement and energy of a street scene in Seoul?
Tip Number 2: Have your subject stand as still as possible to add movement to your travel photo.
For the previous photo, my subject was moving. This time let’s try a different approach.
On my first day in Shanghai, I noticed this nut vendor. I was drawn to his smile and enthusiastic sales approach, so I bought a bag of nuts from him. Then, I used gestures to ask him if I could take a picture. I pointed to my lens and encouraged him to stand still while looking at it.
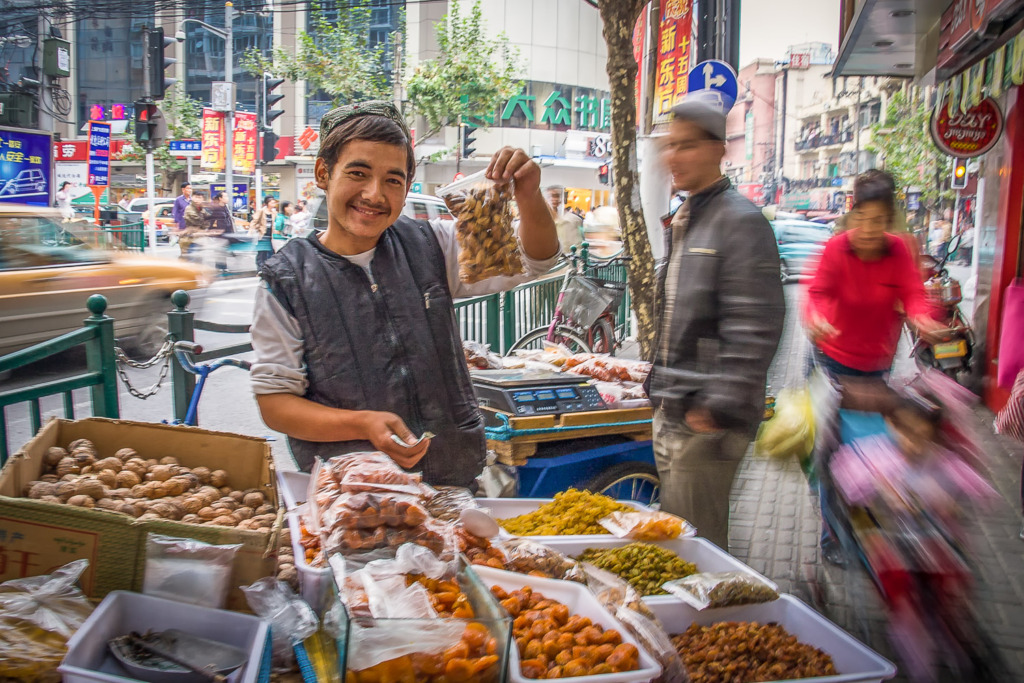
f/8, ¼ second, ISO 200, Aperture mode
I wanted to add movement to this travel photo to show the energy of the Shanghai street scene in a portrait of the vendor. Standing as still as possible, I shot the photo hand-held at ¼ second.
What do you think? Doesn’t this picture have a feeling of energy? It’s a panned photo, but the passing people and cars are in motion instead of my subject and camera moving.
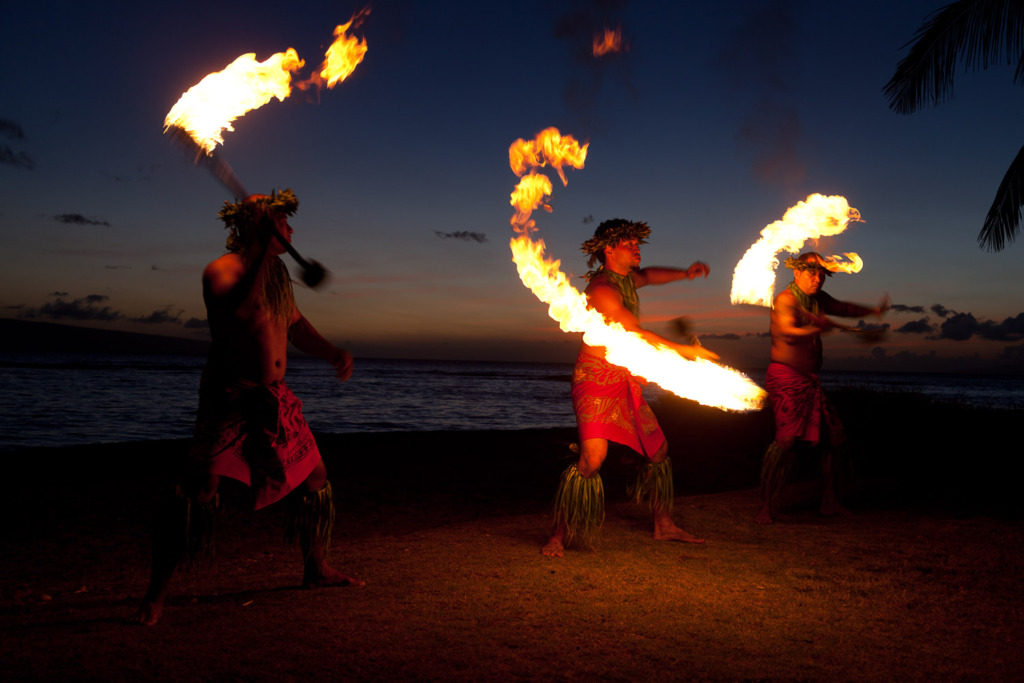
f/5.6, 1/30 second, ISO 200, Manual mode
Here’s another example of adding movement to travel photos. I took this shot during a show on the beach in Hawaii. The center dancer was standing still, except for his moving arms, so I was able to capture a trail of flames.
Tip Number 3: Use a tripod to help add movement to your travel photos at night.
I used a tripod for this image to set a slow shutter speed of 4 seconds. We were walking across Westminster Bridge in London, and I wanted to remember Big Ben with the blue hour sky behind it and light traffic trails. It would have been a lovely shot without the traffic, but the light trails make it more exciting.
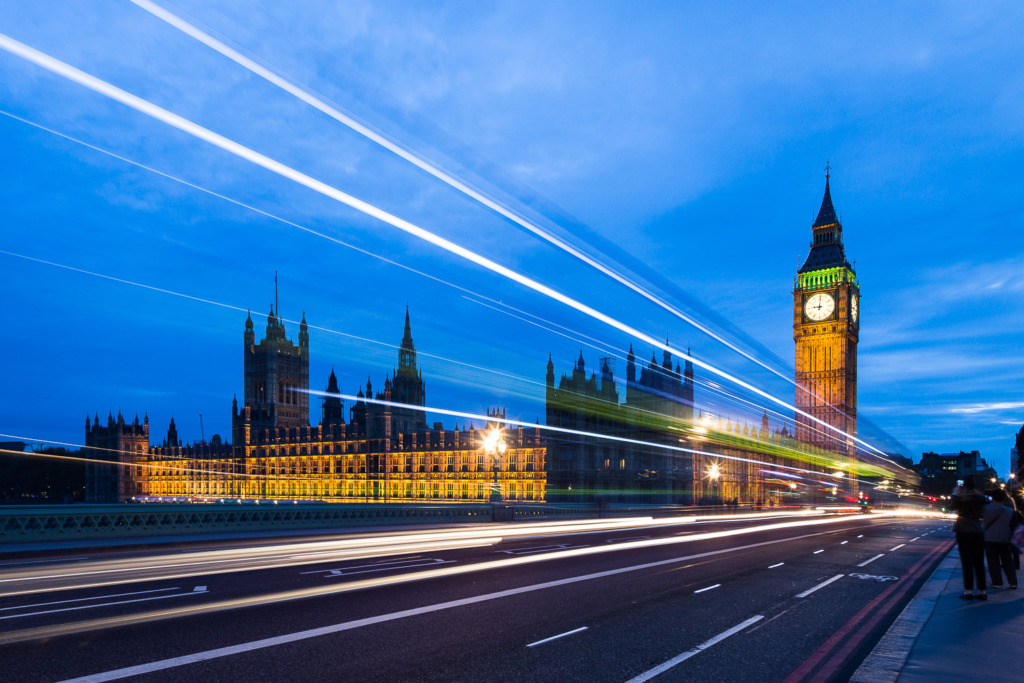
f/14, 4 seconds, ISO 100, Manual mode
I needed a tripod for this image, too. I was shooting photos of galleries in our Seoul, South Korea, neighborhood for a magazine article. I’d positioned myself across the alley from this gallery and tried to capture the interior and the sign outside, but I wasn’t having much luck.
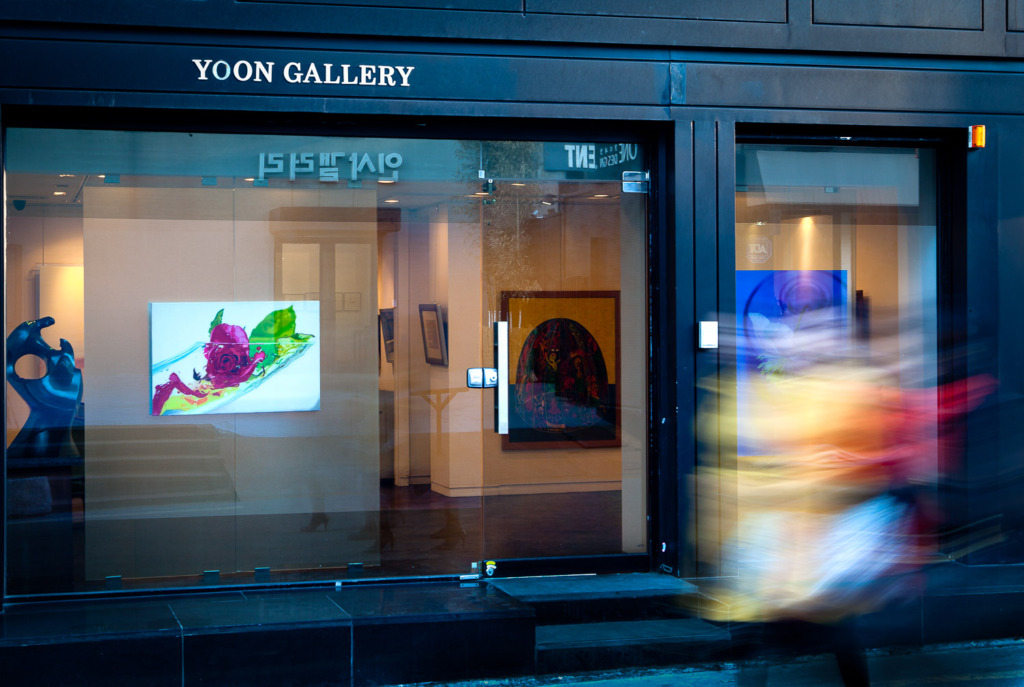
f/8, .5 second, ISO 100, Aperture mode
Then, I noticed three women wearing bright clothes and walking down the alley. As they entered the scene, I pressed the shutter button and held my breath. Yes! This was just what I needed to add movement and excitement to the travel photo. And the colors of their clothes even blended with the colors inside the gallery. Photographer’s luck! 😉
Now it’s your turn.
Give these tips a try before you go on your next trip. Imagine your hometown as a travel destination and head out to practice these techniques. Then, you’ll be ready for your next memorable vacation!
You’ll need to escape from Auto Mode on your camera to try these techniques. I have just the answer in my training here.
You can learn more about panning in this post.
Go to this post to learn more about adding motion to your photos.
If you love learning about photography and want to take it to the next level, visit Scott Kelby’s blog.


Leave a reply