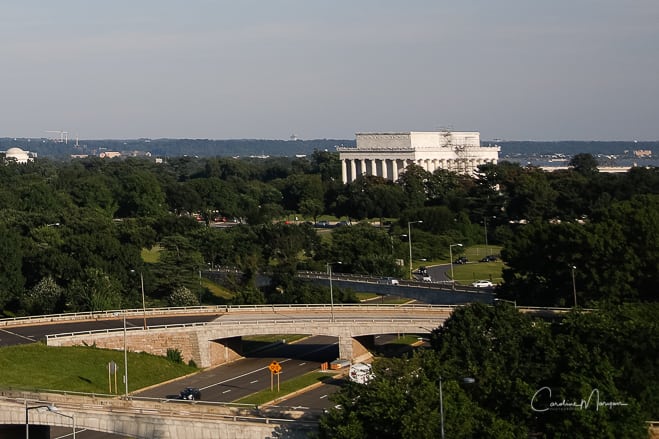
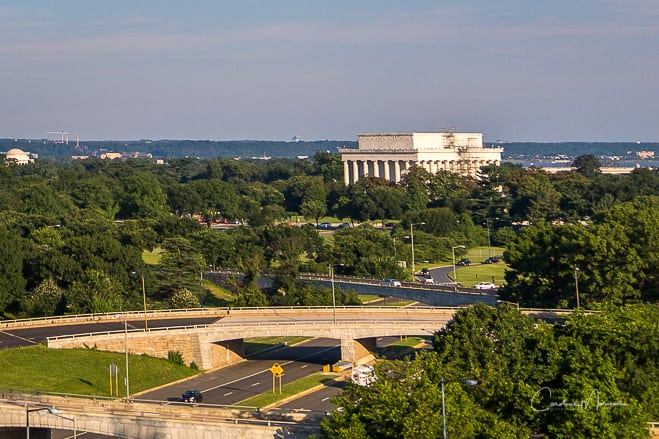
This shot is of The Lincoln Memorial in Washington, DC, taken from the Kennedy Center in the late afternoon. If you slide all the way to the right, you’ll see the RAW file that the camera captured. To use it in the post, I had to save it as a JPEG in Lightroom, without processing. If you slide all the way to the left, you’ll see the JPEG that the camera created. You’ll notice that it is sharper and there is more contrast. However, the details in the darker parts of the image are too dark to appreciate. It’s a fine snapshot, but not a great image, in my opinion.
In parts one and two of this series, I’ve discussed photoshopping and compositing. Most photos don’t involve either of these treatments. It’s time to talk about the most important part of finishing a photo: processing.
All digital photos are processed. I bet that got your attention! Many people will argue that their photo is art because it is SOOC (straight-out-of-camera) and there is no processing involved. What they don’t realize is that those SOOC photos are processed by the camera. Let me explain…
Digital cameras gather all the data that they “see” and create a RAW file out of it. These RAW files are large and unfinished. They can’t be printed, emailed or posted on the web. They need to be converted to a smaller format that can be used, like JPEG.
If you choose to shoot JPEGs, your camera is still creating RAW files first. Then, it goes through a series of steps to create the final JPEG. If you shoot in Automatic mode, these steps are determined by the camera. If you shoot in Program, Aperture, Shutter or Manual mode, you have the option to change them before you shoot.
Depending on your camera, you may be able to choose the sharpness, contrast, saturation, color tone, white balance, noise reduction, lens aberration correction, red-eye reduction, exposure and even more. These are all processing decisions. They are all applied after the shot is taken and before it is stored as a JPEG to your memory card.
But wait, there’s more! If you shoot the same scene with two different camera brands, you are likely to get slightly different finished JPEGS. Nikon cameras tend to shoot cooler (more blue) photos than Canons, for instance. If you shoot the same scene on Auto with both cameras, one will have a cooler cast to it. So, the camera is making decisions on the color cast of your photo! This is why you’ll see many Nikon shooters changing their white balance to Shade or Cloudy in their camera.
Another curious fact is that the photo you see on the LCD screen on the back of your camera, in playback mode, is a JPEG, whether you are shooting RAW or JPEG.
If you’ve chosen JPEG in your image quality menu, once the photo is taken and converted into a JPEG by your camera, the changes are baked in.
What if you don’t like the finished photo when you see it on your computer screen? You can process it with software, but the range of changes is more limited than if you had chosen to shoot in RAW.
OK, we’ve now determined that all photos are processed, one way or another. The camera can make all the processing decisions (Auto mode), or you can make some of them (Program, Aperture, Shutter or Manual mode). But, there’s a third choice.
You can take over the processing decisions and create your own art, with more latitude to make changes. You can shoot in RAW. Remember, all RAW photos must be processed using software on your computer or, perhaps, on your mobile phone or iPad. To test the waters, most people begin by selecting to shoot in RAW and JPEG at the same time. This can be chosen in the image quality menu on the camera. Then, they play around with the RAW files, using processing software, to get a feel for what it does. They always have the camera-finished JPEGS to fall back on, in a pinch.
If the only things you could change in processing software were the same as the settings in the camera, you might be tempted to skip the whole RAW deal. But, after you’ve made those initial decisions, the art really begins.
The photo you see when you slide to the right is the same JPEG from the camera that you saw above, a SOOC photo. The photo you see when you slide to the left is the RAW file, processed in Lightroom. Notice how you can now see the details in the shadows. The colors are richer. It looks much more like what I saw when I took the shot! If you’d like to see a larger version, you can click here.
In the next blog post, I’ll explain how you can enhance your photos and really feel the creative process. And, it’s not just for RAW photos, although they are the best. You can process JPEGS, even ones shot with your mobile phone. And, what about all those old slides and prints gathering dust in your closet? Wait until you see what you can do with those!


Leave a reply