How can you capture a unique travel photo? One easy way is to plan ahead and then wait for the light to change.
Shoot the sunrise and before.
When shooting the sunrise, patience helps! And friends to chat with. And maybe even a commuter cup of coffee! You’ll need to arrive early to make this work.
The Setup for shooting a unique travel photo of the sunrise:
First of all, use an app to know when and where the sun will rise! While the Weather Channel app will tell you the time of the sunrise, it doesn’t tell you where the sun will appear. For $4.99, you can buy the LightTrac app instead. It’s very easy to use and will allow you to plan ahead. You can also track the moon with it. (PhotoPills is also amazing, but it’s more expensive and there’s a steep learning curve.)
Next, don’t forget to bring a flashlight! Setting up a tripod in the dark can be tricky-especially if you’re doing it on a rock ledge and don’t want to fall off! A headlamp with a red light will help preserve your night vision. I love my Luxpro headlamp and include a link below.
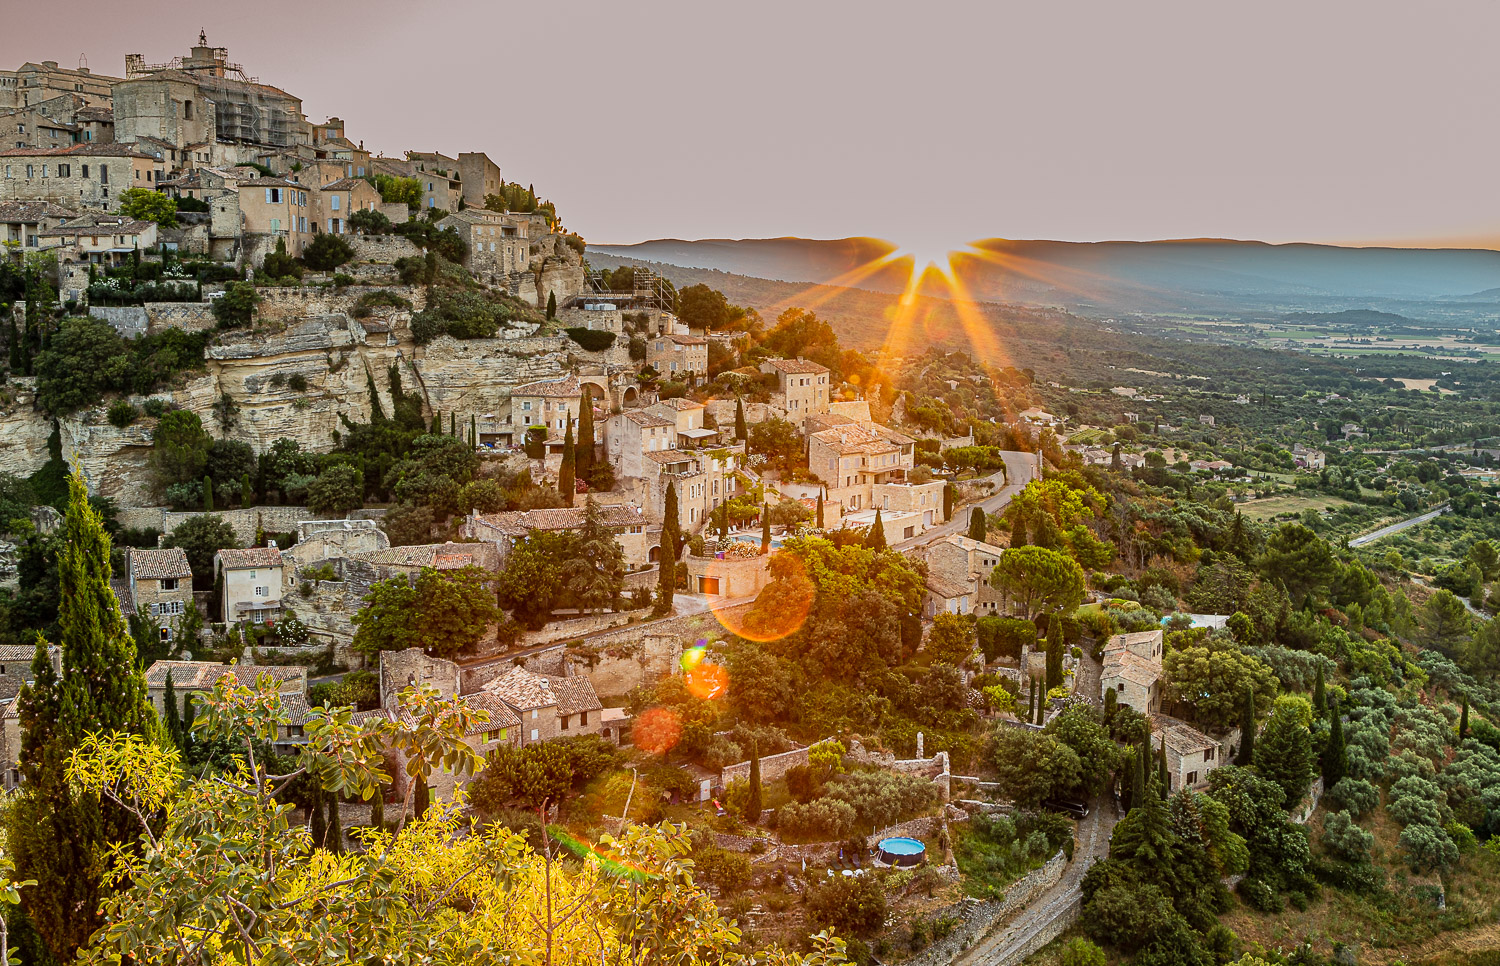
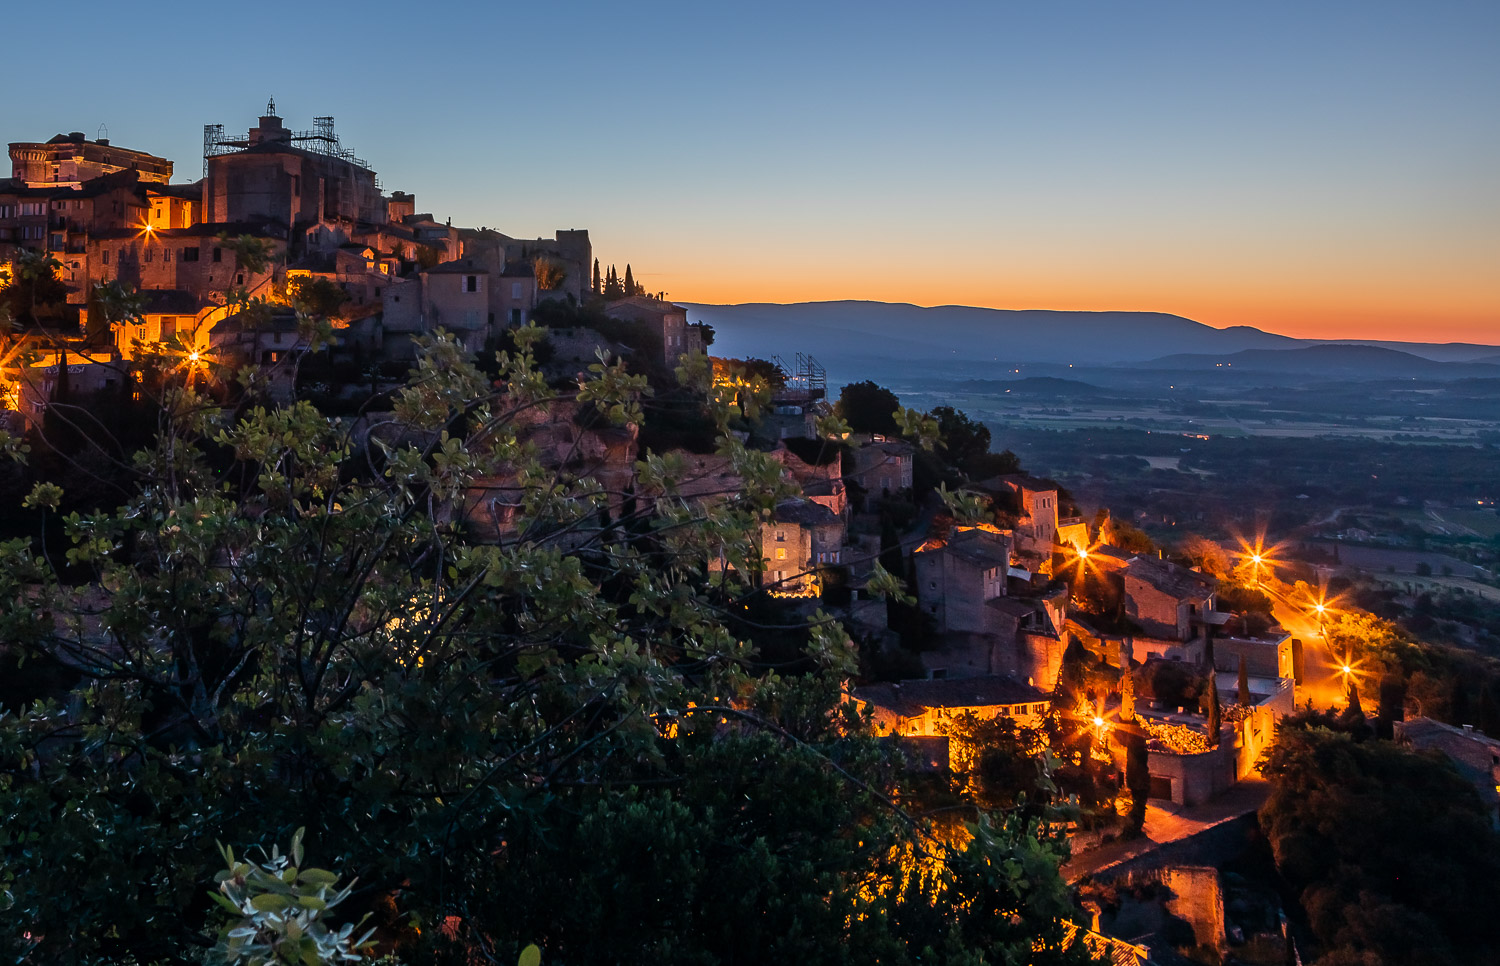
Use Google Maps to decide where to shoot from ahead of time. For the photos below, we stood on a rock ledge overlooking the village of Gordes, France. On the Google map, we could see the ledge, along with a camera icon and the words, “Point de vue sur la ville de Gordes.” Thank you, technology!
Settings for the darker photo: Manual mode, f/11, ISO 100, 15 seconds.
Settings for the lighter photo: Manual mode, f/20, ISO 100, .5 sec.
The thought process:
To shoot a unique travel photo, you’ll need to be creative. After you’ve set up your tripod, look around to see if there might be an additional place to shoot from. I shot the two photos of Gordes above from two slightly different spots, only a few feet apart.
I also watched the light change. I loved the twinkling village lights before dawn, but when the sun rose, I saw a chance for a photo with different energy.
Just remember that you’ll need to watch your settings and exposure. I’m generally shooting in Manual mode when my camera is on a tripod so I’m responsible for those settings.
Wait for the building lights at blue hour.
First, beware of the name. The blue hour doesn’t last an hour. In fact, today, in my town of Williamsburg, VA, the blue hour will last 11 minutes! You must be prepared for blue hour shots!
The setup for a unique travel photo
Be sure to arrive early to find a safe spot to set up your tripod. Your preparation will be very similar to shooting the dawn.
A common issue with blue hour photos of buildings is that the lights generally don’t come on until the sky is almost completely black, and the building lights really help to create a unique travel photo.
The details:
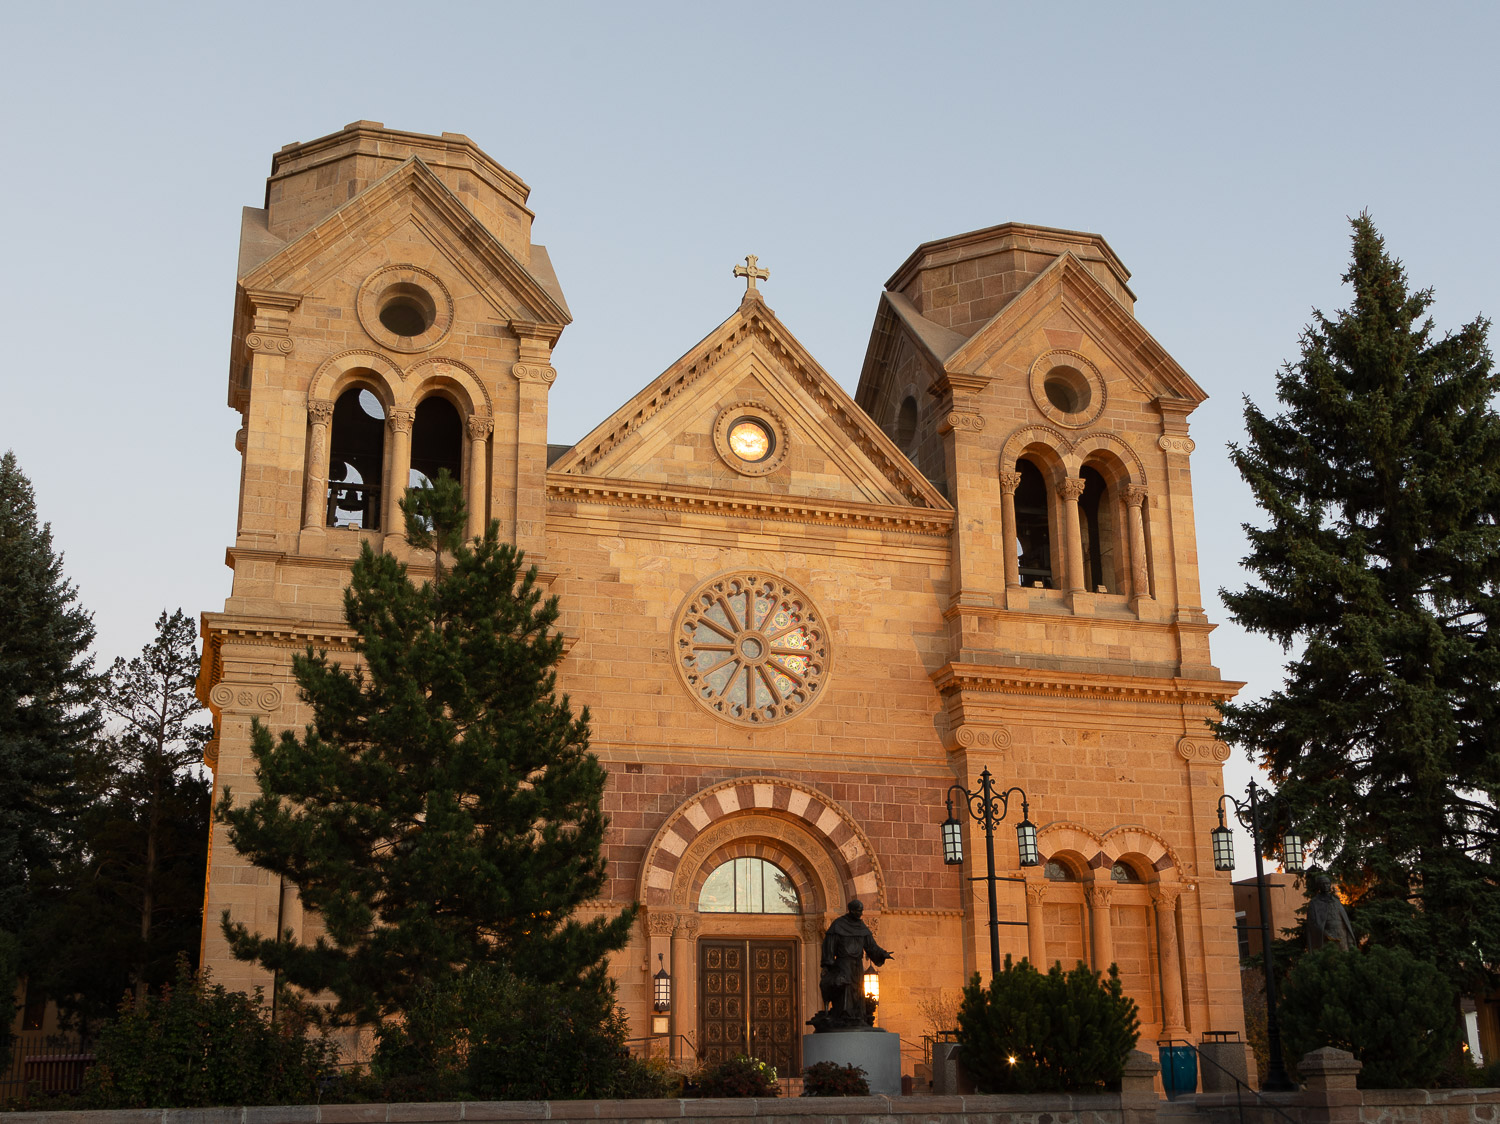
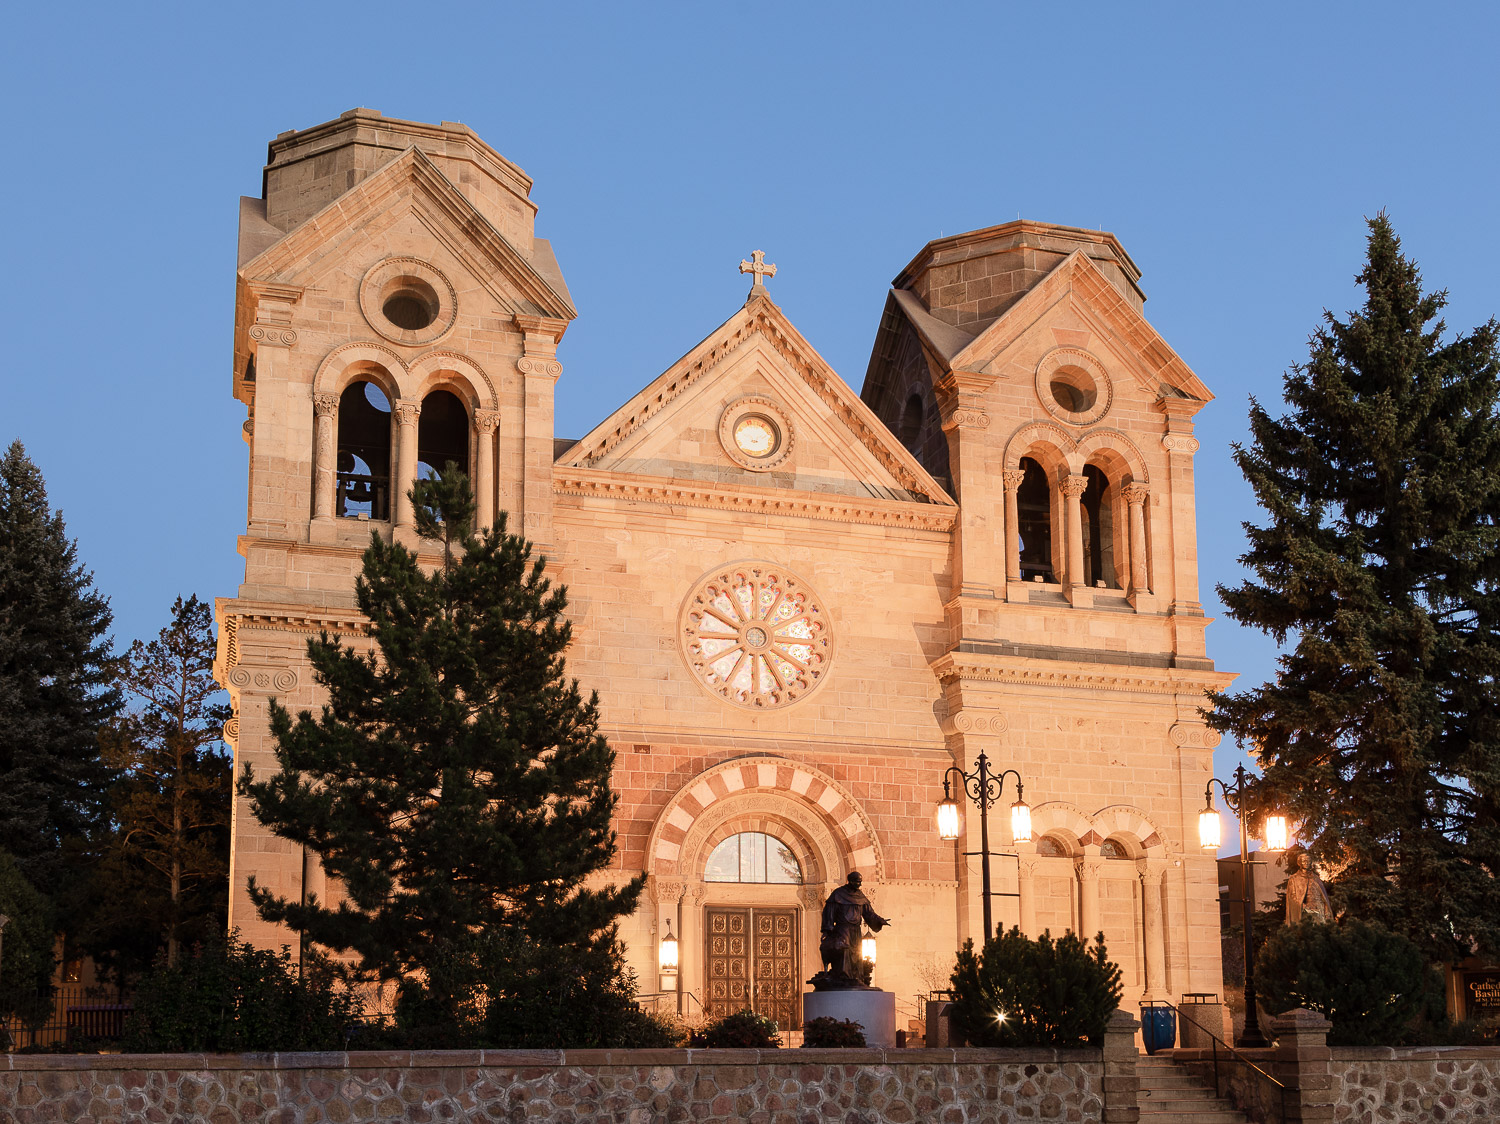
To shoot this photo of The Cathedral Basilica of St. Francis of Assisi in Santa Fe, New Mexico, Skip and I arrived early and waited. As the sky grew increasingly dark, the lights finally started to come on. However, several of them never did light up. Fortunately, I was able to add light in post-processing in Lightroom Classic.
Also, you may have trouble finding a place to set up your tripod in an urban setting and that can cause your buildings to be lopsided. As you’re taking your photo, allow extra room around the subject. Then, use the Transform panel in Lightroom Classic and Free Transform in Photoshop to straighten your shots if needed.
While I normally use Manual mode when I’m on a tripod, I used AV mode because the light was changing so fast and I was trying to time my shots to avoid passing cars. The settings for the lighter photo were f/11, ISO 100, 1.6 sec. The darker photo’s settings were f/11, ISO 100, 8 seconds.
Try a different exposure to add drama.
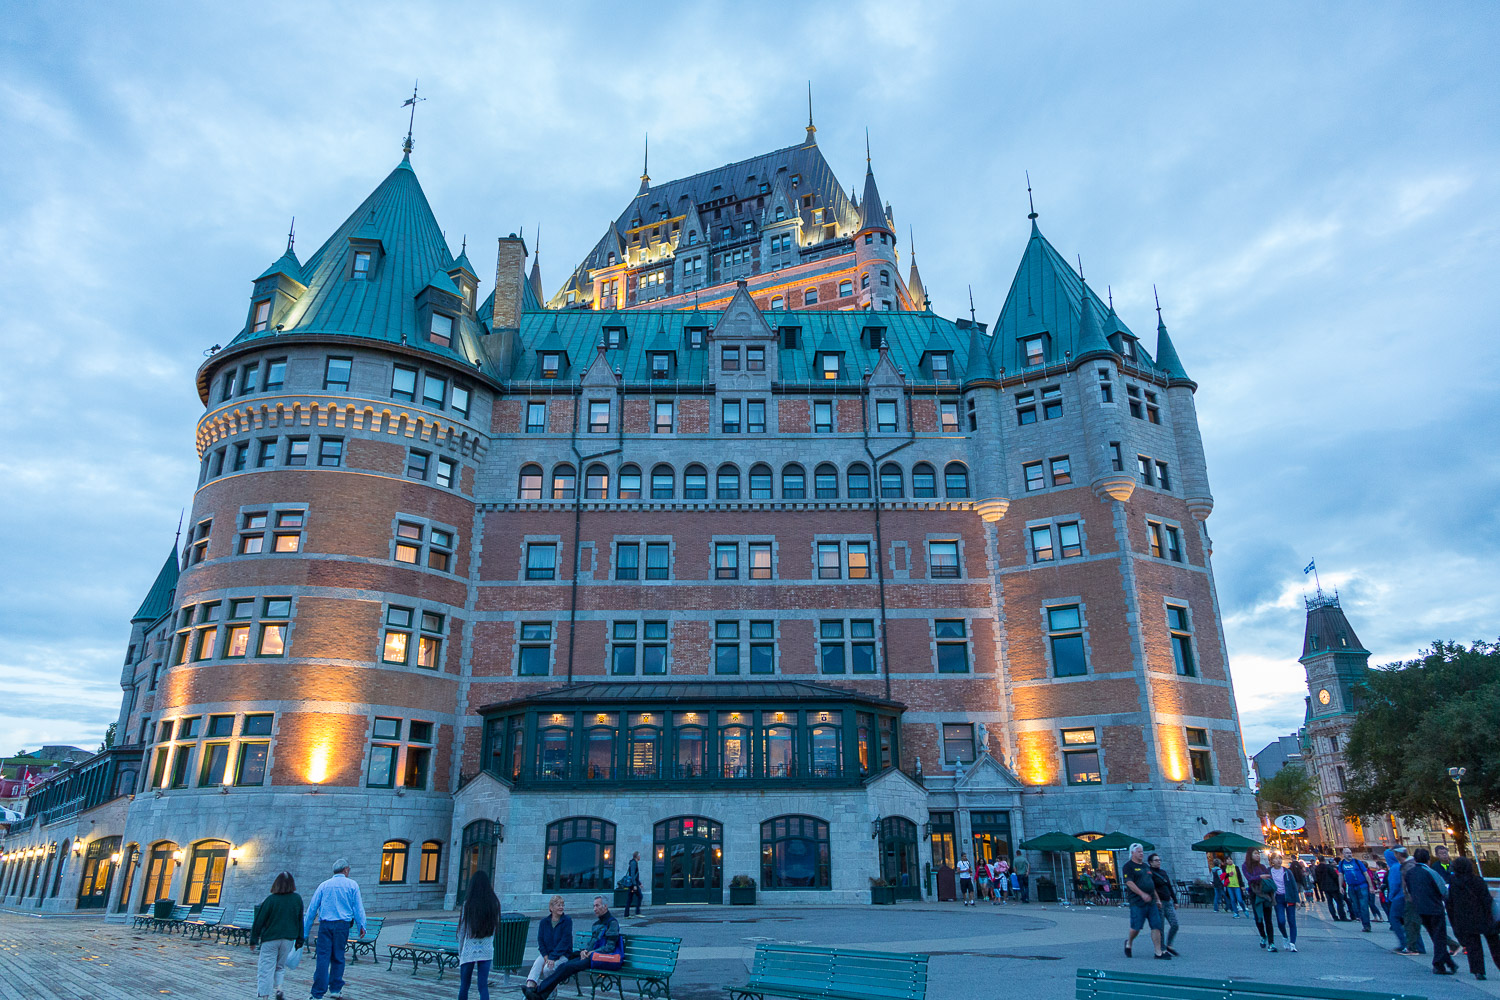
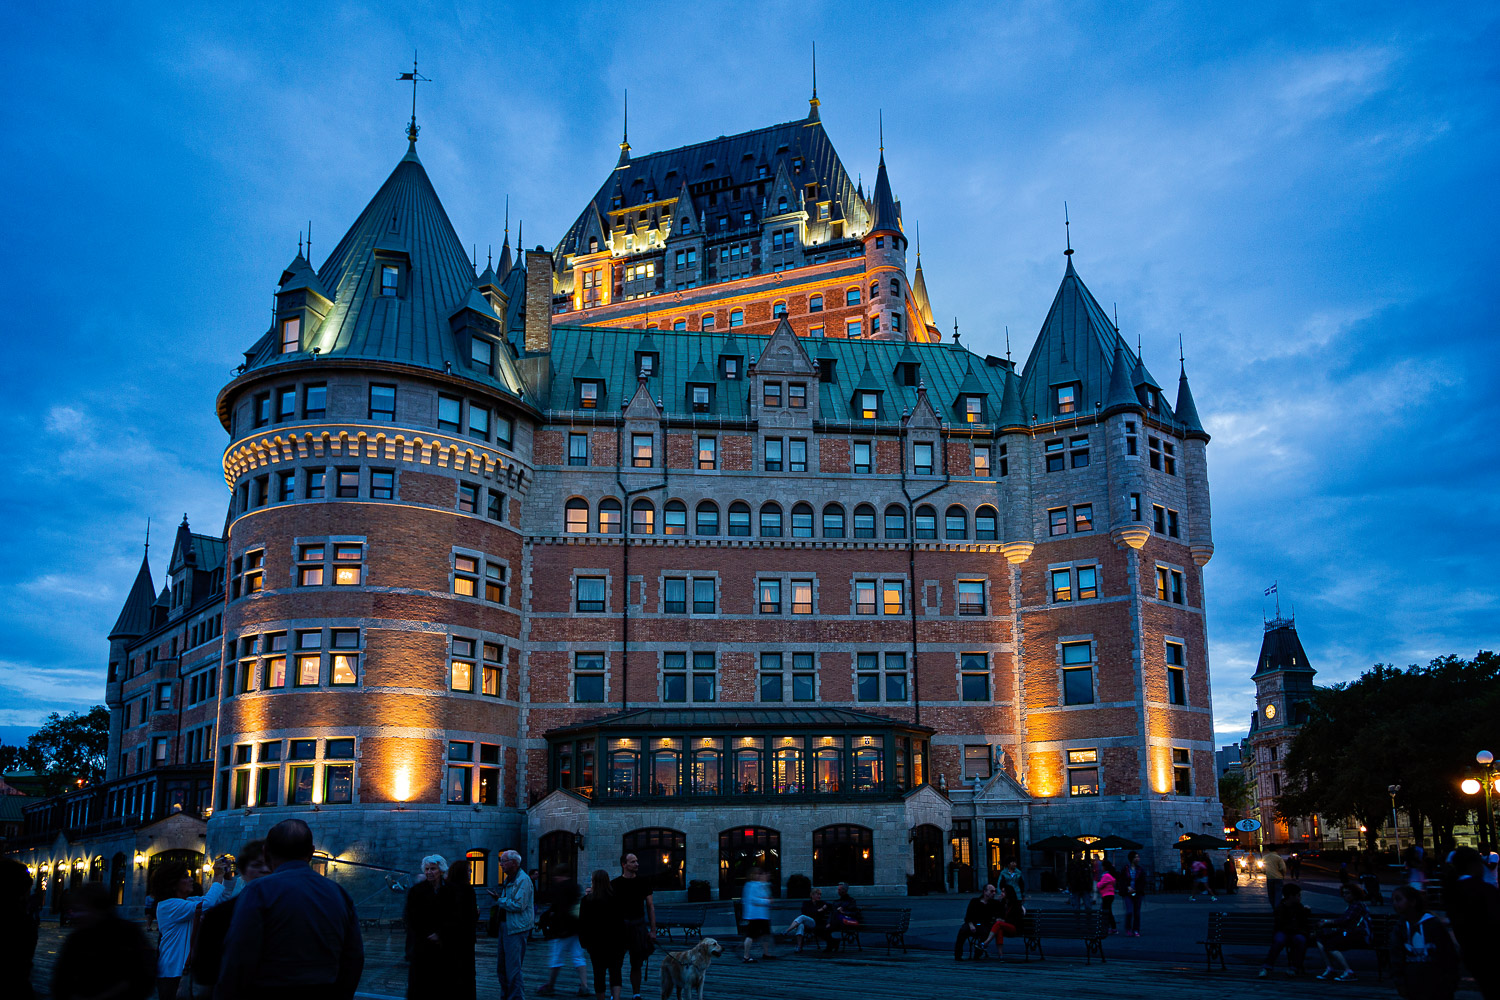
Skip and I were out for dinner in Québec City, Canada when I saw the lights and the blue sky and knew this could be a unique travel photo of the Fairmont Le Chateau Frontenac Hotel. I didn’t have my tripod with me. Good grief. So, I hand-held my camera while leaning against a building.
I shot the lighter photo in Aperture mode with my ISO set to auto. The settings were f/4, ISO 3200, 1/40 sec. Then I switched to Manual mode to shoot the next photo. I wanted to emphasize the building and blur the people as much as possible. I also wanted a moodier shot. The settings were f/4, ISO 400, 1/6 sec.
Now it’s your turn.
I wrote a blog post about the challenge of shooting the Québec photo without a tripod and you can read it here: https://www.carolinemaryan.com/brace-yourself-for-slow-shots/
Are you curious about how to set your camera or iPhone? Click here to learn more about my upcoming workshops: https://www.carolinemaryan.com/workshops-camera-how-to-williamsburg-va/
You can find my favorite headlamp for shooting in low light here: (affiliate link) https://amzn.to/40dARW4




Leave a reply