What Can you Learn from Metadata?
Have you ever looked at a photo that you’ve downloaded to your computer and noticed that it was blurry or grainy (full of digital noise)? Don’t delete it! Instead, learn what caused the problem by looking at your metadata!
So, what is metadata, and how could it help you improve your photography?
Metadata is a record of all the settings that were used when you shot a photo. On iPhones and many modern cameras, you can even get the exact GPS coordinates in the metadata. Amazing, when you come to think of it! These settings are baked into the digital file when you take the picture!
One of the advantages of digital photography is that you can see the settings you used after you took a picture.
Quick note- To save you from overwhelm and me from writing a book-length post, I’m only going to cover two photo problems in this post.
Even that may seem daunting if you’ve never looked for your metadata but hang in there. It is well worth it and I’ll try to be really clear as I write this. If you finish reading and try it out and are totally lost, please let me know in the comments! I may need to clarify some of the details.
And, I do include a really cool link to an article about the statue in one of the photos. 🎉
Is this new?
Back in the old days of film cameras, you had no idea what settings you had used to take a photo unless you had taken notes.
When I took a photography class in Jakarta, Indonesia, the teacher gave us an assignment. We were to take a series of photos of exactly the same scene in Manual mode while changing the settings for each photo. This was to help us see the effects of the changes. She gave us specific settings to use.
This seemed like such a good idea, until the photos were developed. I knew the negatives would be in the same order as my shots and would be numbered. So far, so good. That should mean that I would be able to match them up to the list of settings.
Then, I looked at the photos. They were not in any particular order. 😳 Photos I’d taken of my kids on the same roll of film were interspersed with the practice shots. Hmmm… So, I decided I’d take a look at the negatives and pair them with the photos. Here’s the problem. I’d taken exactly the same scene, just with different settings. Looking at those small negatives, I couldn’t see any differences that I could identify.
Of course, now I know that I should have put an index card in the corner of each shot as I took it. I could have written the settings on that card. Then, I would be able to read the settings in the photos themselves.
Those index card would be sort of like metadata in the digital world.
Metadata to the rescue
Today we have two advantages over the old days. First of all, we aren’t paying a lot of money to have our photos developed. 😃 Secondly, we can see the settings and learn from the metadata. That can help us improve our photography.
It’s really simple to use if you know what to look for and where to find it. Don’t let it overwhelm you! There is a lot of information. The good news is that you can safely ignore most it.
What settings should you look for in the metadata?
You’ll want to find the following three settings. (Depending on which app you use to see them, they may have different names. I’ve included the names used by the two apps on a Mac, Preview and Photos, plus the names used in the Files app on the iPad. Also, in some software, they are found under the Exif tab in the metadata.)
Shutter speed:
(Shutter Speed in Preview) (fraction followed by “s” in Photos)(Exposure Time in Files app on iPad)
ISO:
(Photographic Sensitivity in Preview) (ISO in Photos)(ISO Speed in Files app on iPad)
Shooting Mode:
(Exposure Program in Preview) (Not available in Photos)(Exposure Program in Files app on iPad)
Where do you find these settings?
First, you’ll need to download your photos to your computer or iPad. Then, you’ll open them in whatever software you use for seeing your photos. This will vary with your computer system and the apps you have.
On Macs and iPads, you can open your photos in the free Photos app or view them in the Preview app (also free). The larger you can view your photo, the better, so I don’t suggest using an iPhone for this exercise.
If you use Adobe’s Lightroom Classic, On1 Photo Raw or Luminar, you’ll be able to find all or most of the metadata in these apps, too. You do have to pay for these apps, but they offer a lot of value!
The steps to take:
Now, open a photo that you think needs improvement. It’s time to learn from the metadata.
In Photos on a laptop or desktop, it’s easy to find most of the metadata. Just click on the button with the “i” in a circle at the top right. That’s the information button. A window will pop up with all of the information but the Shooting Mode.
(This may be enough information, but if you find that you need to see the Shooting Mode during your troubleshooting, follow the next set of directions to get your photo into Preview.)
If you open your photo in Preview instead, you will see more information, but how do you get there?
If your photo is in the Photos app, follow these steps:
- First, go to Image in the menu bar at the top of the screen.
- Scroll down to Edit With and Preview will open as a choice in the new menu that pops open.
- Click on it and your photo will open in Preview.
- Now, go to the menu at the top of Preview and click on Tools.
- Under it, you’ll find Show Inspector. The shortcut for this is Command-i.
- Click on the “i” tab in the More Info box that pops up.
- Finally, click on the “IPTC” tab to find your metadata.
If you photo isn’t in the Photos app, all you have to do to open it in Preview is to double click on it. Then follow steps 4-7 to find your metadata.
What about Photos on the iPad?
There’s an app for this! 😎 In the App Store, search for The Photo Investigator. It’s free. (You can upgrade for more options and no ads, but the free version will show you all the metadata you need for this exercise.) Install it on your iPad. Launch it and it will show you the photos in your Photos app. Choose your photo and select the Metadata button. Then, click on Exif.
If you don’t want to install another app on your iPad, there’s a workaround that requires a few extra steps. You can read about them in this article by writer, Andrew Myrick, which tells you how to share your photo to the Files app, where you’ll be able to access the Exif data. Be sure to read the rest of this post before you try this since you need to know what you are looking for! 😉
What can you learn from the metadata?
Take a good look at the photo you’ve chosen. Here are the problems we’re going to cover in this post:
Grainy, also known as digital noise
Blurry overall
Grainy photos (Digital Noise):
This is an easy one to start with. If your photo looks like it has tiny black or colorful dots on it, this called grain or digital noise.

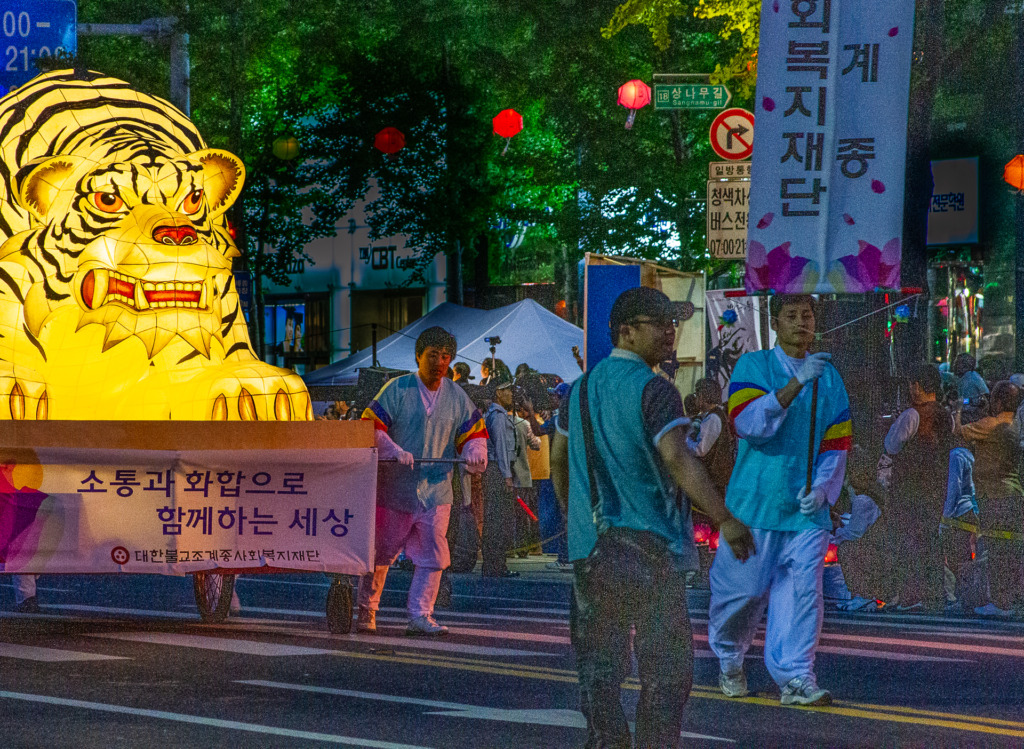
In this photo, which I cropped from the large photo at the top of the post, you can clearly see the noise on the clothing of the people on the right. It looks like I sprinkled salt all over their dark clothes.
Now, we’re going to figure out what caused it.
In the metadata, look for the ISO number. Unless you have a pro-level camera, any number above 1200 is going to cause some graininess, particularly in the shadow area. If your camera is older, even 400 ISO may be too high.
In the case of this photo, the digital noise or graininess is caused by shooting at ISO 3200.
Solution for the future? Shoot in a brighter environment or set your ISO before the shot. (I usually have my ISO set to auto, but have learned to set it for certain lighting conditions by studying my metadata.) One of the advantages of shooting in Program, Aperture, Shutter or Manual mode is that you can tell the camera the settings you want! 👏
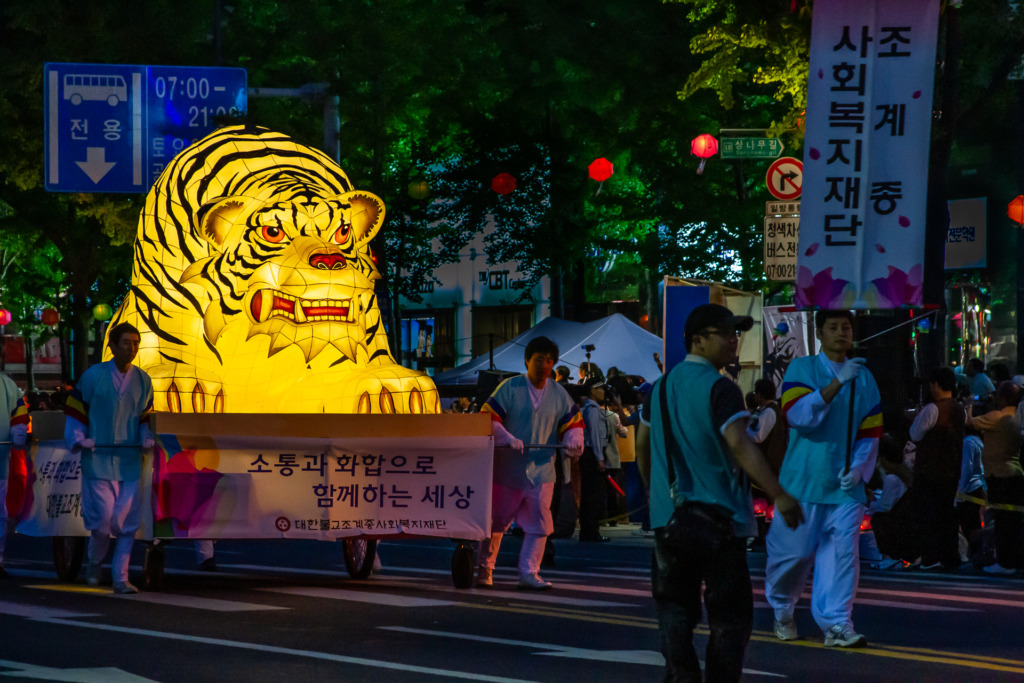
Do you have photos like this that seem destined for the trash? There is hope. New technology can do an amazing job of reducing digital noise. This photo is the full photo that the other ones were cropped from. I’ve run it through noise reduction in Lightroom Classic. (This is one of my excuses for not deleting old so-so photos from my Lightroom Catalog. I took it in 2010 and just did the noise reduction yesterday. It wasn’t available in 2010!)

Blurry everywhere:
If your entire photo is blurry, it probably means that you moved while you took the photo. This blurriness can range from looking slightly out of focus to looking really blurry.
Too many people just delete these shots and miss the chance to avoid them in the future! Instead, you need to be a sleuth and learn from your metadata. This is a really valuable lesson and here’s why. The blurriness could be caused by the conditions or it could be caused by you. 😬

Sometimes, the answer is obvious. In this photo, the Balinese dancer is the subject, and he is blurry. So is the background. I had focused on him and used a low aperture number (wide aperture) to cause the background to be blurry, so I’m not concerned about that. But, if I focused on the dancer, why is he blurry? A quick look at the shutter speed has the answer. I shot it at 1/60 second. That’s way too slow for a fast-moving dancer.
But, all was not lost. I kept shooting. This photo captured him when he was standing still. Note that his right hand is moving. I hadn’t changed the shutter speed. (When you are shooting in situations like this, setting your camera to Continuous Shooting mode really helps! You press and hold the shutter button and the camera keeps shooting until you release the button.)

How to investigate:
Here’s how to investigate and learn from the metadata. First, find the shutter speed in the metadata and write down the number. If you have your camera set to Auto ISO, most cameras have a minimum shutter speed that will be set automatically in Auto, Program, or Aperture mode. The belief is that any slower shutter speed will result in camera shake (which causes overall blurriness) if you are hand-holding the camera. Remember, cameras are designed to believe that you are not using a tripod. Also, depending on the sophistication of the camera, this minimum shutter speed number may vary depending on which lens you are using.
Next, take a look at the shooting mode if it’s available. If you shot in Shutter mode or Manual, you are the person who set that speed. Solution? Set it faster in the future or brace yourself for the shot or put your camera on a tripod.
If you shot in a different mode, check the ISO. Is it higher than your camera’s minimum ISO (usually 100 or maybe 200)? This means that the scene you were shooting required more light. The camera will adjust for low light by raising the ISO. If the ISO number is at its maximum setting, chances are that the camera then slowed the shutter speed for a better exposure.
That takes us back to that Shutter Speed you noted. If it’s below your camera’s minimum shutter speed for Auto ISO, this is how that happened. Solution? In the future, put your camera on a tripod in low light. And remember to set your ISO to a low number when you do this.
Note: Some cameras will not go below the minimum shutter speed for Auto ISO. If that’s the case, the photo will probably also be underexposed (dark).
What if it’s me?
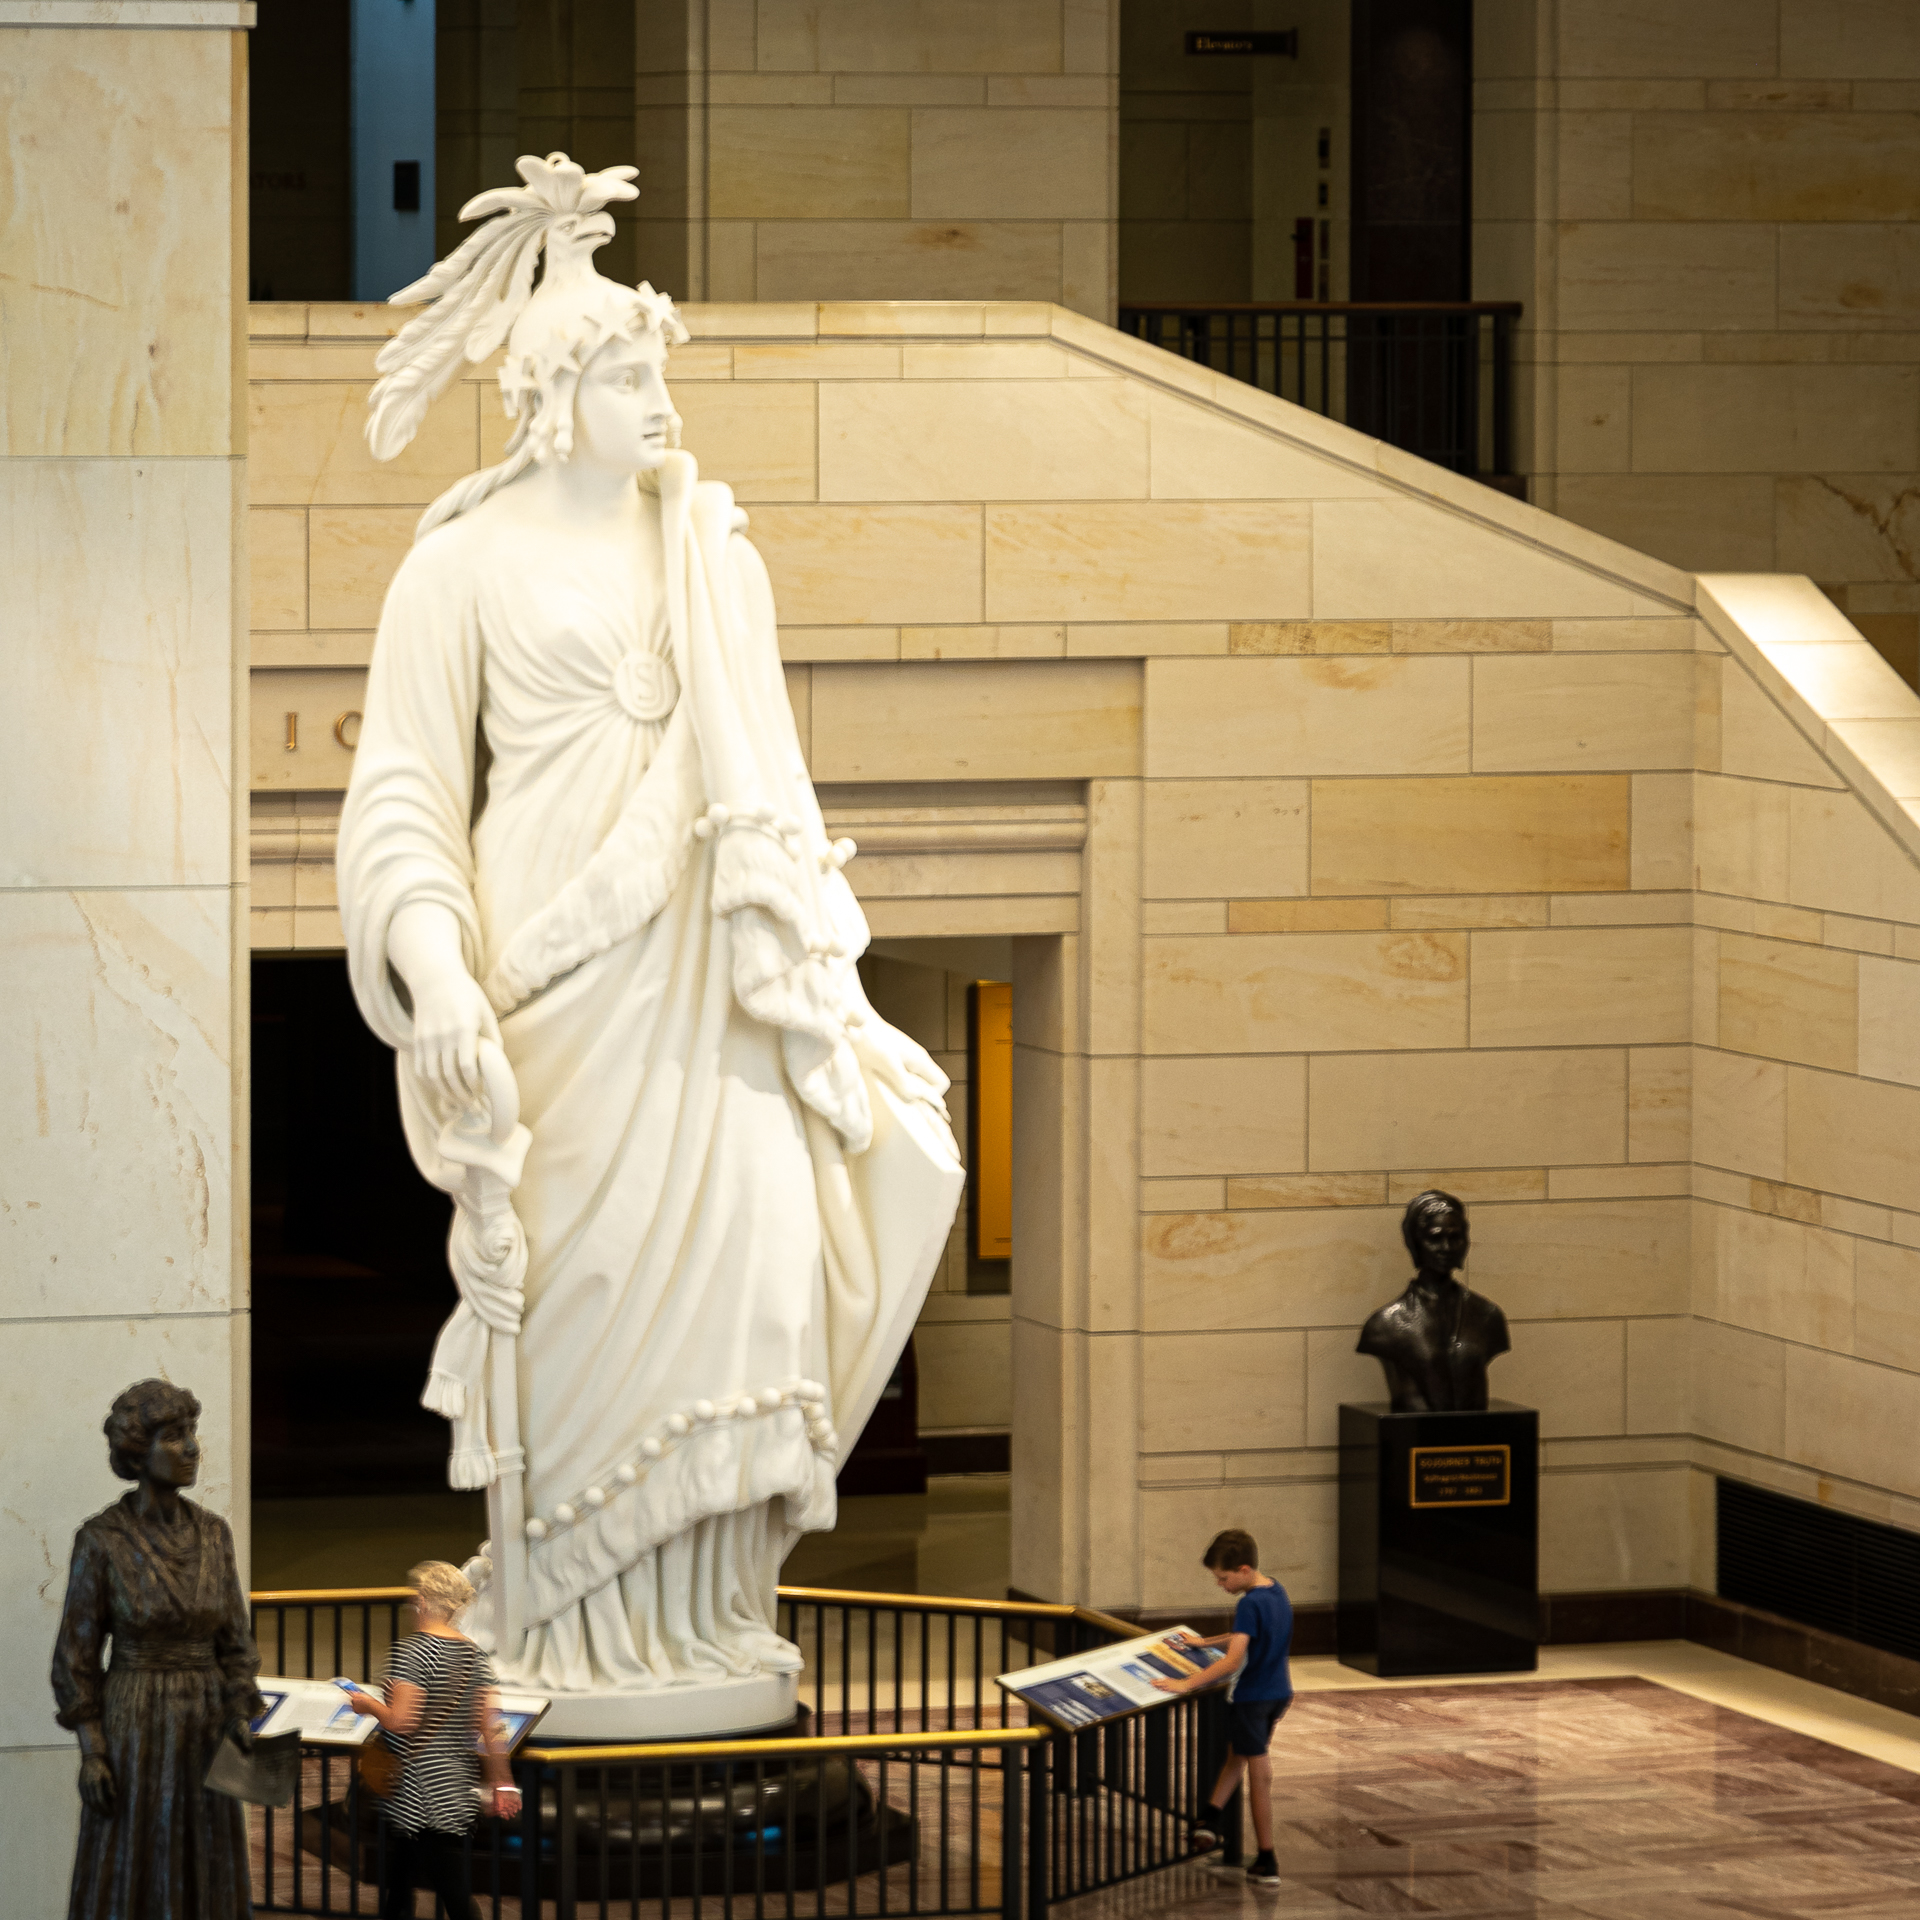
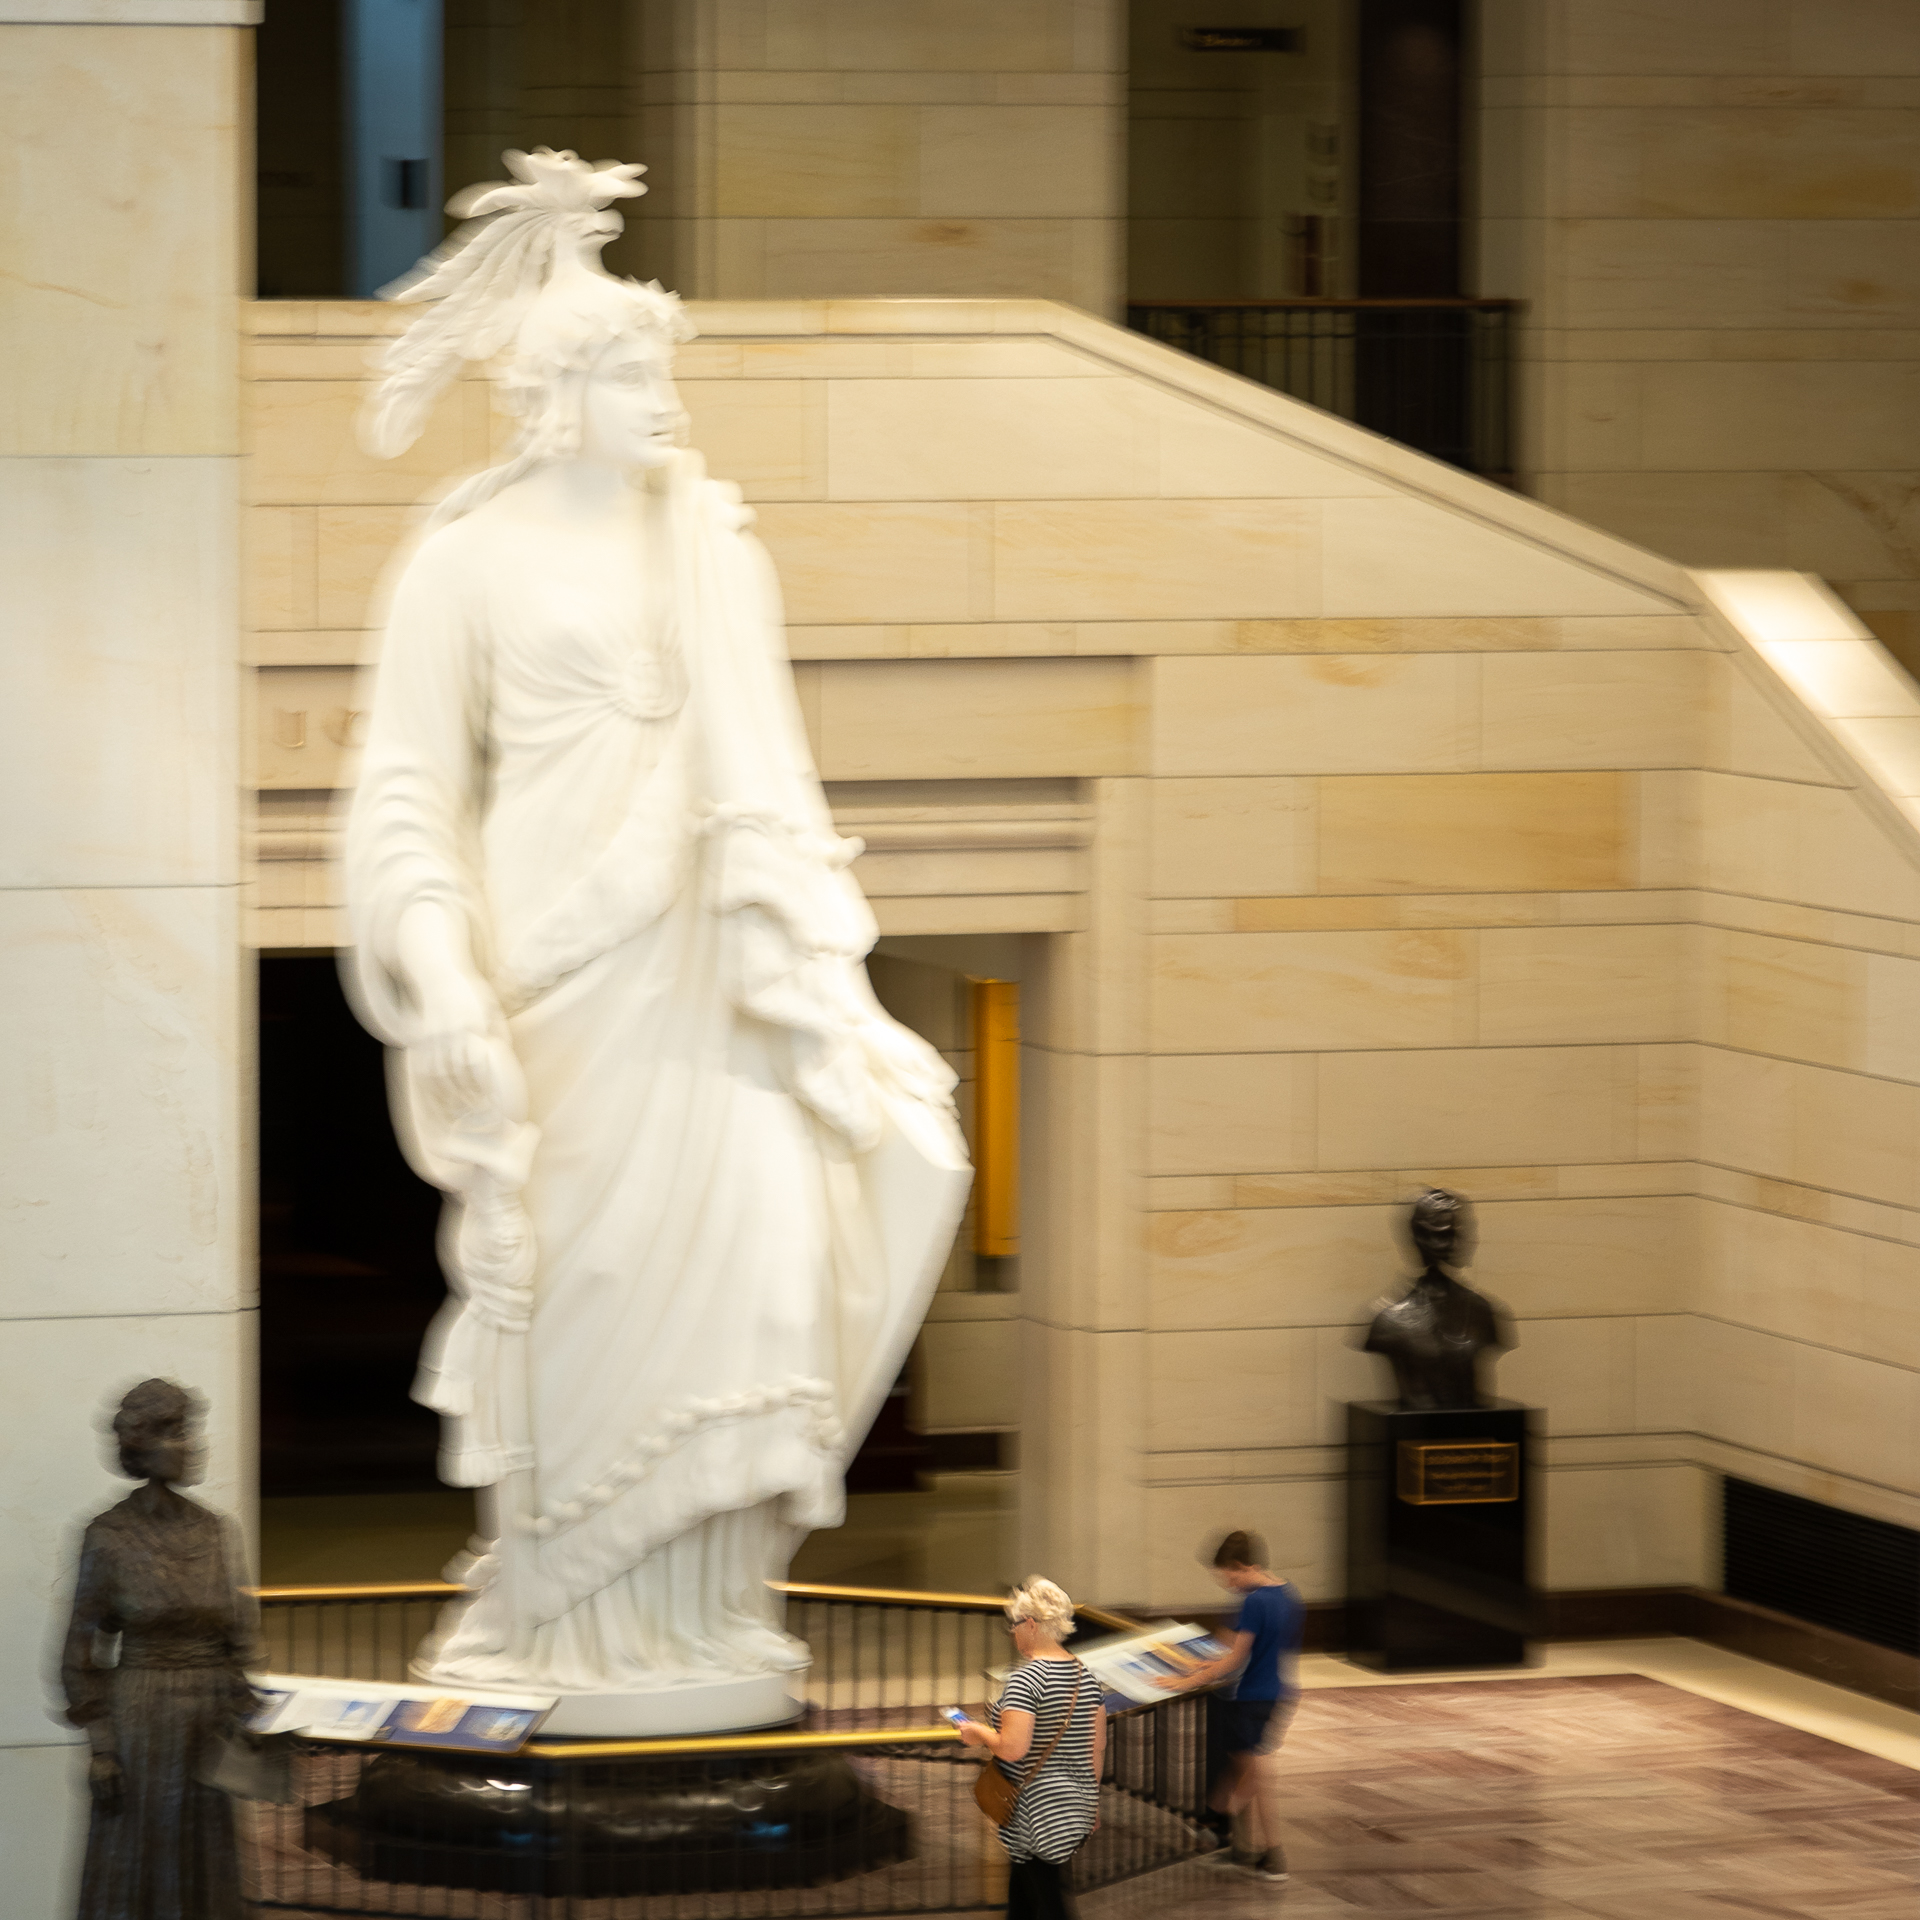
Let’s face it. This statue wasn’t going anywhere. So I must have caused the blurriness. With a quick look at the metadata, I learned that I was shooting at 1/13 second. Way too slow. And I was shooting at ISO 100, which meant I had it set for that. Fortunately, I glanced at the LCD screen after the shot and knew the photo was blurry.
But, I was on a tour and we were walking through the Visitor’s Center at the Capitol, in Washington, DC. I was falling behind. This was no time to stop and change my settings. Instead, I leaned on a railing and braced myself for the second shot.
Finally, there may another possibility to investigate. What if the shutter speed isn’t too slow? Some of us just can’t stay still long enough for slower speeds. Remember, cameras are programmed to work for the average user. Solution? You may need to go into the menu of your camera and set a higher minimum shutter speed in the Auto ISO menu setting. This will remain as the minimum until you return to the menu and change it again. This solution can save you from many future blurry shots. This is a case of knowing yourself and then telling your camera what you need. You’re the boss! 😎
Still wondering how to set the minimum shutter speed?
Here is a great article about this subject, by Hungarian photographer, Miklós Mayer. He has lots of photos to help you with settings. Sadly, it may be that your camera doesn’t have this setting. 😩 Be sure to watch his video that’s included in the article. I think it’s really well done and explains using Auto ISO really well.
Have you studied your metadata to learn from it in the past? What was the most important thing you learned? Please share it in the comments!


Leave a reply