
If you’ve ever looked at a portrait with that soft, creamy background and thought, “How do they do that?”—you’re not alone.
That beautiful blur is called shallow depth of field, and it’s a favorite technique among DSLR and mirrorless photographers. They control it by adjusting the aperture of their cameras.
But how can you do this with an iPhone since you can’t control the aperture? It’s easier than you might think!
Whether you’re photographing a person, a pet, a beautiful view, or even your coffee mug, here are four ways to blur the background on your iPhone and make your subject pop.
1. Use Portrait Mode to Blur Background on iPhone
The easiest way to get a blurred background on your iPhone is by using Portrait Mode in the built-in Camera app.
How to use it:
- Open your Camera app and swipe to Portrait mode.
- Make sure your subject is well-lit and a few feet away from the background.
- Tap on your subject to set the focus, then take the shot!
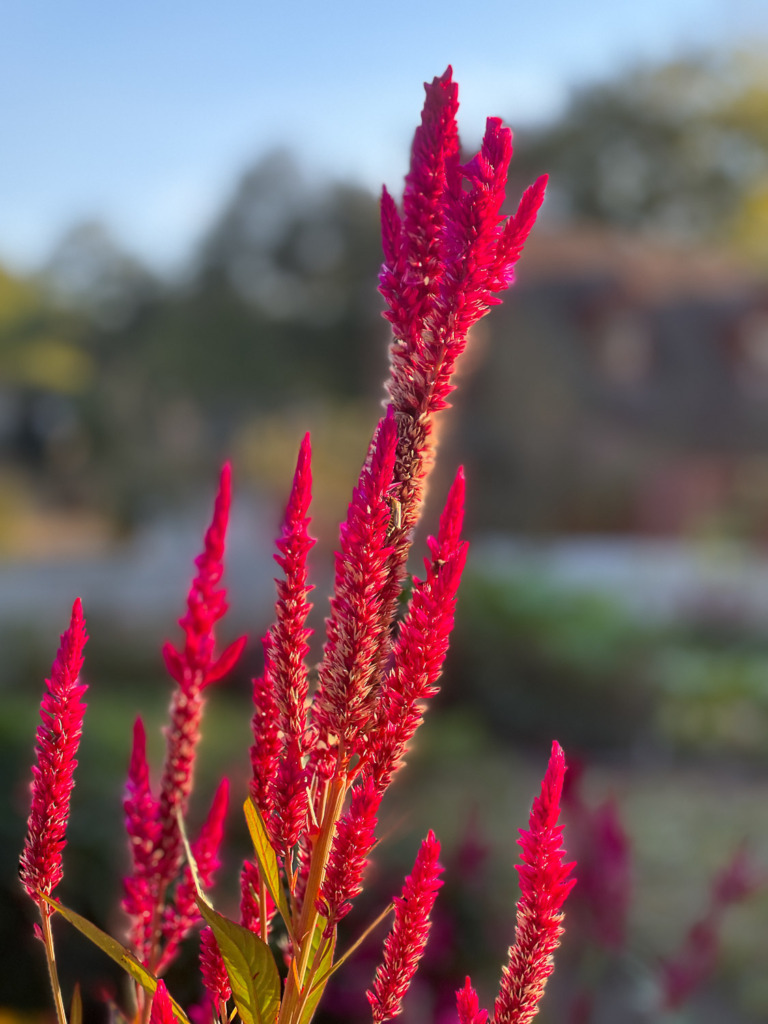
Your subject can even be an object 😉, like the Plumed Cockscomb Flowers above. (iPhone 13 Pro Max ISO 50, f/2.8, 1/120 sec)
Portrait Mode works best when there’s some distance between your subject and the background. The farther back the background is, the blurrier it will look!
Depending on your iPhone model, you may get a message to move farther away or closer. If you don’t follow the suggestion, your iPhone will still take the shot—but it won’t be in Portrait Mode.
You can even adjust the amount of blur after you take the photo! Just tap Edit, then use the f/number slider to control the depth of field.
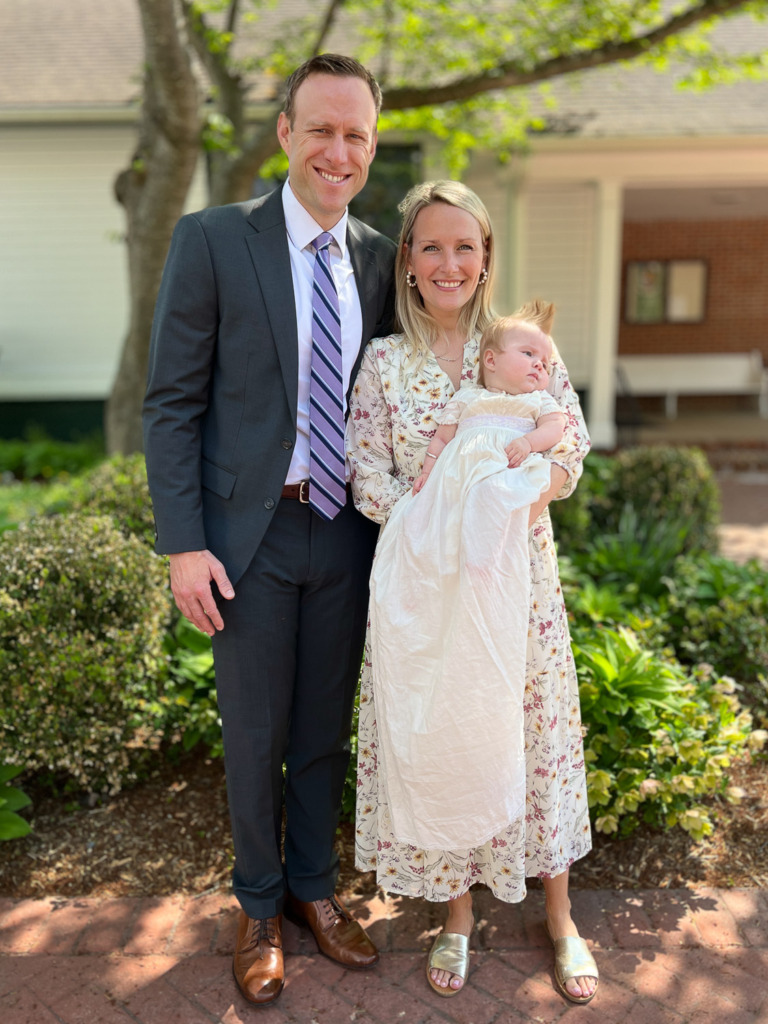
Here’s another example. I took this photo of my daughter, her husband, and their baby at her christening using Portrait Mode on my iPhone 13 Pro Max (ISO 50, f/1.5, 1/750 sec).
The creamy background draws all the focus to the family—and the christening gown has a special story! It’s been in my family for generations. My father wore it, I wore it, my daughter wore it, and now her daughters have, too. It was 125 years old when I captured this moment—and it’s traveled far! Our daughter was baptized when we lived in Jakarta, Indonesia. I brought the gown with me when we moved. 🧳
2. Use Stored Depth Data to Blur Background on iPhone – Part 1
If you have an iPhone 15 or newer and you’re photographing a person, dog, or cat, your phone automatically saves depth information in the photo’s metadata—even in Live Mode.
That’s what happened in the photo above, taken by my husband with my iPhone 15 Pro Max. He didn’t tap to focus or switch to Portrait Mode! But because the phone recognized my face, it saved the depth info. I later blurred the background using just the Photos app. (ISO 50, f/2.8, 1/640 sec)
✅ No tap to focus.
✅ No Portrait Mode required.
✅ Live Photo turned on!
This is incredibly helpful when photographing kids or pets who won’t sit still. After the shot, just edit in the Photos app and blur the background.
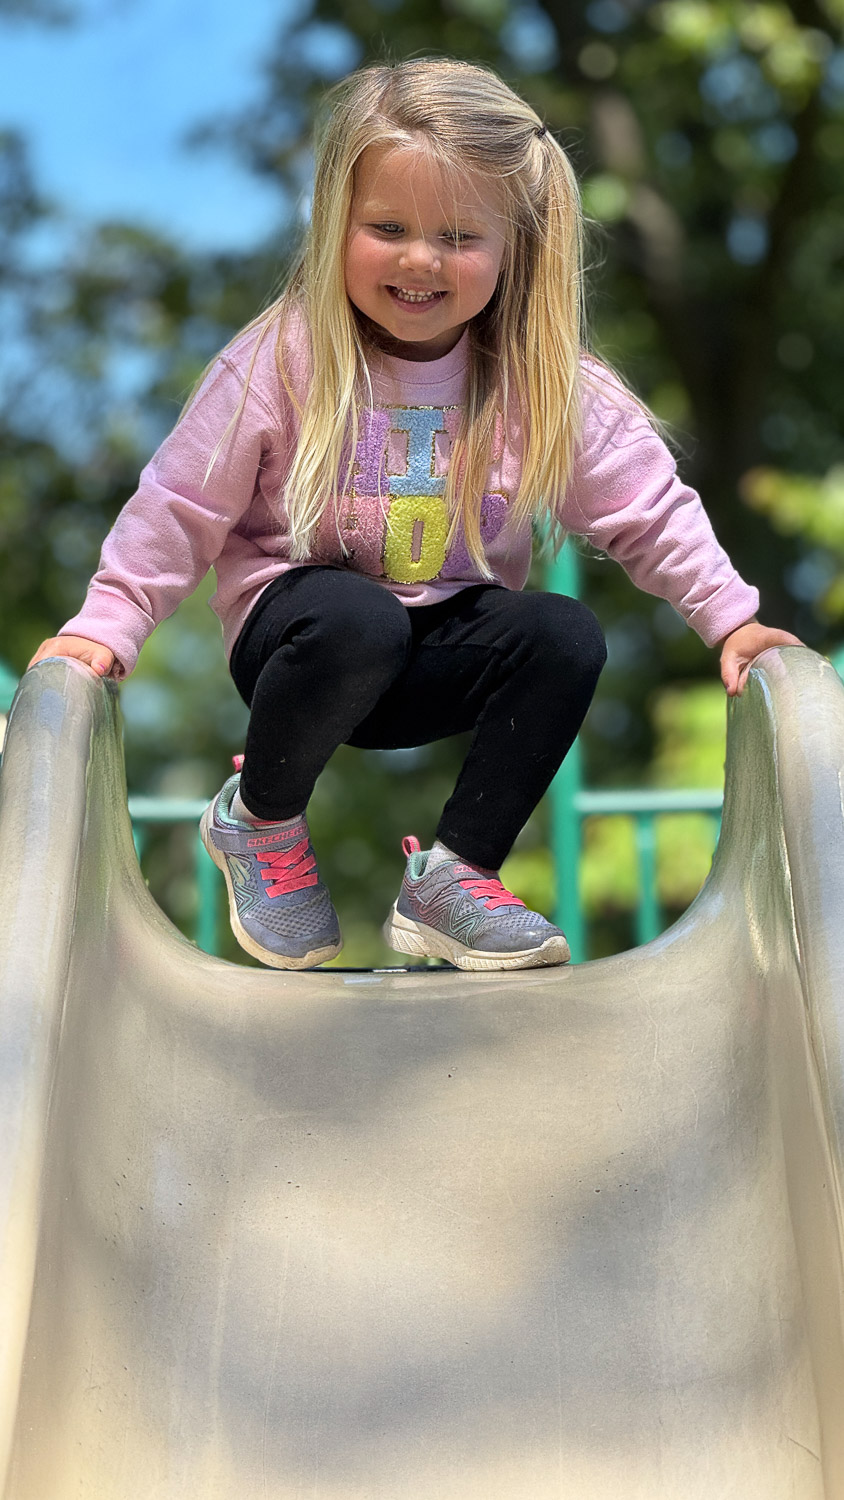
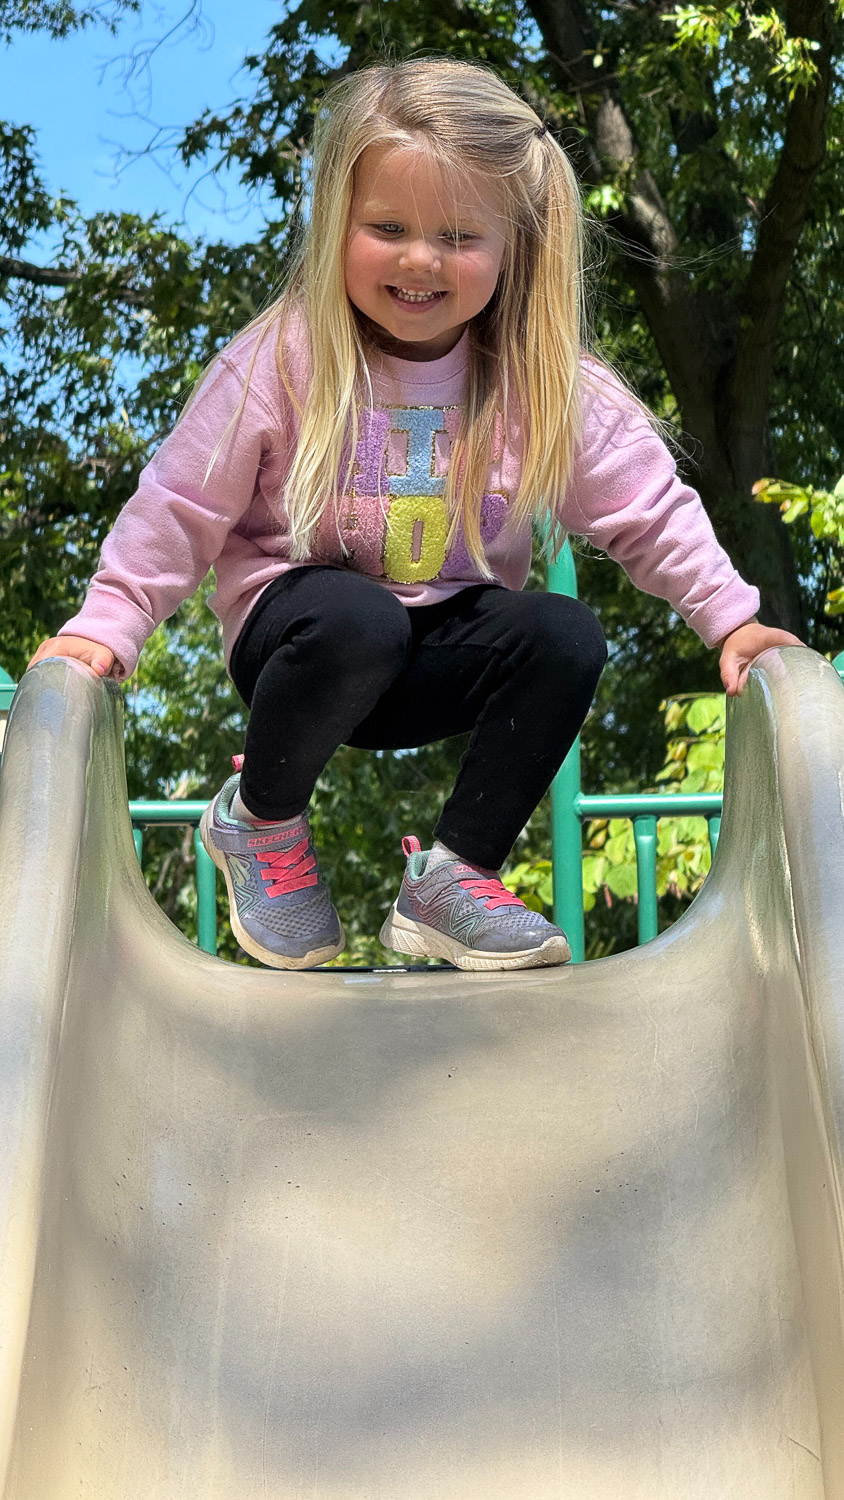
I took a single shot of my granddaughter Gemma as she was about to go down a slide using Live Mode with the telephoto lens on my iPhone 15 Pro Max (ISO 50, f/2.8, 1/580 sec).
- No Portrait Mode.
- No tap to focus.
Yet because her face was recognized, depth data was saved. I duplicated the photo and added background blur to one version in the Photos app. Both are Live Photos—3-second videos—so I ended up with two very different creative looks from one tap. It almost feels like cheating! 🤣
3. Tap to Save Depth Info and Blur Background on iPhone – Part 2
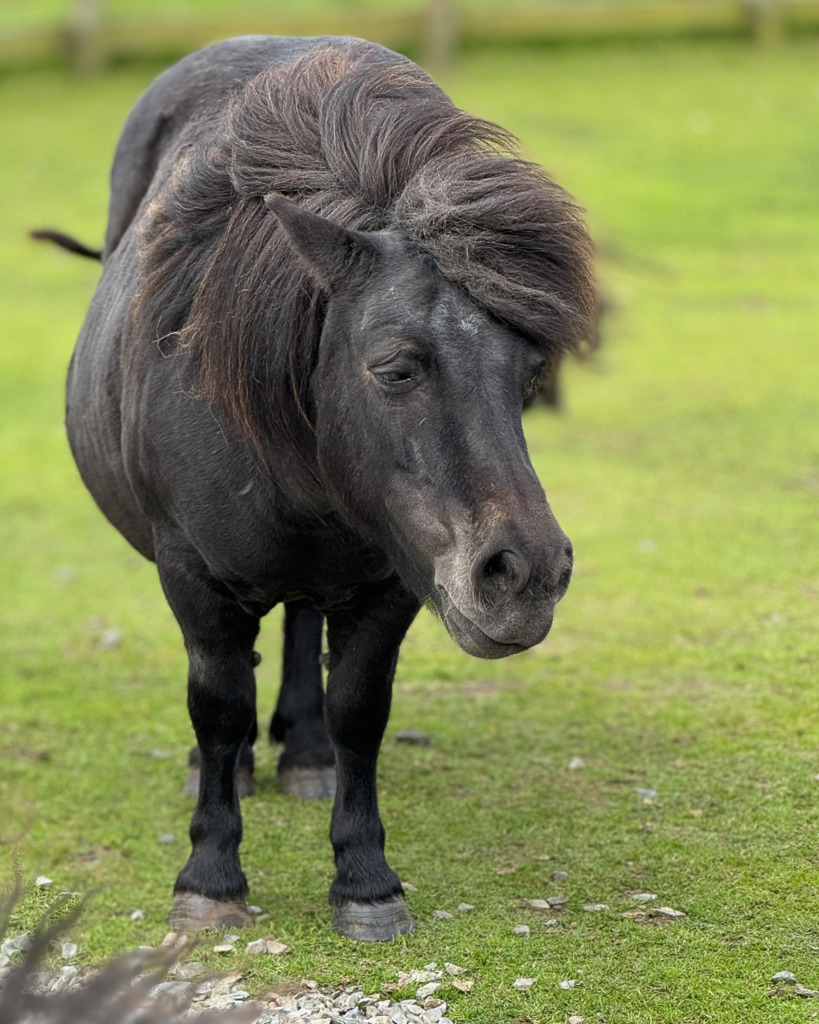
I captured this Shetland pony on a blustery day in the Shetland Islands using my iPhone 15 Pro Max (ISO 50, f/2.8, 1/400 sec).
Since iPhones don’t automatically recognize ponies as subjects (like they do for people, cats, and dogs), I tapped on his face before taking the shot to save the depth data.
- I used Live Photo.
- I didn’t use Portrait Mode.
- I tapped to focus—essential on older iPhones or with non-human subjects.
Later, I used the Photos app to blur the background and cropped the image to make him the star. Look for a small black circle with an “f” to appear on your screen when depth is captured.
4. Use the Classic Distance Trick to Blur Background on iPhone
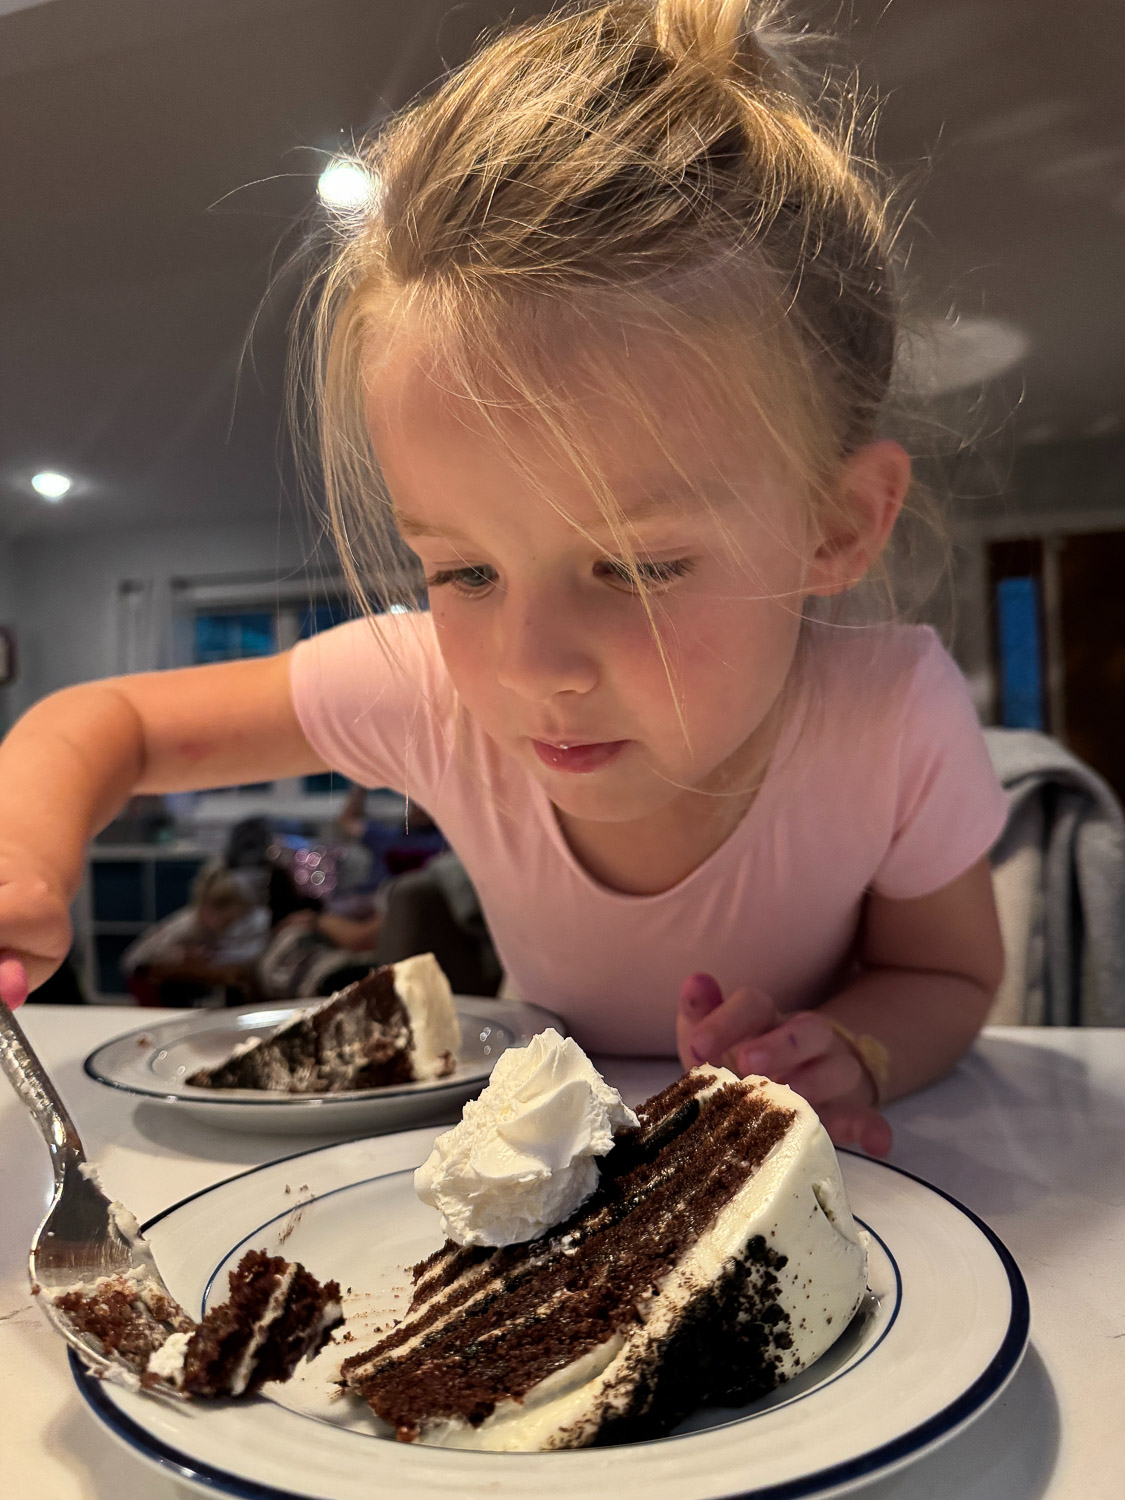
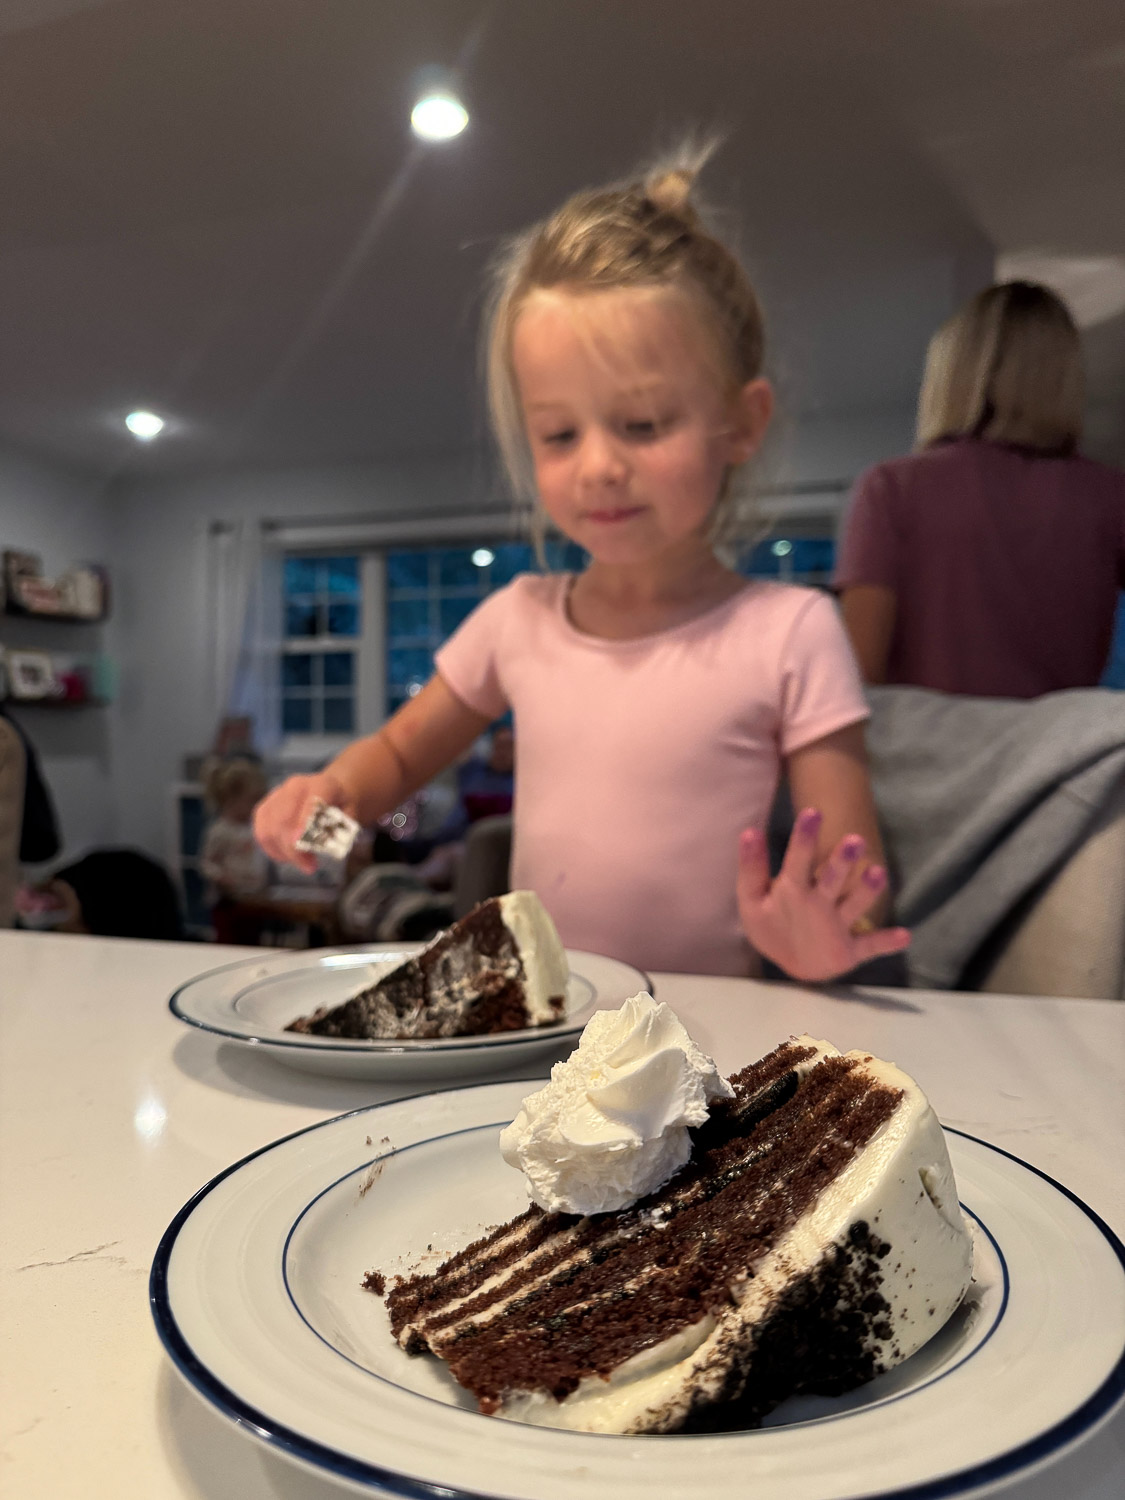
I took two shots of Maryland’s official State Dessert—Smith Island Cake—with my iPhone 15 Pro Max using Portrait Mode (ISO 400, f/1.8, 1/60 sec).
In both cases, I tapped on the whipped cream to focus.
- In the first image, my granddaughter is farther away—she’s blurry.
- In the second, she leaned forward to match the cake’s distance from the camera—now she’s sharp, and the background stays blurred.
This is a classic technique photographers use with any camera:
- Get physically close to your subject.
- Ensure the background is far away.
- Tap to focus on your subject.
- Shoot!
The closer your subject and the farther away the background, the more beautiful the blur.
🎯 Now It’s Your Turn
This week, try to blur the background on your iPhone photos using these four techniques. And here’s a tip: Don’t worry about taking a perfect photo when you’re experimenting!
In fact, it’s often easier to learn a new technique when you’re not trying to make art—just test it out and give yourself room to explore.
Next week, I’ll show you how to create a shallow depth of field using your DSLR or mirrorless camera.
📎 Here’s a link to my post about Capturing Photos of Flowers with Your iPhone.
🎓 Want to learn more? Check out my online class: Camera Mechanics.
📱And yes—my iPhone photography class is coming later this summer!
You might also like


Leave a reply