I modified the aperture shape to create the stars in this photo of the three kings in front of our Christmas tree. Details: f/2.8, 0.8 seconds, ISO 100, 100 mm. Click on the photo to see a larger version.
Since Christmas, I’ve been sharing tips and tricks for shooting better holiday photos on my Facebook page (Caroline Maryan Photography). I called the series The Twelve Days of Christmas. Yesterday, it was the last day, and I posted this photo of three bamboo kings, from our creche, in front of our Christmas tree. I decided to have some fun with bokeh while I composed it.
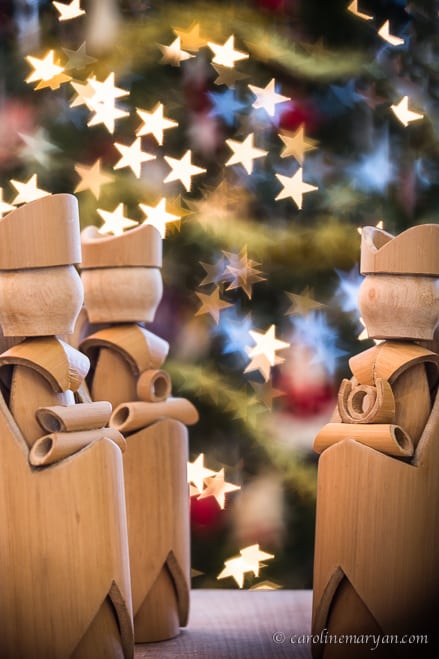
I modified the aperture shape to create the stars in this photo of the three kings in front of our Christmas tree. Click on the photo to see a larger version.
Today, I want to share how I created the stars in the background. I hope you’ll give it a try, but be forewarned… it can be addictive! You’ll want to set aside part of a day when you can play around with no distractions.
The stars are really nothing but bokeh, but I had to modify it as I shot. Here is some background into how I shot this photo.
It’s amazing what a difference the aperture you choose can make to your photo. A narrow aperture (a high f-stop number) will create a deep depth of field and is perfect for landscape photography or shots where you want everything to be in focus. A wide aperture (a low f-stop number), will make your subject seem to pop off the screen or paper, since only it is in focus.
But, throw in lights in the background, especially if they are surrounded by something dark, and you get an even bigger difference.
If you choose a wide aperture, the lights will become much larger and will be the shape of your aperture, round. They become an important part of the composition.
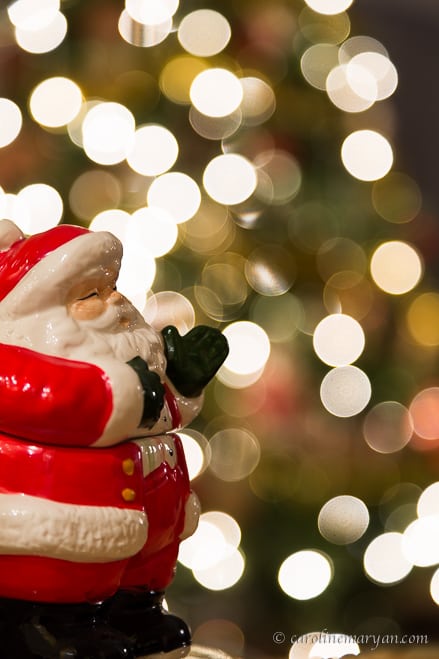
This Santa was shot at f/4, a wide aperture, so the Christmas lights seem much larger and rounder. More details: 0.8 seconds, ISO 100, 105 mm. Click on the photo to see a larger version.
If you choose a narrow aperture, you’ll see the out-of-focus lights become mini starbursts. You’ll still be able to tell that they are lights.
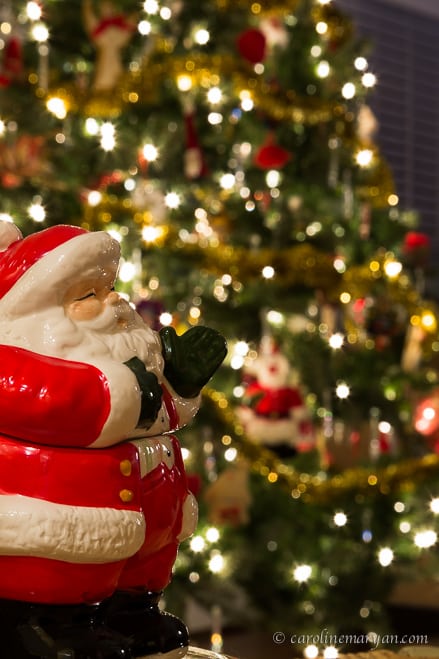
This Santa was shot at f/22 and you can see how the lights have become mini starbursts. More details: 25 seconds, ISO 100, 105 mm. Click on the photo to see a larger version.
Try this with your camera on a tripod. Arrange the scene. Then shoot the exact same scene with both a narrow and a wide aperture. That’s what I did with these two photos. I simply changed the aperture and shutter speed. Otherwise, they are the same. But what a difference in effect! Christmas lights are the perfect lights for this. You can just string them up behind the scene.
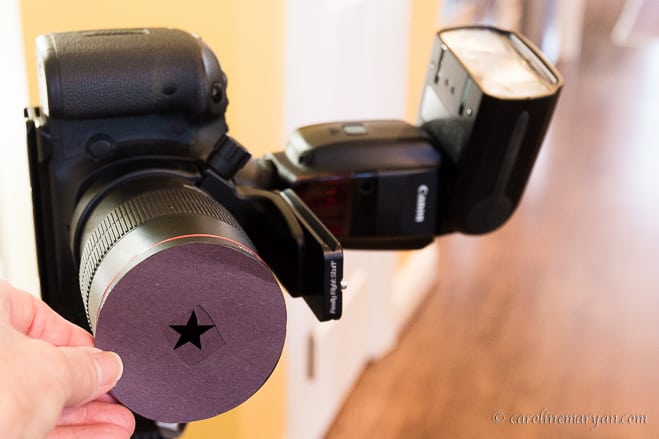
Holding a pattern in front of the lens and shooting in a wide aperture can result in bokeh with that pattern. Click on the photo to see a larger version.
But, how did I get the star-shaped lights in the photo of the three kings? I fooled the camera into thinking it’s aperture was that shape by holding a pattern in front of the lens. There are many websites online that will give a detailed description of how to create a pattern and mount it on your camera. You can easily find them on Google, so I’ll limit myself to some observations I made…
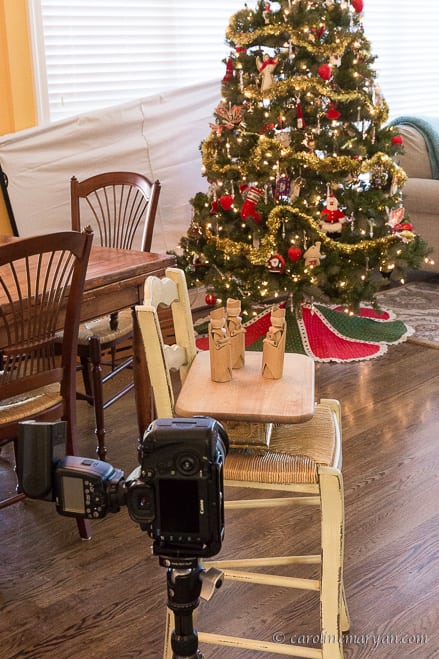
The setup for the shot. The subject is close to the camera and the tree is farther away, to help the bokeh effect. Click on the photo to see a larger version.
The best way to fine-tune your attempts is to use live view. You turn that on as though you are going to shoot video. You’ll then see the photo you are composing on the LCD screen on the back of your camera, just like an iPhone! One caveat: it will use up your battery quickly and will heat up your sensor, which can cause excess digital noise and other problems. So, use it sparingly. As you look at the screen, you can adjust your focus and zoom. This will change the quality of the pattern!
I tried this with three different lenses and two cameras. I got the best results with my full-frame camera (Canon 5D Mark III) and my 100 mm macro lens. I shot with the widest aperture I could with each lens.
Most of the websites will have you create a much more elaborate device than you see in the photo. I found that I could hand-hold it and save time that way.
Try to keep your pattern edges as smooth as possible. Otherwise, they will look shaggy in the photo.
Finally, size matters! You need to experiment to find the right size of pattern opening for your lens. If it’s too small, your photo will include a lot of black. And, being too big doesn’t work either.
Hope you’ll give it a try!


Leave a reply